Everything you need to know about ceramic tiles: a comprehensive guide for Australian homes

Ceramic tiles have a quiet superpower: they can sit back as a crisp, light-catching backdrop — or step forward as the detail that makes a room feel finished. In Australian homes, they’re a go-to for splash zones and wet-area walls, and a smart option for many indoor floors when you choose a floor-rated tile that suits the space.
This guide blends the practical (what ceramic tiles are, where they perform best, what to budget for) with the aesthetic (how they catch the light, how texture changes a room, how colour shifts from morning to evening). And because great interiors are built on cohesion, you’ll also see a few Nero styling cues—simple finish and proportion choices that help tiles and tapware read as one cohesive design.
Note: Standards, classifications, and suitability can vary by product and application—always confirm specifications and installation requirements with your supplier and licensed installer.
Ceramic tiles at a glance:
- Ceramic, decoded: Made from clays blended with minerals (often silica/sand and feldspar), then pressed and kiln-fired. Add a glaze and you get that crisp, hard, easy-clean face that shrugs off everyday splashes and marks.
- Porcelain vs ceramic — think “density + exposure”: Porcelain is typically denser, fired hotter, and commonly defined by very low water absorption (often ≤0.5%), which is why it’s the go-to for high traffic and outdoors. Ceramic is typically easier to cut and easier on budget — perfect for interior walls and plenty of indoor floors when chosen correctly.
- Match the tile to the room, not the mood board: Glazed ceramics shine on wet-area walls. For bathroom and laundry floors, prioritise an appropriate slip rating (especially in showers). Large formats make living spaces feel calmer and more expansive; mosaics add grip and texture — at the cost of more grout lines.
- Budget like a stylist (with a calculator): Ceramic tiles can start around $20–$55/m² (often $30–$100/m² for floor-grade/design ranges), with porcelain/premium finishes higher. Installation is where totals swing: ~$40–$120/m² for standard jobs, up to $150/m²+ with heavy prep or complex patterns. Add 10% waste (more for herringbone/feature layouts) and compare quotes like-for-like.
- Maintenance is the quiet deal-breaker for long-term satisfaction: Sweep often, mop with warm water and a mild pH-neutral cleaner, and go easy on harsh chemicals. Watch your grout in wet zones — when it stops beading water, it’s time to refresh or reseal. The upside: single cracked tiles can often be replaced without rebuilding the whole surface.
If you only read one thing:
- Choose ceramic for interior walls, splashbacks, and many indoor floors when the tile is floor-rated and suitable for the space.
- Choose porcelain for outdoors, high-exposure zones, and heavy-traffic floors, because it’s typically denser and lower-absorption.
Quick rule: “Porcelain” is part of the ceramic family — the difference is typically density and very low water absorption — which is why it’s often the safer default for high-exposure zones. Want the full breakdown? Jump to “Ceramic vs porcelain: how do they differ?” below.
Quick shopping checklist (buy with confidence)
Before you fall for a colour, check these basics:
- Is it wall-rated or floor-rated? Don’t use wall-only (wall-rated) tiles on floors.
- What’s the slip rating (for wet floors)? Ask your supplier or tiler to confirm suitability for your specific space (especially bathrooms and laundries).
- Glazed for splash zones: Especially for kitchens and showers where cleaning matters.
- Tile size + grout plan: Smaller tiles = more grout lines (more texture, more cleaning).
- Order extra: Keep a few spare tiles for future repairs.
Planning note (Australia): Tiles and grout aren’t waterproofing. Wet areas generally require a compliant waterproofing system beneath the tiles, and details can vary by project and location. Ask your licensed waterproofer/tiler to confirm the required system and detailing before tiling.
Why ceramic tiles are the unsung heroes of modern interiors
Ceramic tiles start with a simple idea — clays and natural minerals, milled into a fine mix, pressed into shape, then kiln-fired until they set hard. Depending on the product and firing cycle, that firing is commonly within about 1,050–1,300°C, turning soft raw material into a surface that can handle real life.
Add a glaze and ceramic becomes even more effortless. That glass-like finish fuses to the face of the tile, helping it resist everyday marks and moisture — which is exactly why ceramic keeps showing up in the places that work the hardest: splashbacks, bathroom walls, laundries and powder rooms.
There’s also a practical upside renovators love: ceramic is often easier to cut and handle than denser porcelain, which can simplify installation.
And because it’s widely produced from readily available materials, ceramic can be a more approachable choice — especially when you want impact on walls without blowing the whole project budget.
What are ceramic tiles made of?
Ceramic tiles look effortless once they’re on the wall — but their performance comes down to a few classic ingredients, balanced with real precision. Get the mix right and you get crisp edges, reliable strength, and finishes that can swing from glossy coastal to soft, clay-made calm.
The ingredient list (simple, on purpose)
Most ceramic tile bodies are built from three main raw materials — plus water and the “style layer” on top.
- Clay – the “dough” of the tile. It gives the mix plasticity so it can be shaped and pressed.
- Silica (often sand or quartz) – the backbone. It helps the tile hold its shape and reduces shrinkage and warping as it dries and fires.
- Feldspar – the quiet achiever. It acts like a natural flux, helping the body fuse and harden during firing.
- Water – binds the particles into a workable mass before shaping.
- Pigments + glaze – the finish that changes everything. Pigments deliver colour; glaze creates the surface feel (gloss, satin, matte, texture) and can make the face easier to wipe clean.
Also Read: A Buyer's Guide: 27 Tips on How to Choose Bathroom Tiles
Glazed vs unglazed ceramic tiles: the finish that changes everything
Glazed and unglazed tiles can look similar at a glance, but they live very differently once they’re installed. Think of this choice as the “finish” decision: it affects how the surface handles splashes, fingerprints, and daily cleaning — and it also sets the mood of the room, from crisp and reflective to soft and earthy.
At a glance: Glazed is typically the easiest, lowest-fuss choice for splash zones; unglazed is often more tactile and earthy, but needs a bit more care planning.
Use the table below to match the look you love with the level of maintenance you’re happy to live with.
Glazed ceramic tiles | Unglazed ceramic tiles |
Best for: splashbacks, bathroom walls, laundries, and many indoor floors (when floor-rated)
Buyer’s note: For bathroom floors, don’t assume “glazed” equals “safe” — check the slip rating. | Best for: feature walls and spaces where you want a natural, earthy feel
Buyer’s note: Unglazed is a mood — just plan the care routine from the start. |
Nero design tip: Treat tapware like the final layer of “jewellery”—it should support the tile, not compete with it. Start with the tile mood, then let tapware complete the story. If your tiles are matte, handmade-look, or earthy, a brushed finish adds clean contrast without looking shiny. If your tiles are high-gloss, consider satin or brushed metal so the room feels refined rather than mirror-like. (If you want a softer, spa-leaning look, Nero’s Serenity-style silhouettes suit calmer tile palettes.)
Also Read: Ultimate Travertine Guide: What It Is, Types, Cost, Installation & Care - Nero Tapware
Ceramic vs porcelain: the quick verdict (then the details)
They can look similar in the showroom. But they behave differently once they’re underfoot, out in the weather, or dealing with daily wear.
At a glance: Choose porcelain when you need low absorption, high durability, or outdoor performance. Choose ceramic when you want design variety, easy cutting, and best value for walls and low-to-moderate indoor floors.
The real definition (it’s not just marketing)
Porcelain is still part of the ceramic tile family, but it’s typically made to a tighter spec — and that matters in Australian conditions.
In Australia, many suppliers reference tile classification using AS 13006:2020 (aligned to ISO 13006), which groups tiles by manufacturing method and water absorption. What’s commonly sold as “porcelain” is often reported in the ≤0.5% water absorption category, with absorption typically tested using methods such as AS ISO 10545.3. Check the product datasheet and ask your supplier to confirm the classification for your intended use.
That very low absorption is a big reason porcelain is often chosen for outdoor Australian areas that face rain, heat, coastal salt air, and, in cooler regions, frost risk — and for very high-traffic floors like entryways and busy open-plan kitchens where durability matters most.
How they’re made (and what that changes)
Both start with clay and minerals, shaped and kiln-fired. The difference is in the refinement and density:
- Porcelain is typically made from finer clays and fired hotter, producing a denser, less porous body.
- Ceramic is often a little more porous, and many products rely on a glaze layer for their easy-clean surface.
Durability and water resistance
In general, porcelain’s denser structure makes it more resistant to water absorption and wear. That said, surface durability can also depend on the finish (especially with glazed tiles), so always check the product ratings for your use case.
Chips and “what you see underneath”
This is where the shorthand gets people in trouble:
- Through-body / unglazed porcelain can have colour running through the tile, so a chip is less obvious.
- Glazed porcelain and glazed ceramic can show a different colour underneath if the glaze chips, because the surface is a separate layer.
Buyer move: look at the tile’s cut edge and ask if it’s through-body, colour-body, or glazed before you commit.
Cutting and installation (why quotes can jump)
Porcelain is typically harder and denser, which can make it harder to cut and slower to install. It often needs diamond blades and wet cutting for best results. Ceramic is usually easier to cut and drill, which can be a win for DIY or fiddly corners.
Cost reality (Australia)
Prices move a lot with size, brand, finish, and slip rating. As a broad guide:
- Ceramic can start from the lower end of the market for wall tiles and sit comfortably in budget-to-mid ranges.
- Porcelain often sits higher, especially in large formats, outdoor-rated products, and premium finishes.
Installation can vary widely depending on prep work, pattern complexity, and access.
Nero design tip: If you’re using large-format porcelain for a clean, almost seamless look, keep the tapware just as calm: think crisp lines, soft edges, and finishes that don’t fight the tile. If you’re going bold with decorative ceramic (pattern, gloss, colour), choose tapware like a framing device — one confident finish that ties the palette together.
The verdict: should you choose porcelain or ceramic tiles?
Use this quick framework. It’s simple, but it saves expensive mistakes.
Is the area exposed to heavy water, weather, or high traffic?
If yes, porcelain is often the safer pick because of its low absorption and dense body. It’s commonly used for outdoor areas, busy hallways, and many floor applications.
Ceramic can still work brilliantly indoors, especially on walls, splashbacks, and lower-traffic floors. Just match it to the room and the rating.
Are you working with a tight budget or a fast timeline?
Ceramic often wins on value and ease of cutting, which can reduce labour time. It’s a strong choice when you want high visual impact on walls without pushing the budget.
Porcelain can cost more upfront, but it may repay you in high-wear zones if it lasts longer with fewer chips and less absorption risk.
Do you want pattern and colour, or a quiet “stone look”?
Ceramic is often the go-to for decorative glazes, colour, and graphic pattern. Porcelain often shines when you want stone, concrete, or large-format minimalism.
Nero Design cue: If your tile is the hero (patterned ceramic), let the tapware be the anchor. If your tile is calm (porcelain stone look), tapware can add the character through finish and form.
The short version
Ceramic is usually a smart choice for:
- More design variety
- Easier cutting and handling
- Best value for feature walls and splashbacks
Porcelain is usually worth it for:
- Outdoor areas
- High-traffic floors
- Low absorption performance
Where to use ceramic tiles in your home
Ceramic tiles are at their best when you want a surface that’s easy to live with and easy on the eyes — the kind of finish that looks sharp in morning light and still makes sense when you’re cleaning up after dinner.
Kitchen floors and splashbacks
For kitchen floors, ceramic can absolutely work — just make sure you’re choosing a floor-rated tile with durability suited to traffic (that’s where wear ratings come in). If your kitchen is a real thoroughfare (kids, dogs, constant cooking), porcelain may be the tougher choice — but many Australian homes happily use ceramic in kitchens when the tile is specified correctly.
Design-wise, mid-tones, gentle movement and patterned tiles are forgiving: they disguise crumbs, splash marks and everyday grit without making the room feel busy. When it comes to grout, consider mid-grey or warm taupe over bright white — it stays fresher-looking for longer and doesn’t announce every spill.
For splashbacks, glazed ceramic is the hero: colour-rich, wipeable, and available in everything from classic subway to fluted and handmade-look textures. A slim mosaic strip or finger tile behind the cooktop can add just enough detail to feel “designed”, not decorated.
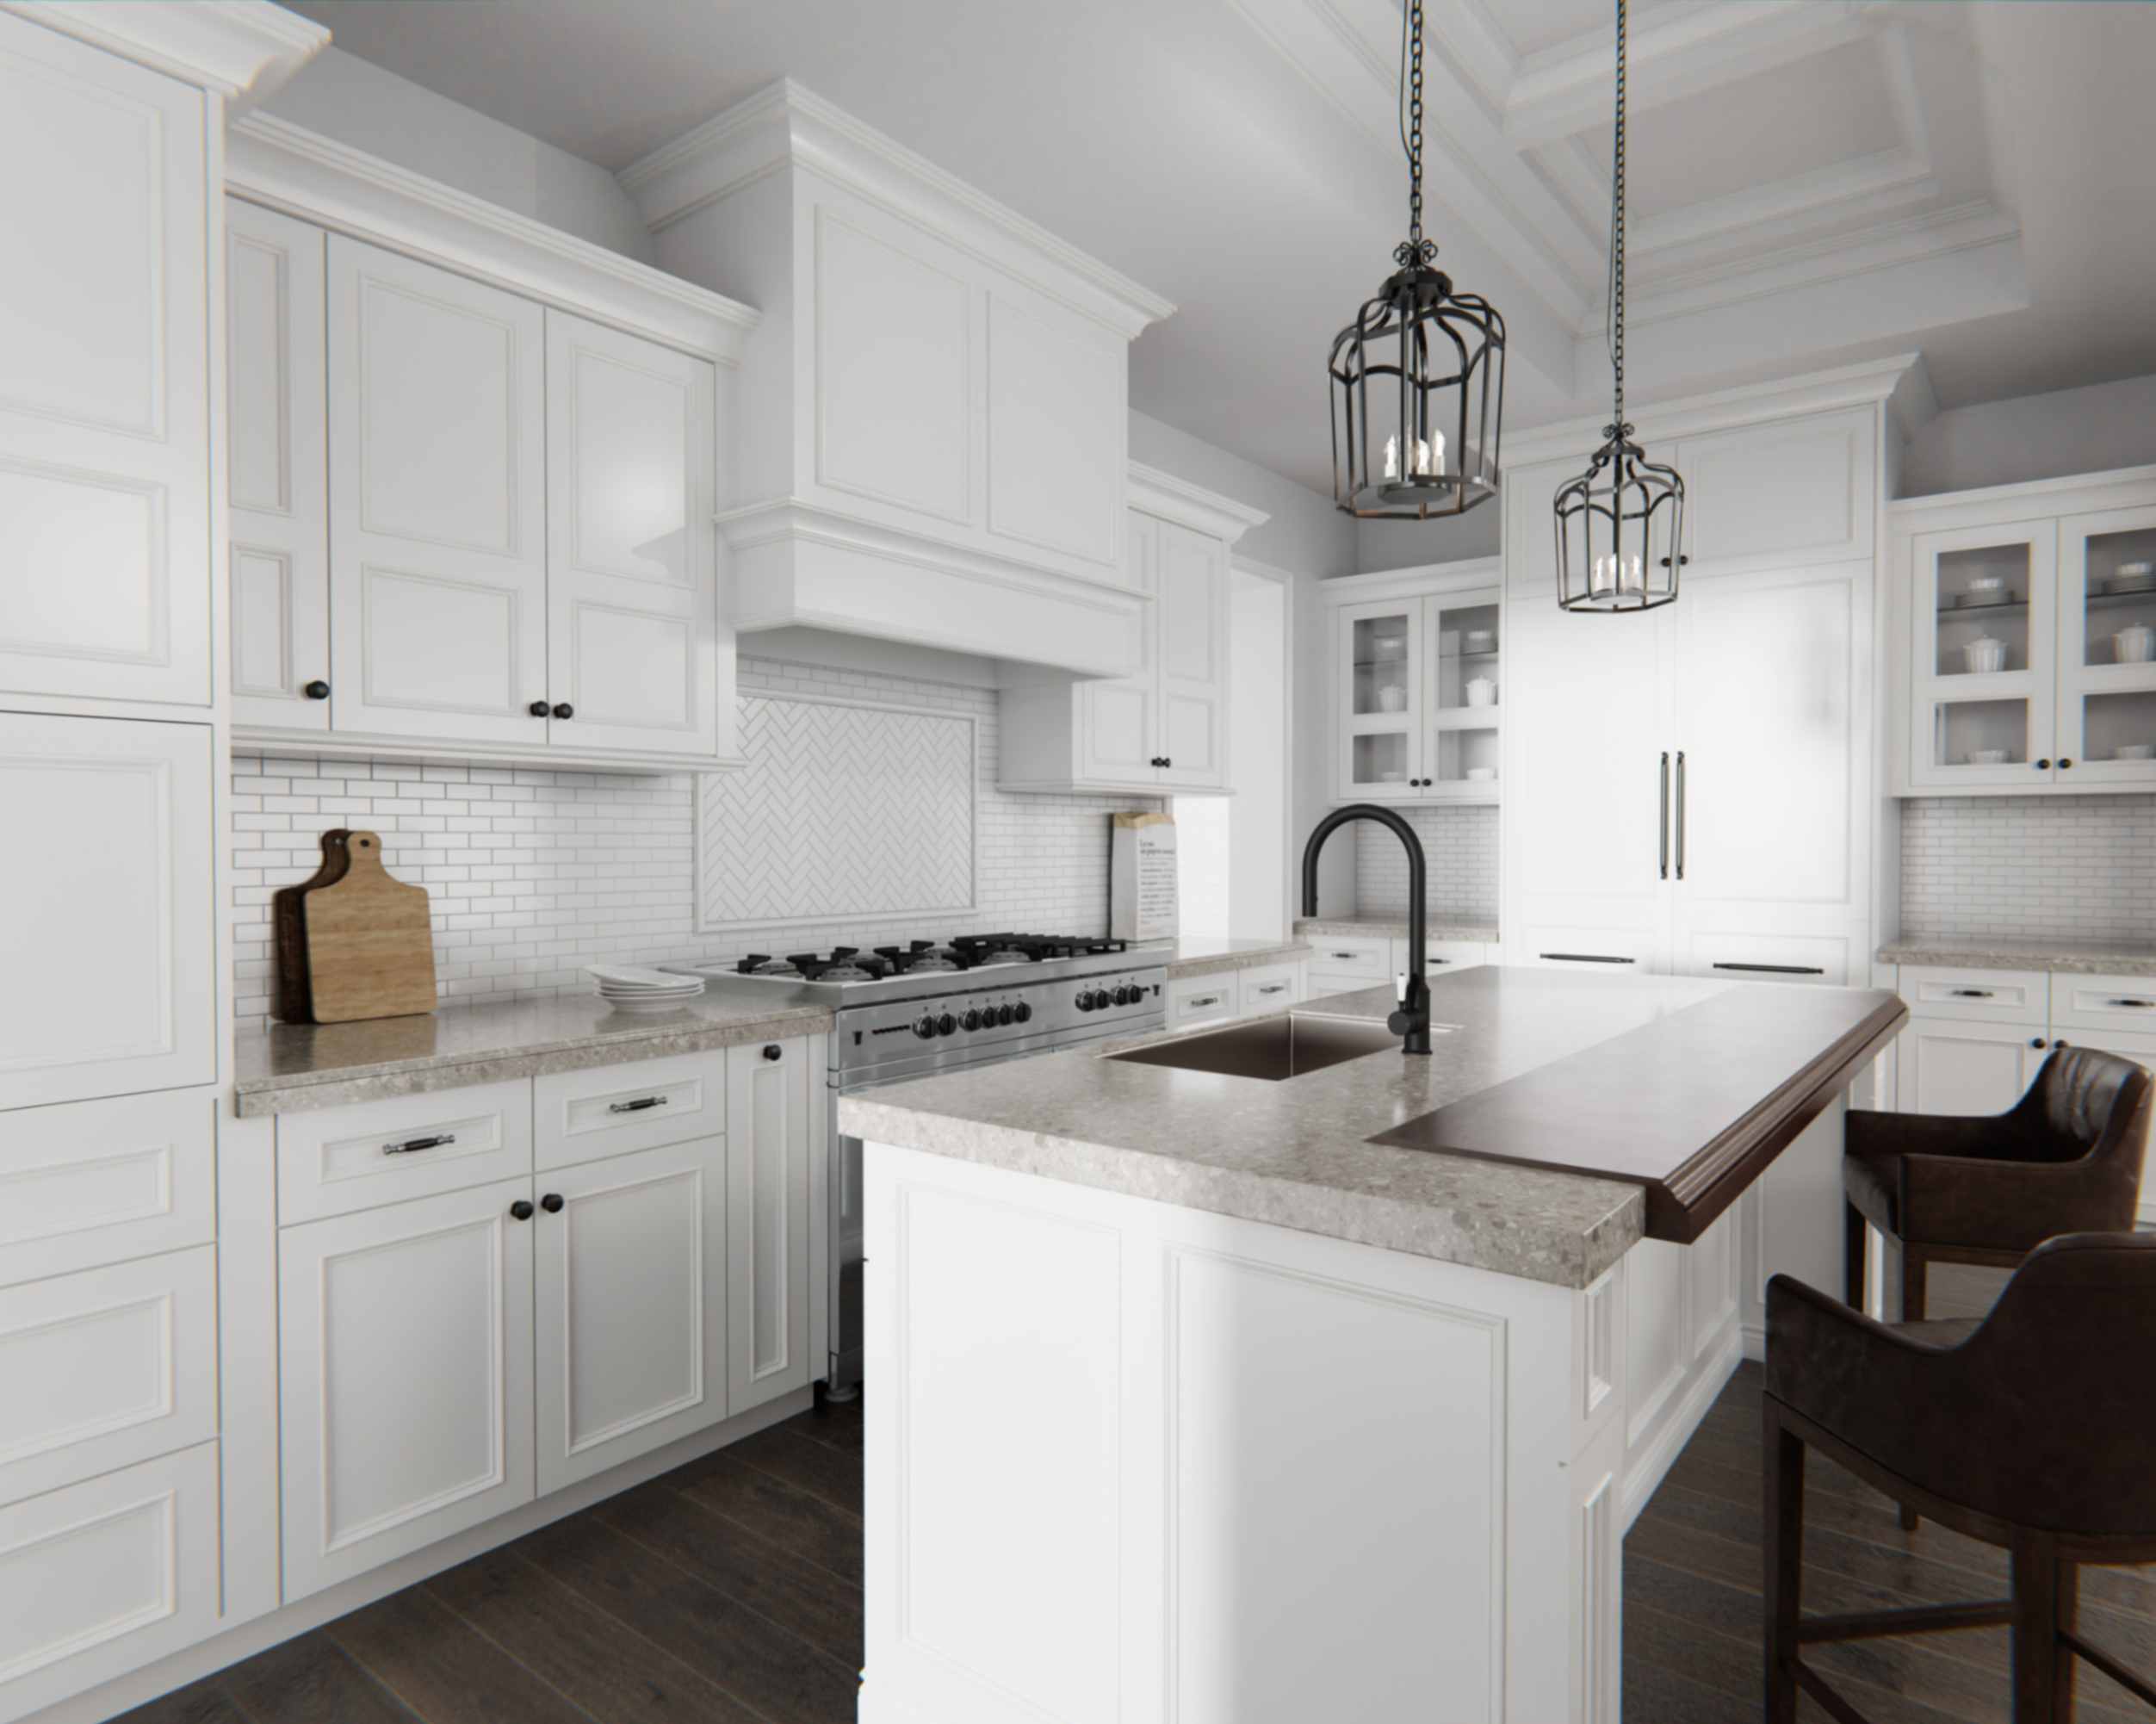
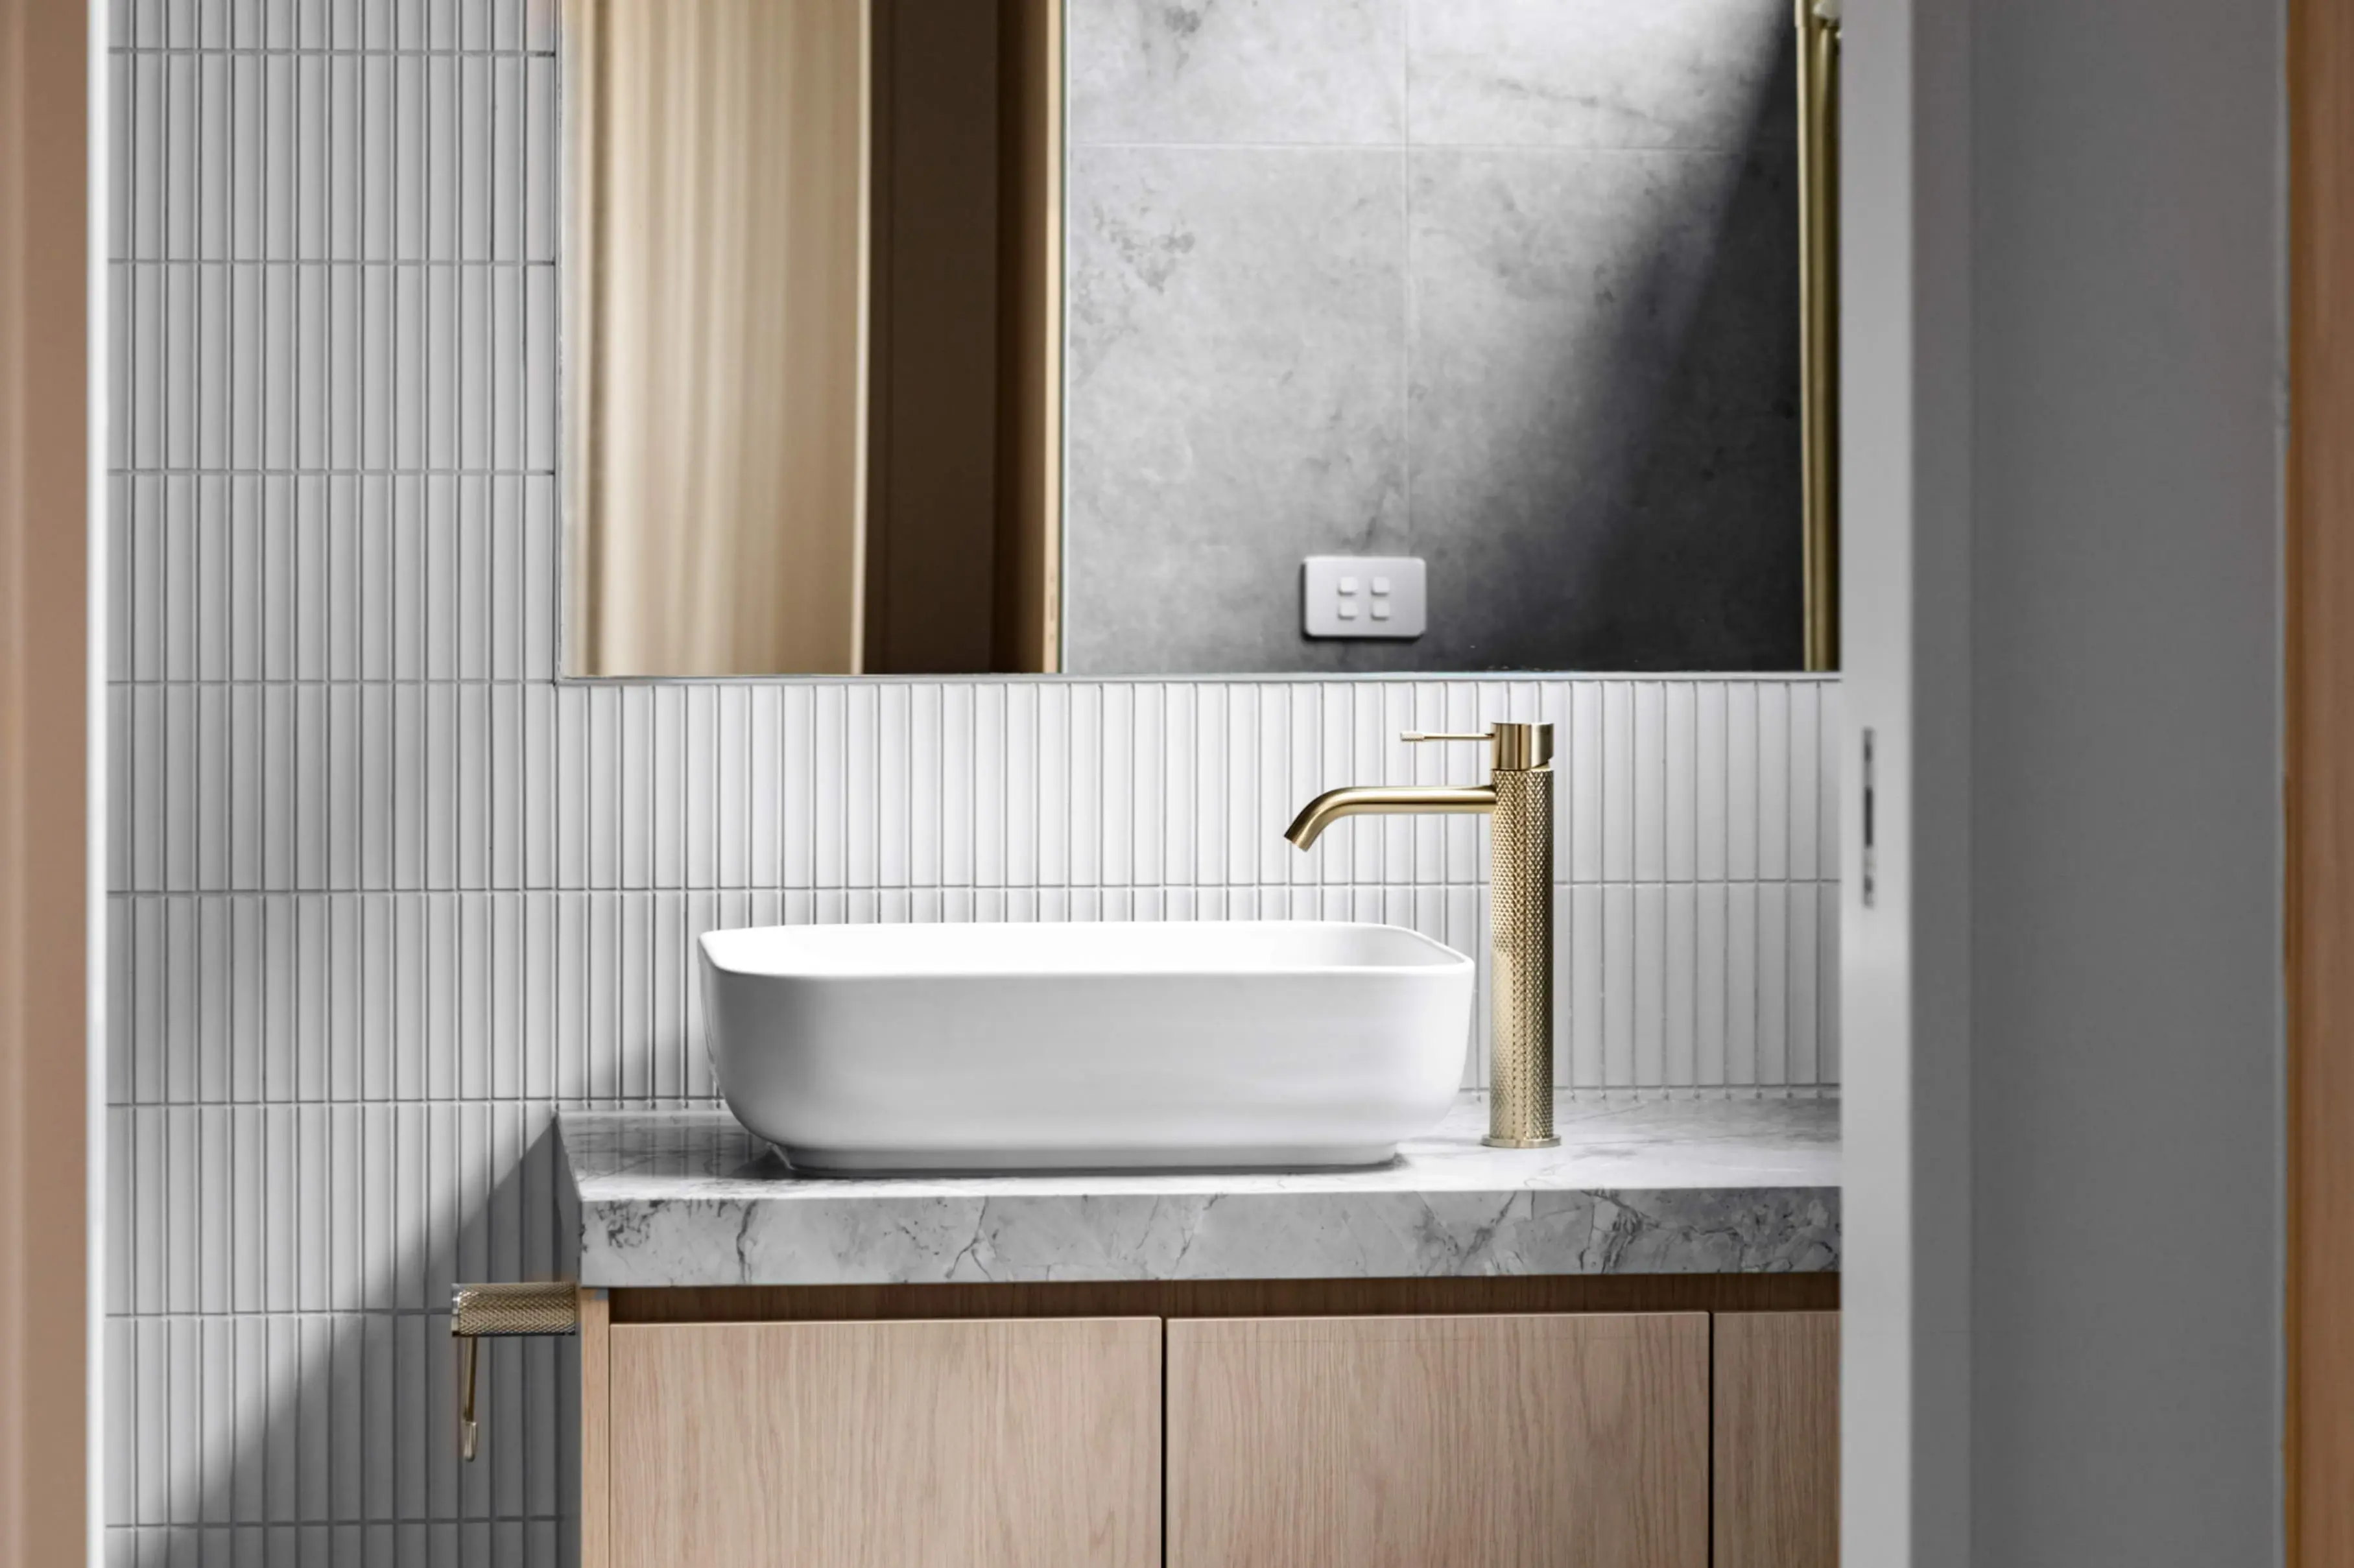
Nero styling cue: Treat tapware as the finishing layer that quietly pulls the palette together. Once your tile undertone is set (warm terracotta/cream vs cool white/grey), choose one calm metal finish and repeat it. A kitchen mixer in Matte Black or Brushed Nickel can sit comfortably in both warm (timber, beige, terracotta) and cool (stone, white, concrete-look) schemes. Brushed finishes are usually the easiest bridge between warm neutrals and cool whites—polished chrome can feel sharper and more reflective.
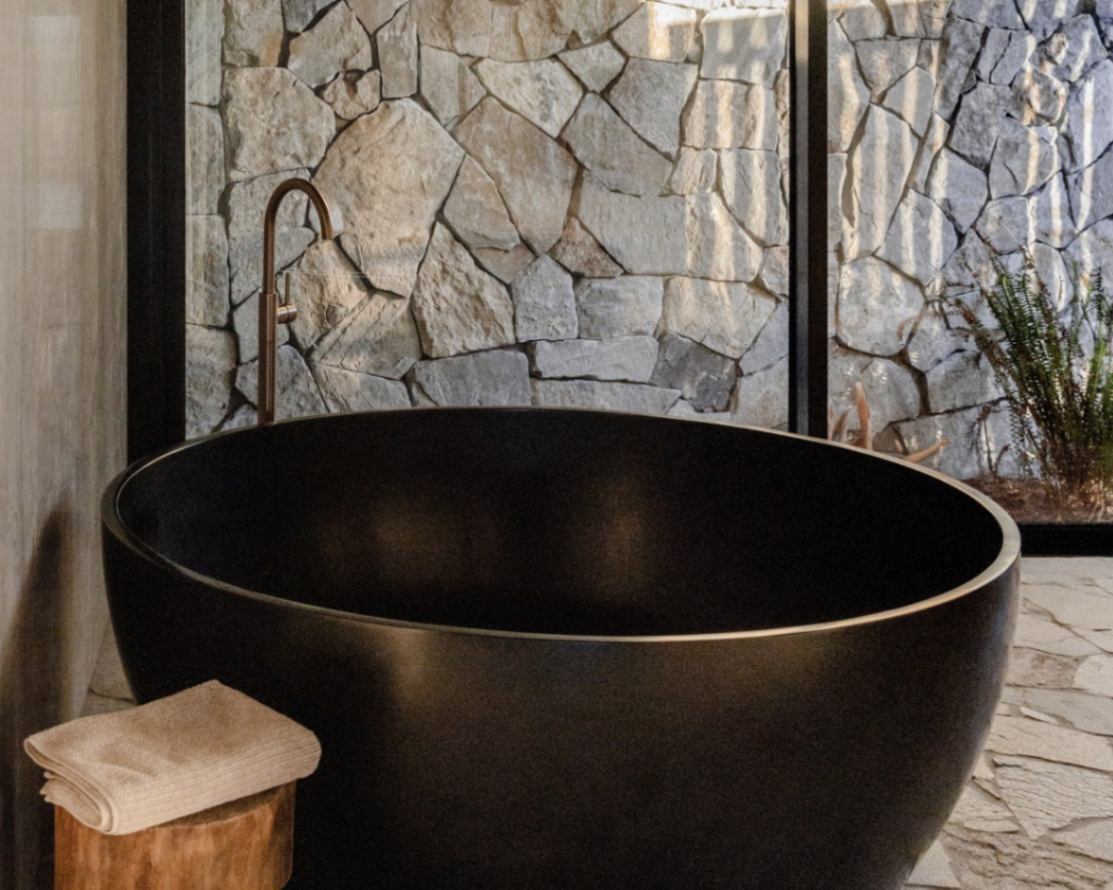
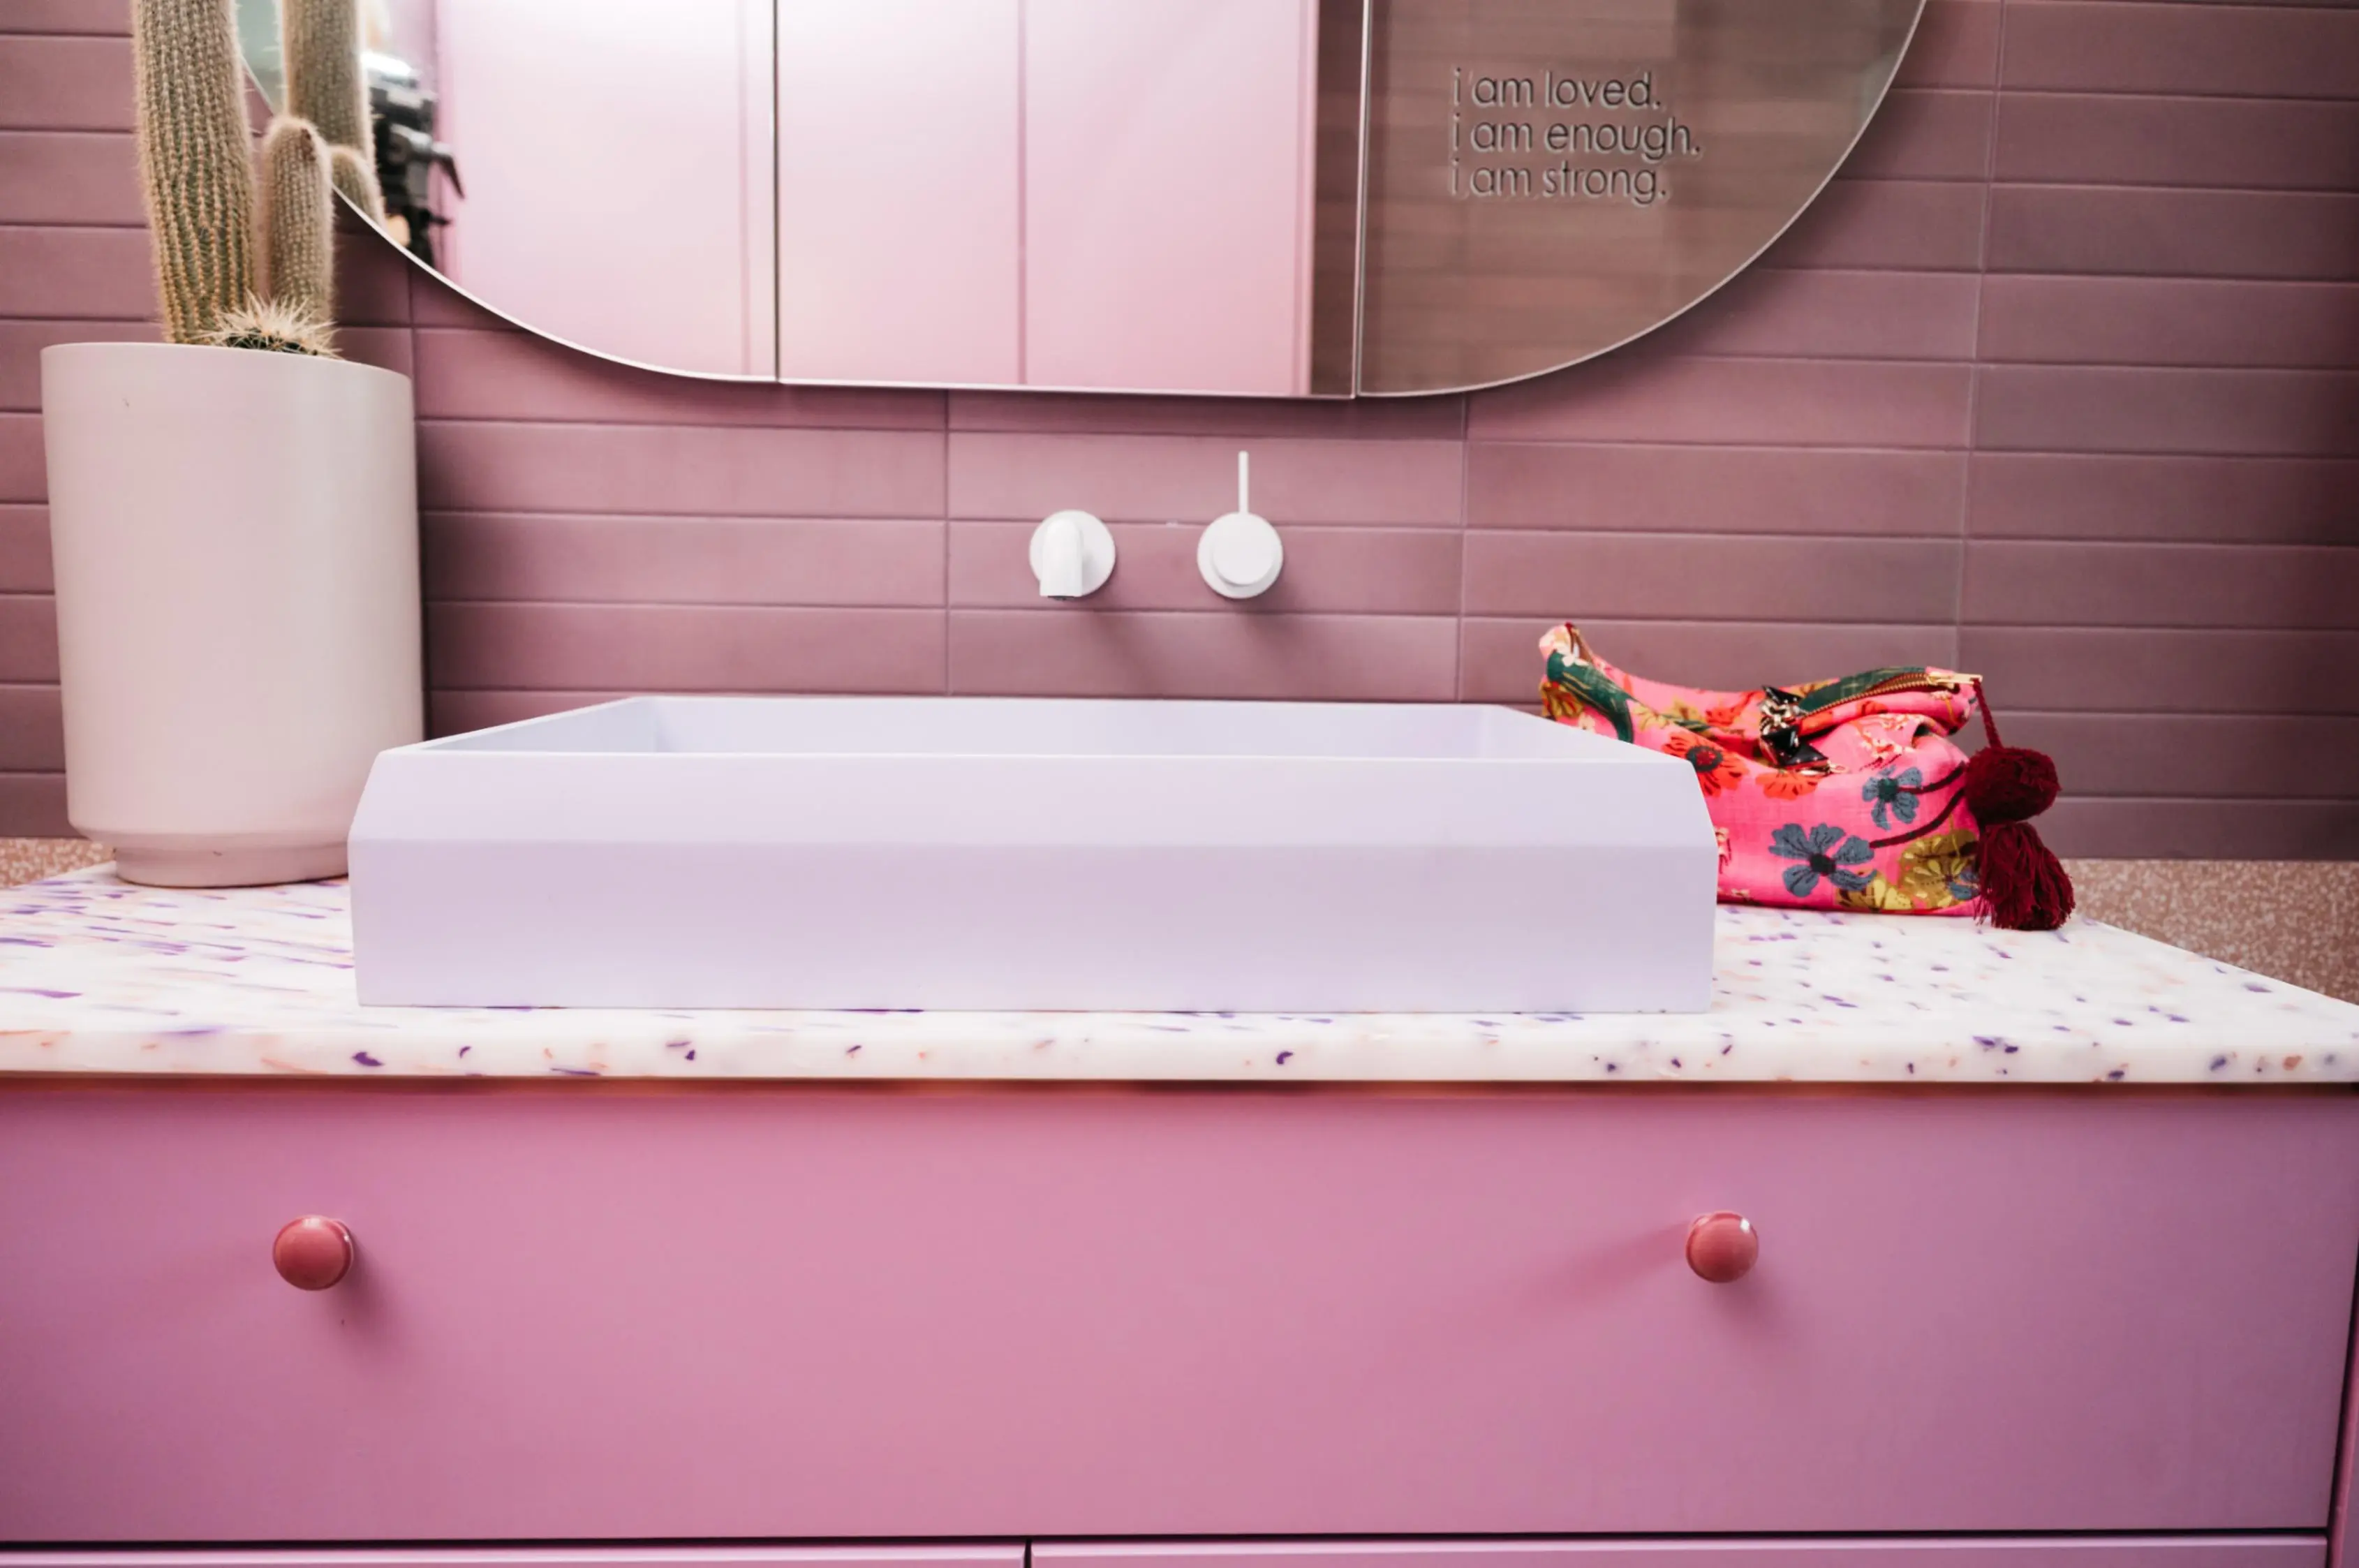
Bathrooms and wet areas
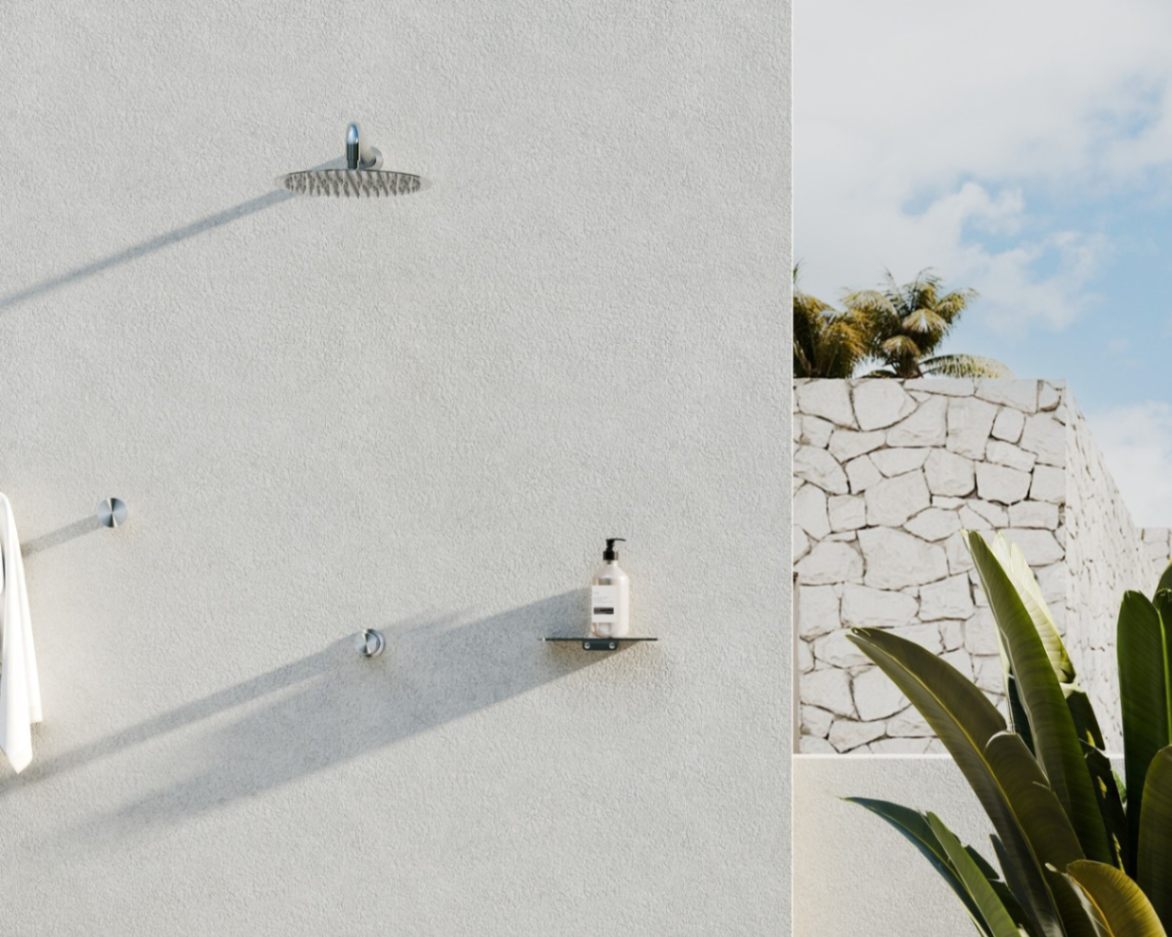
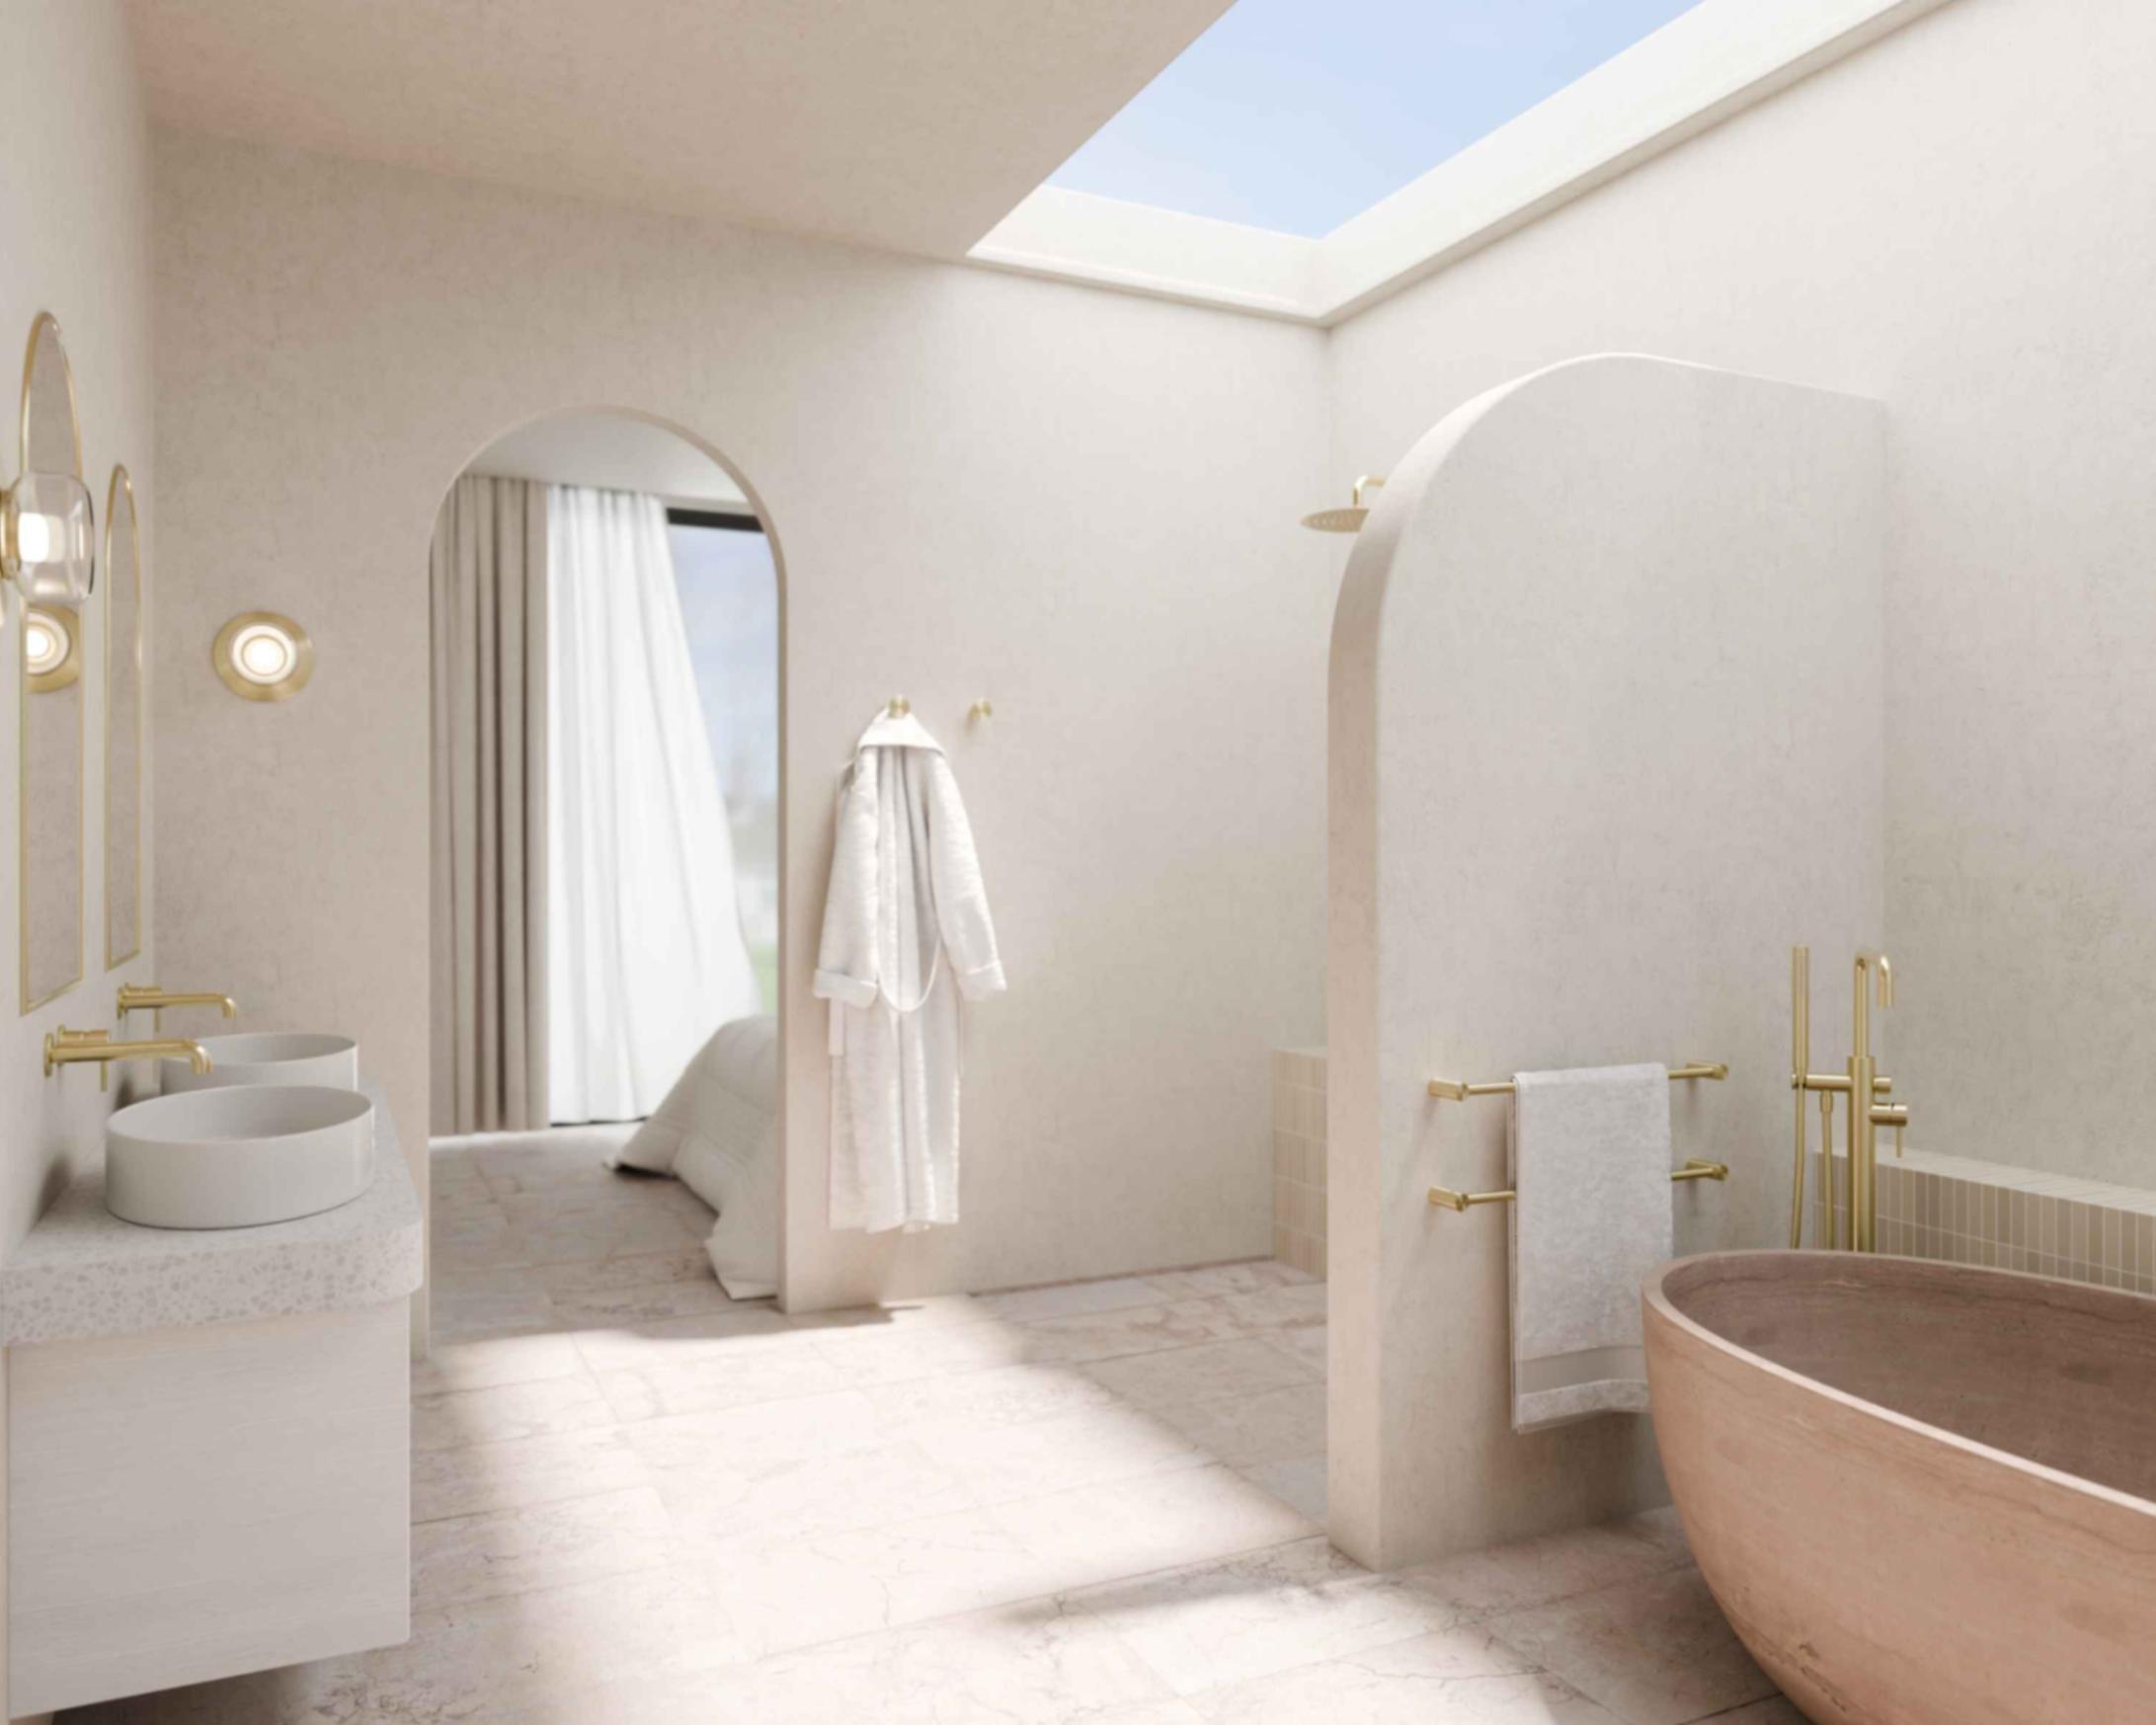
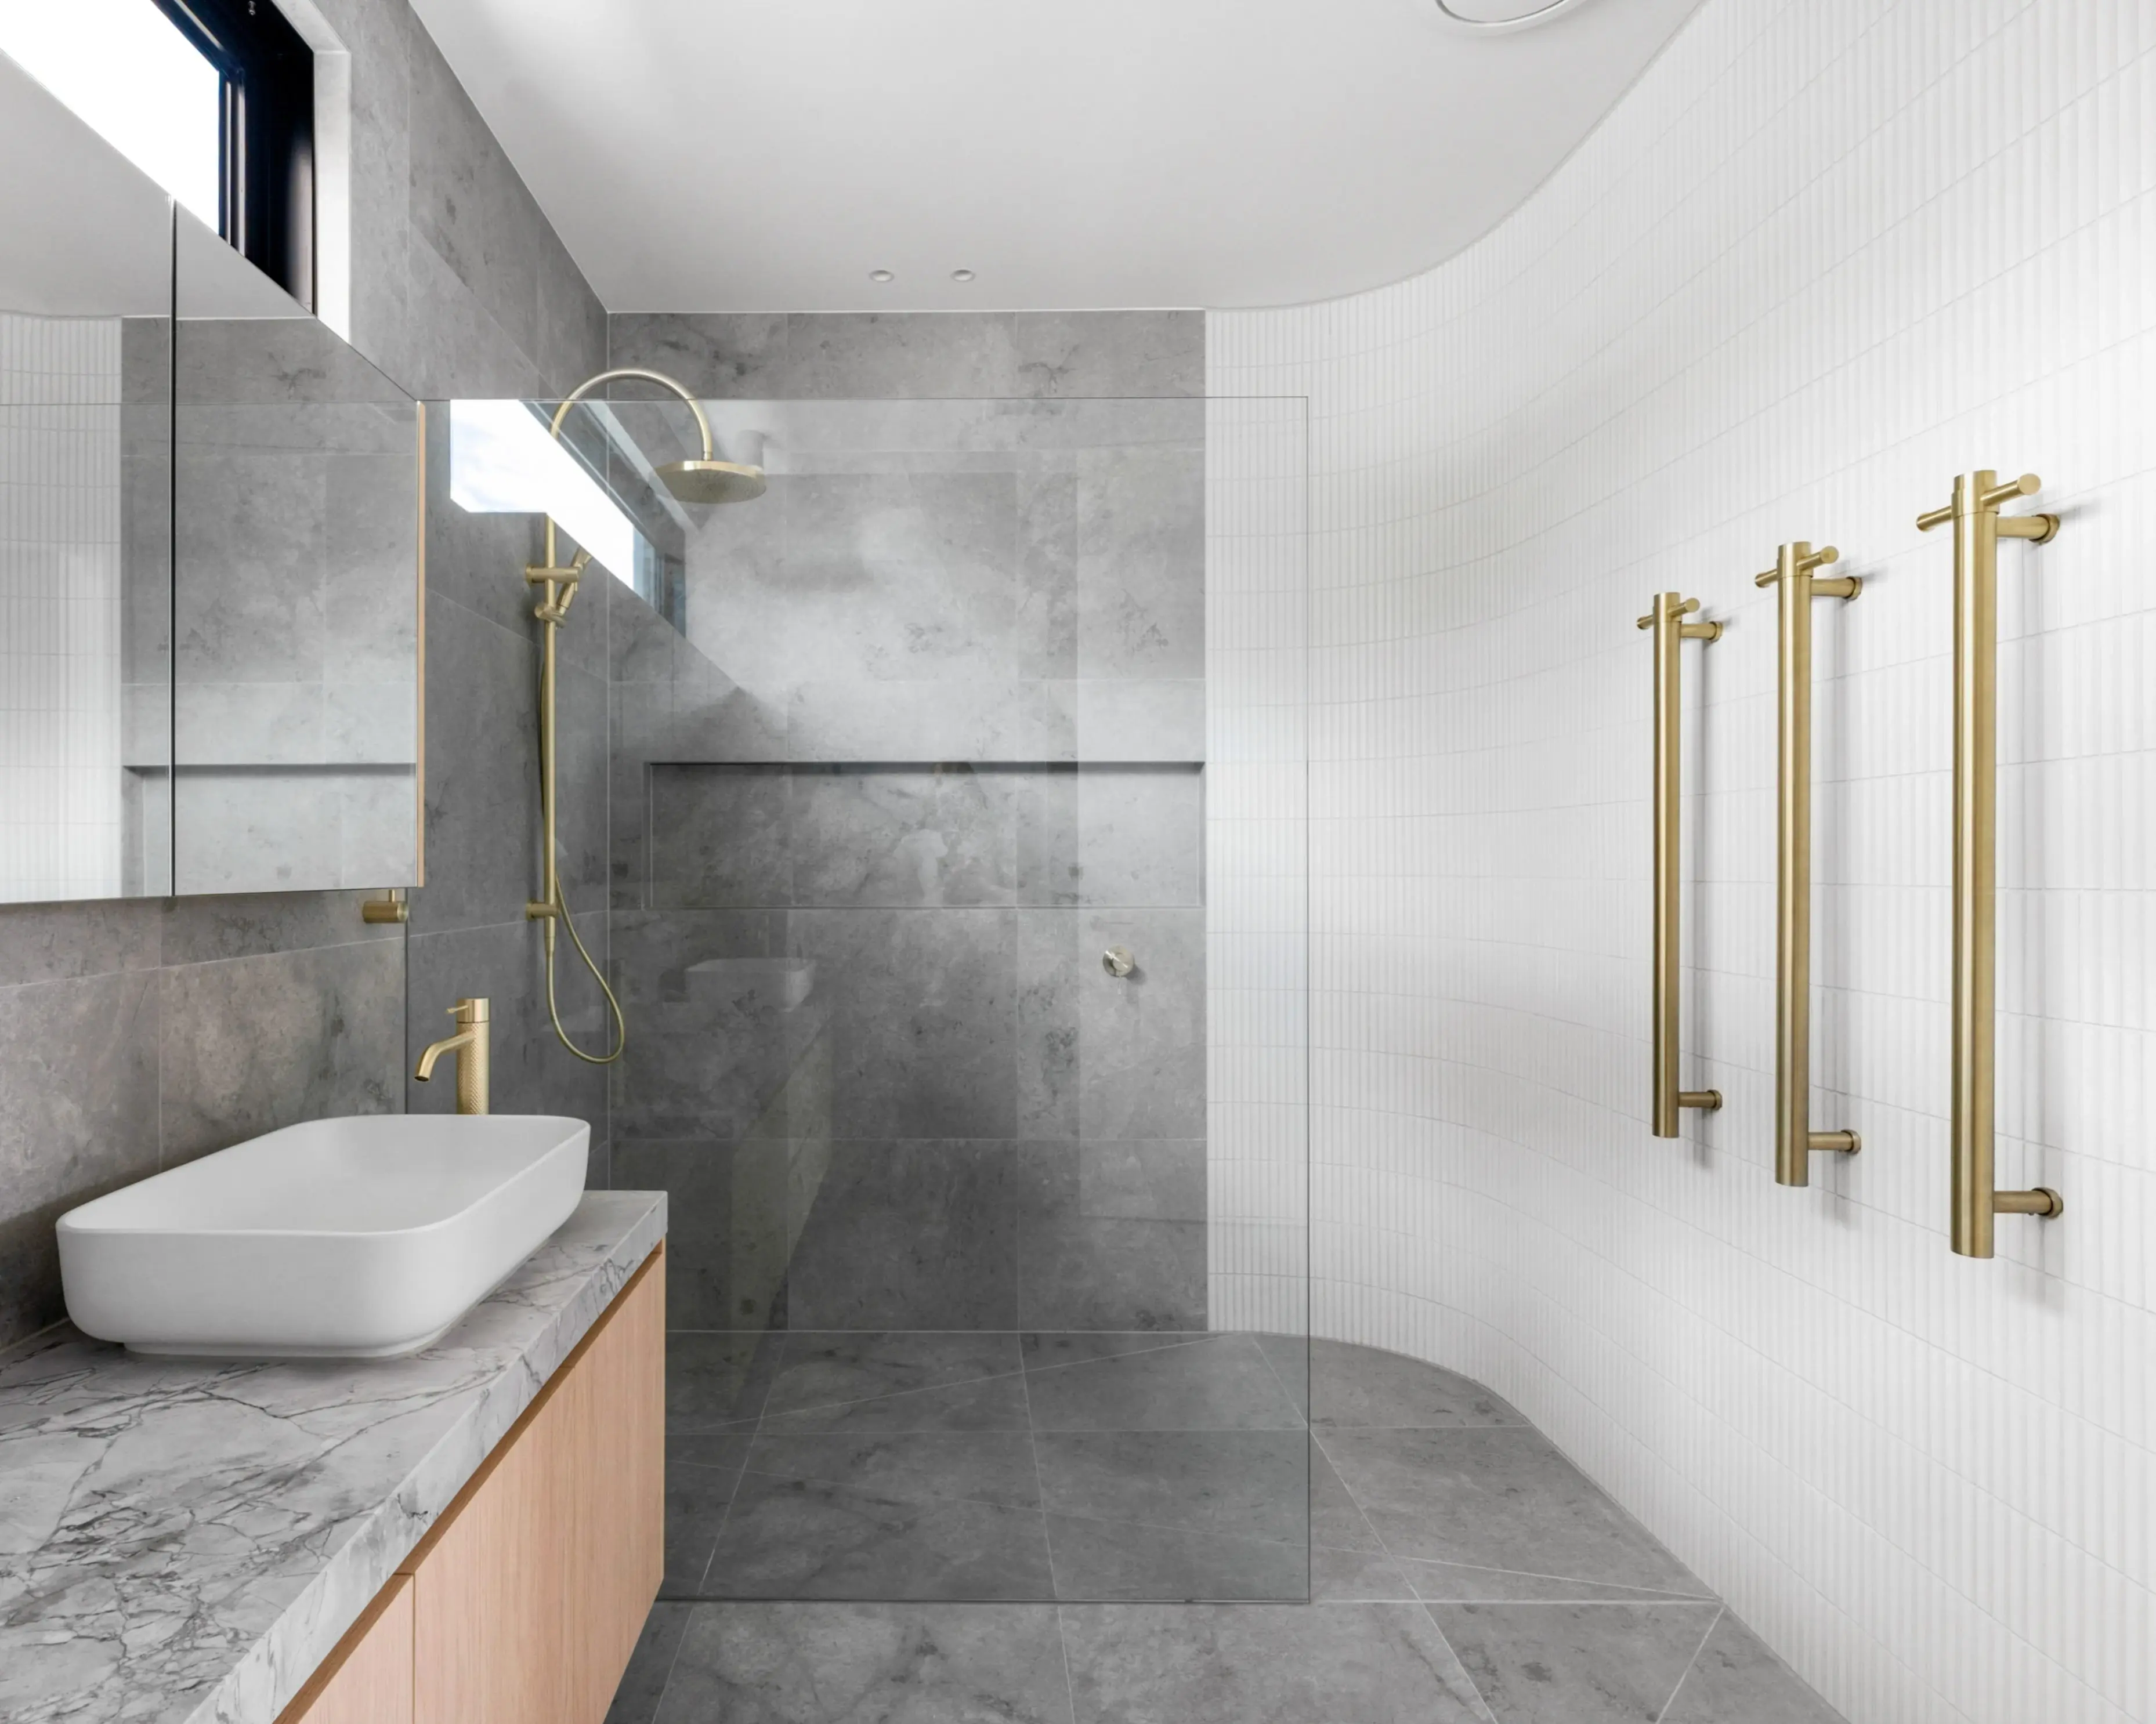
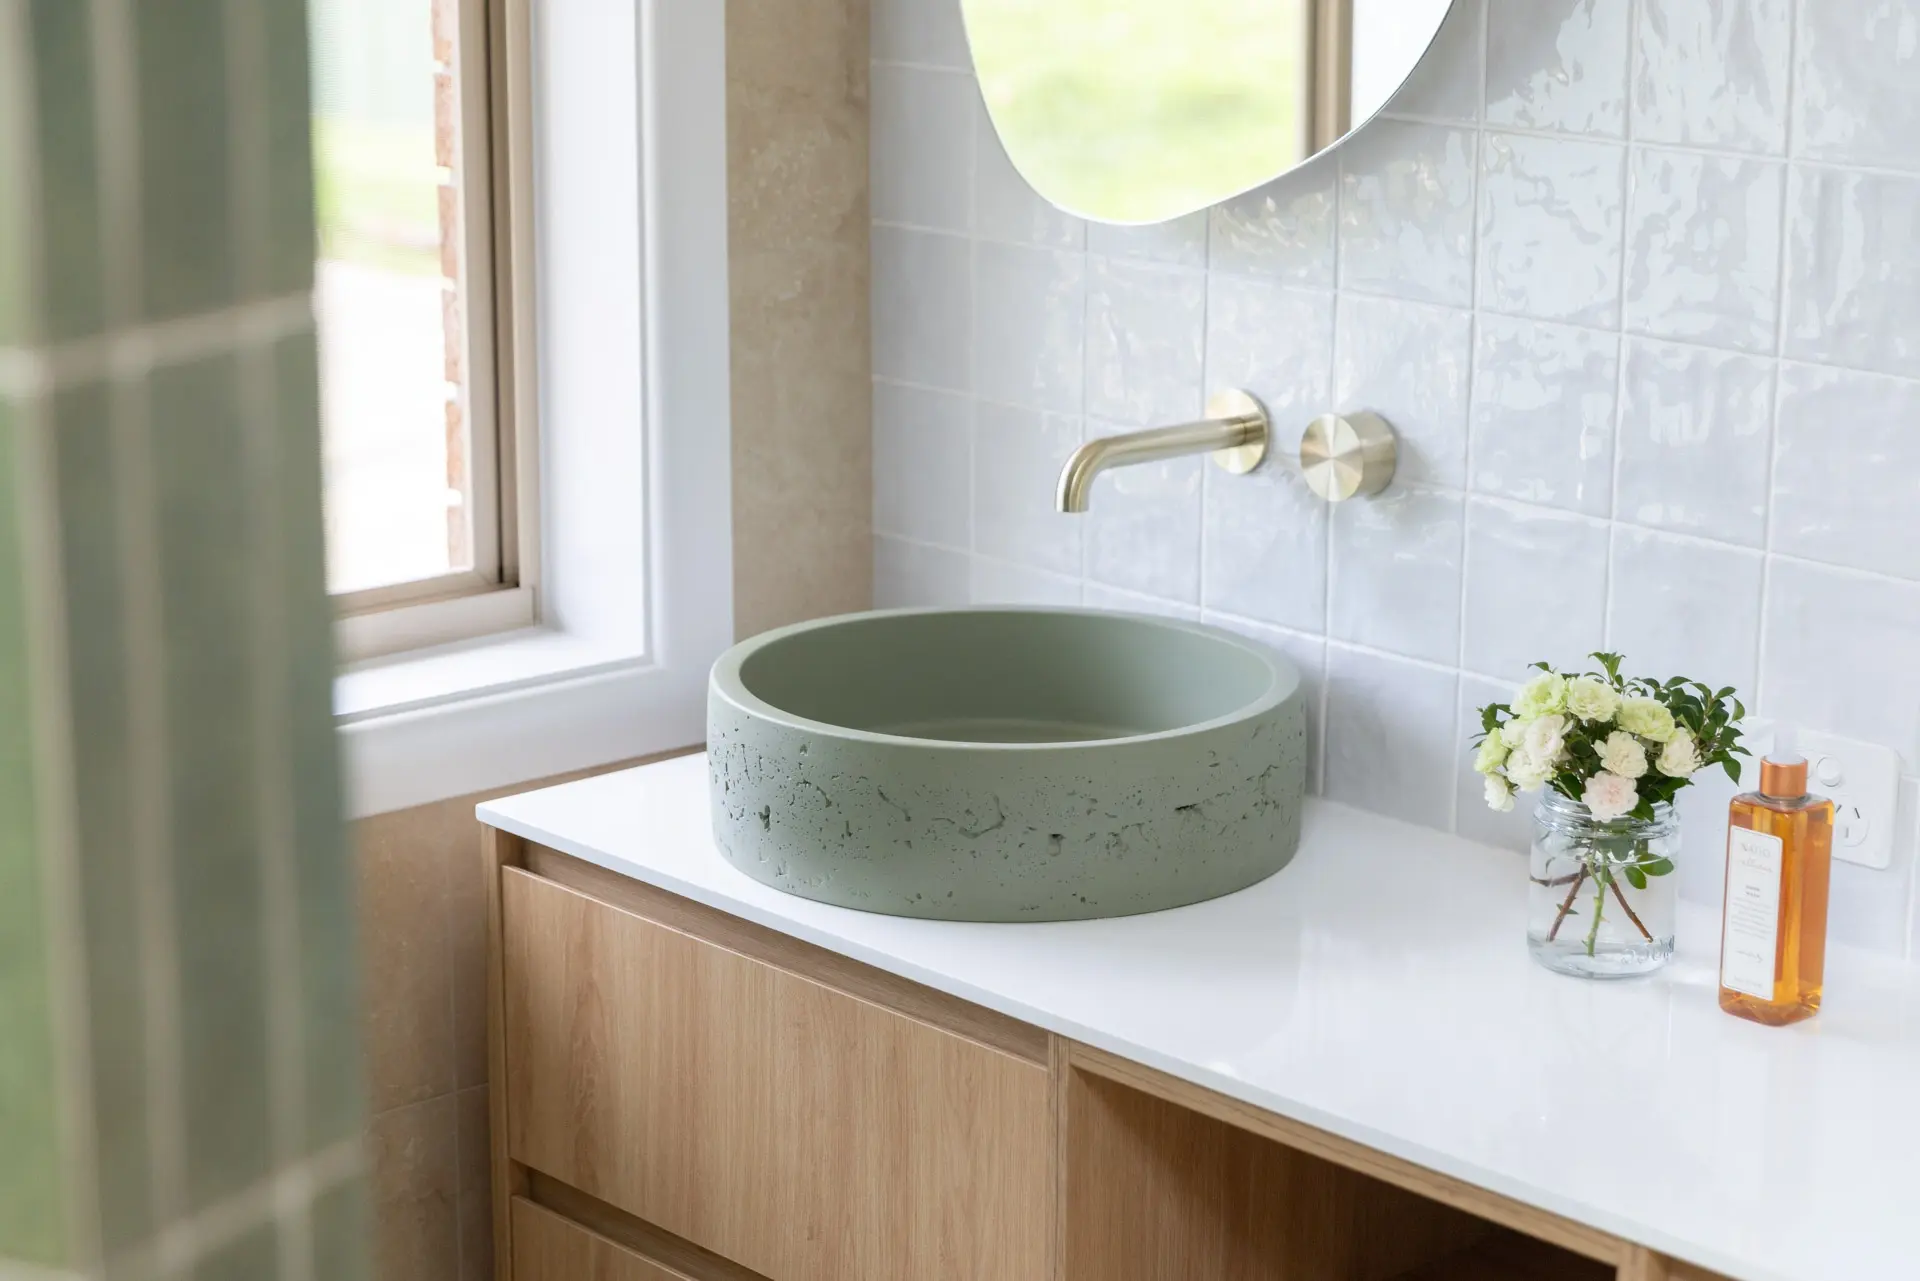
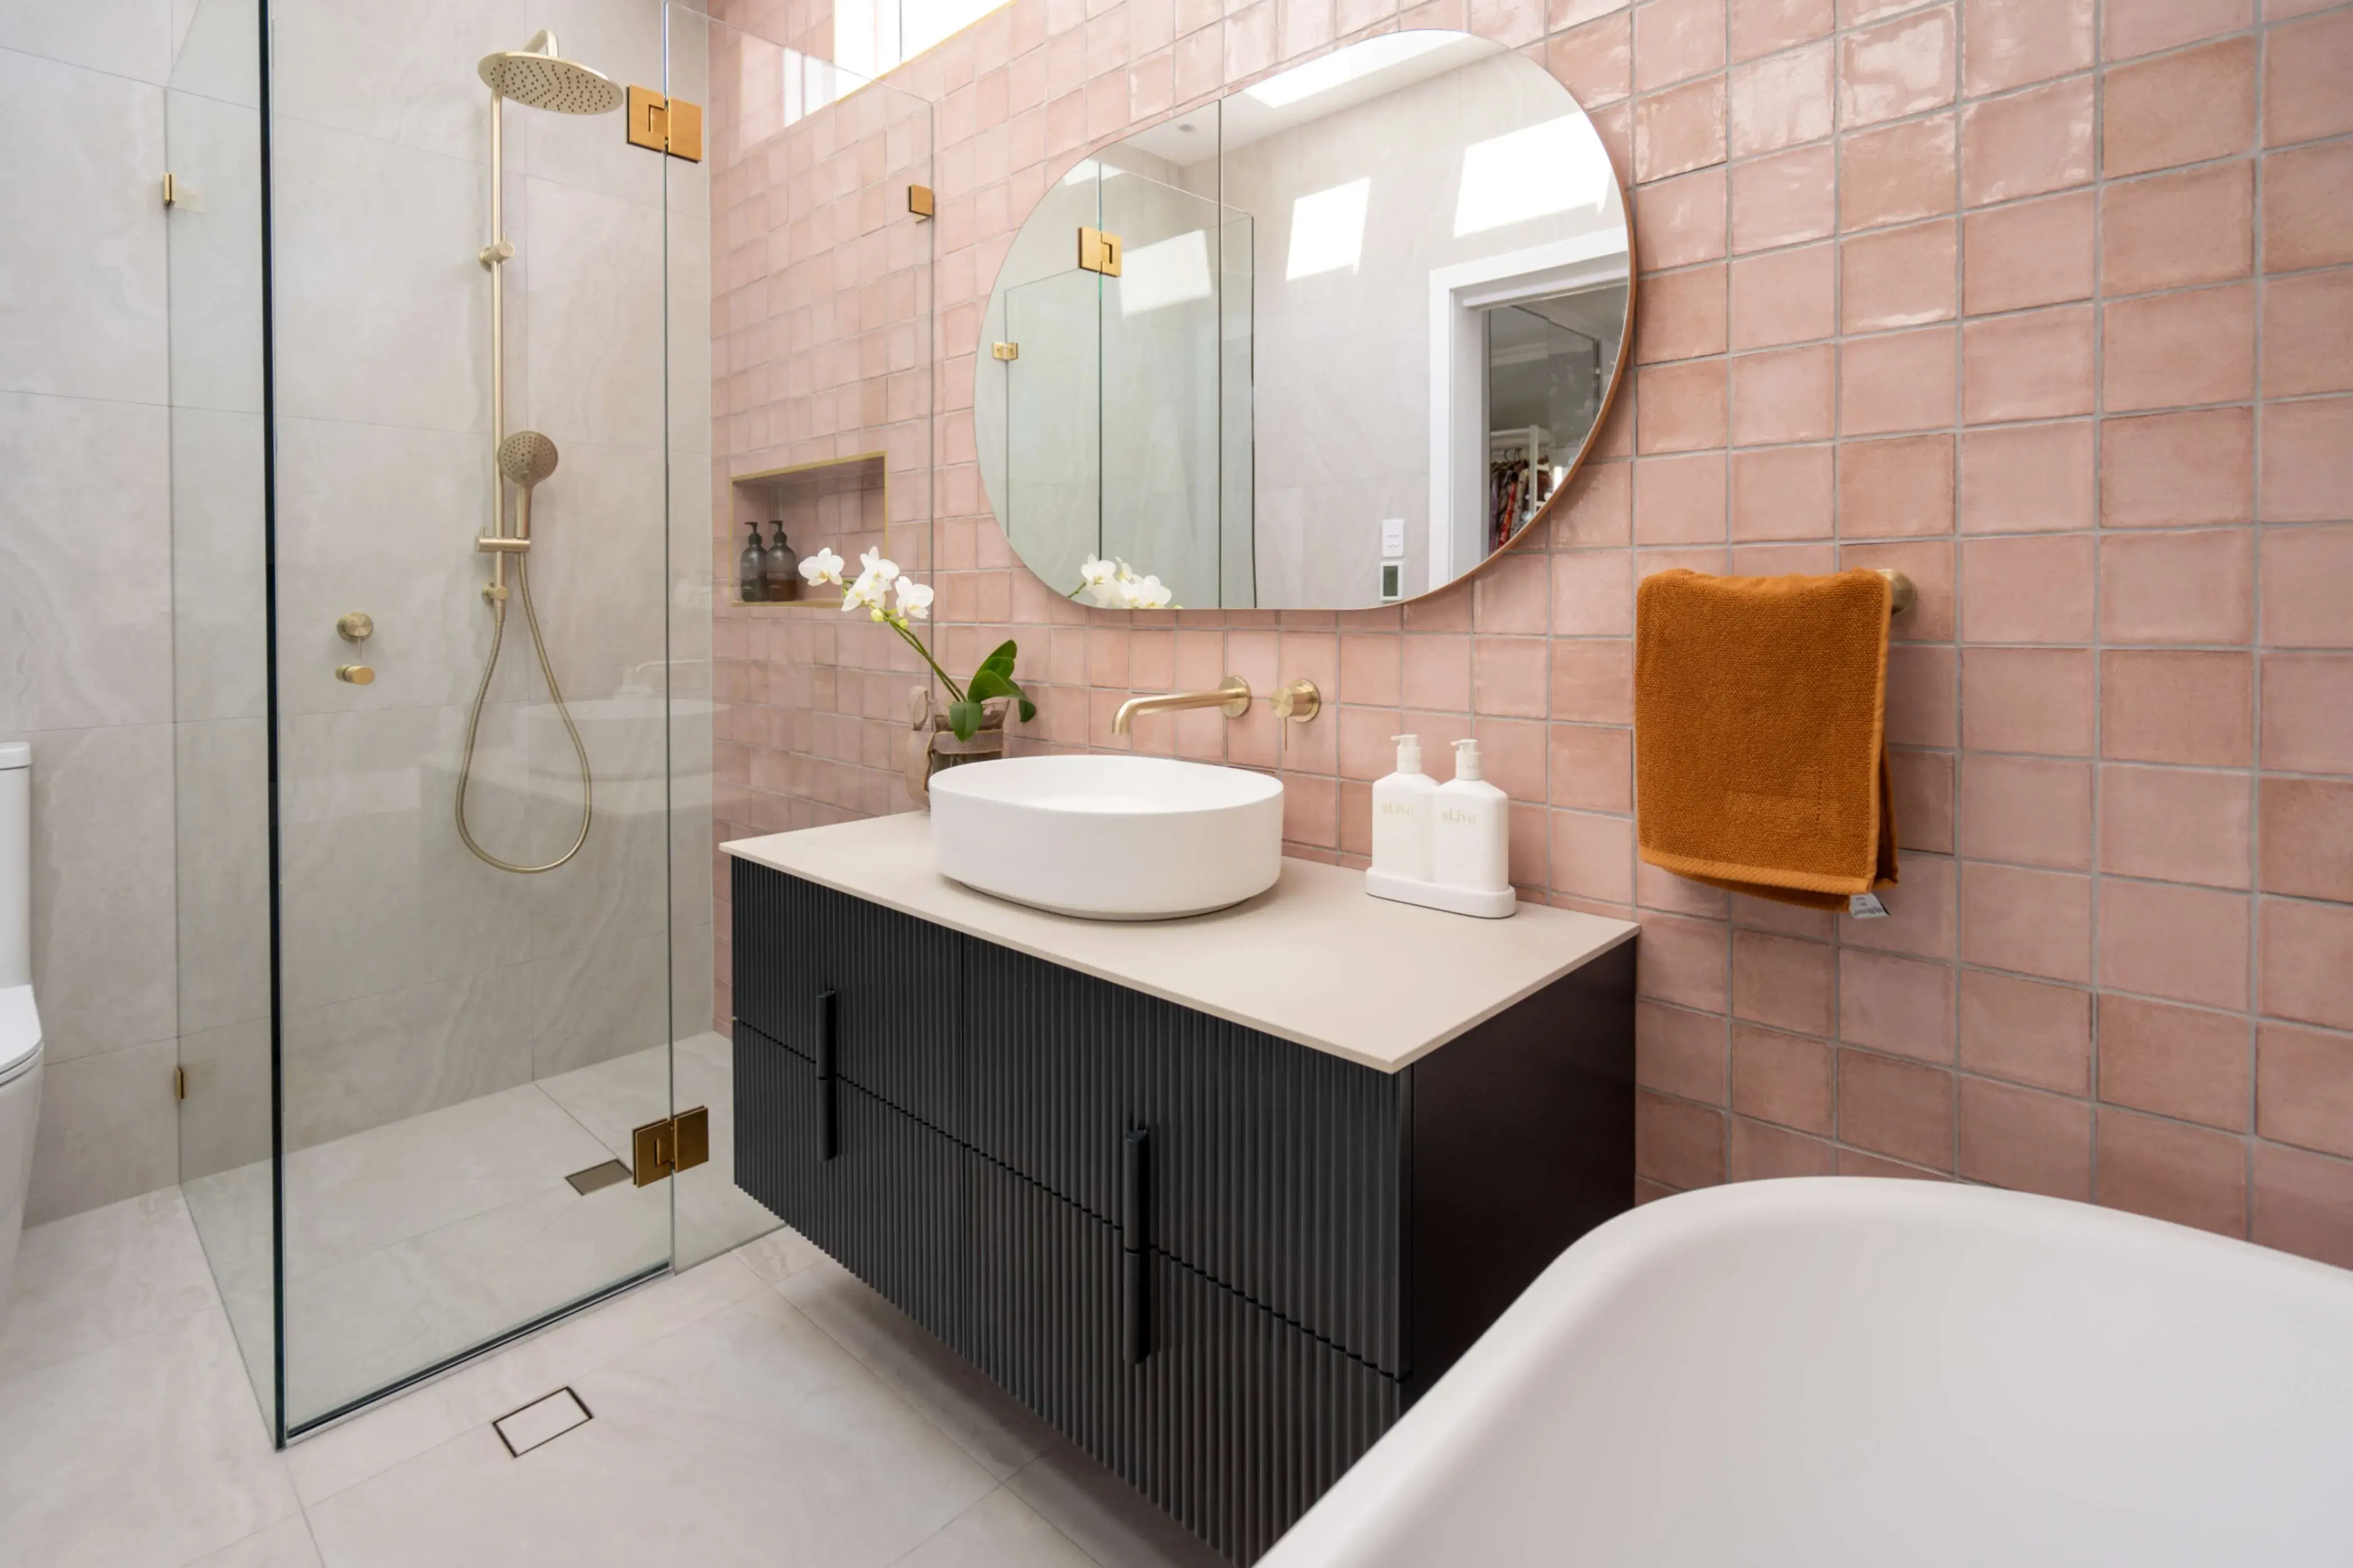
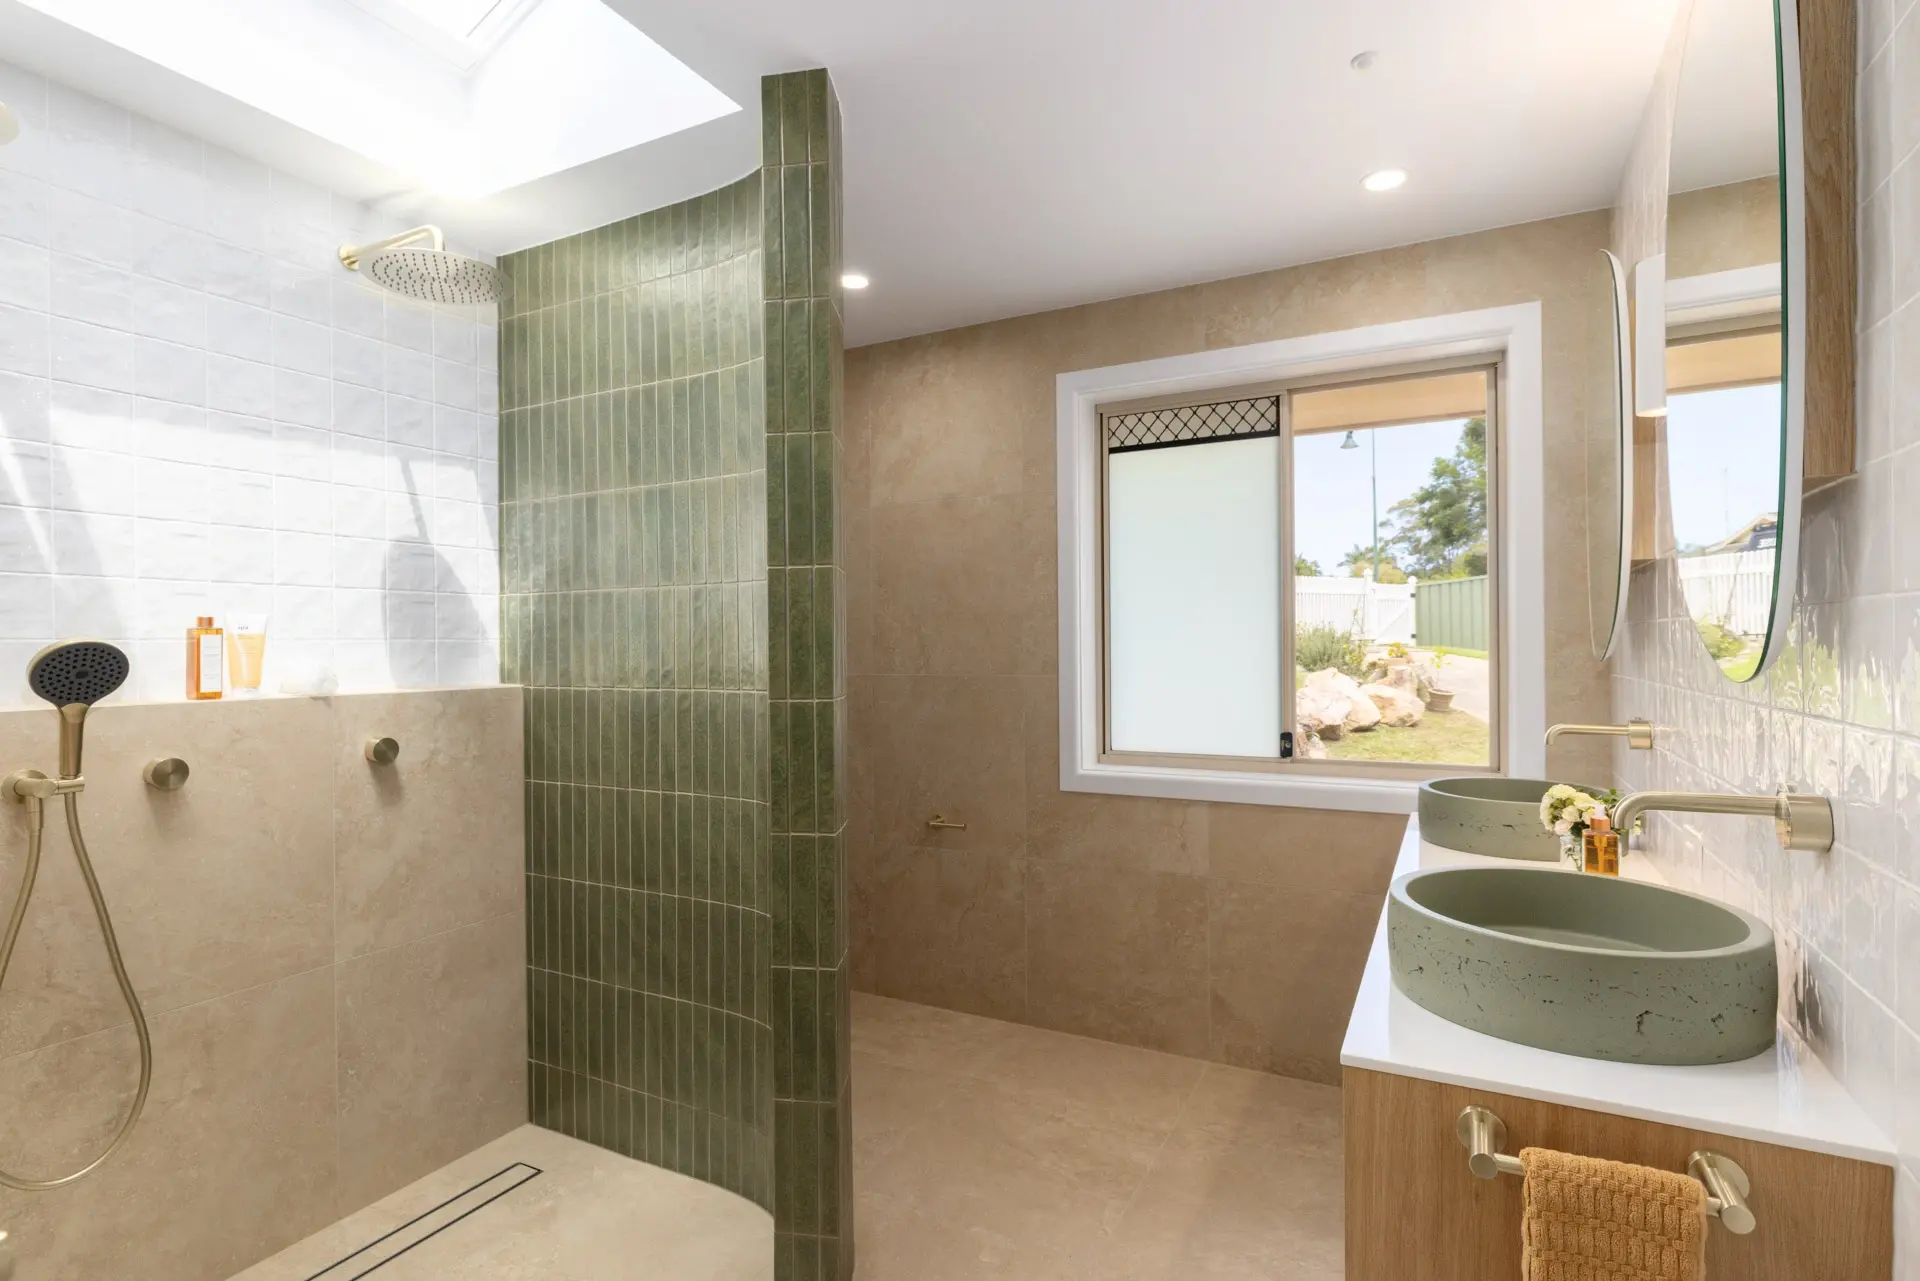
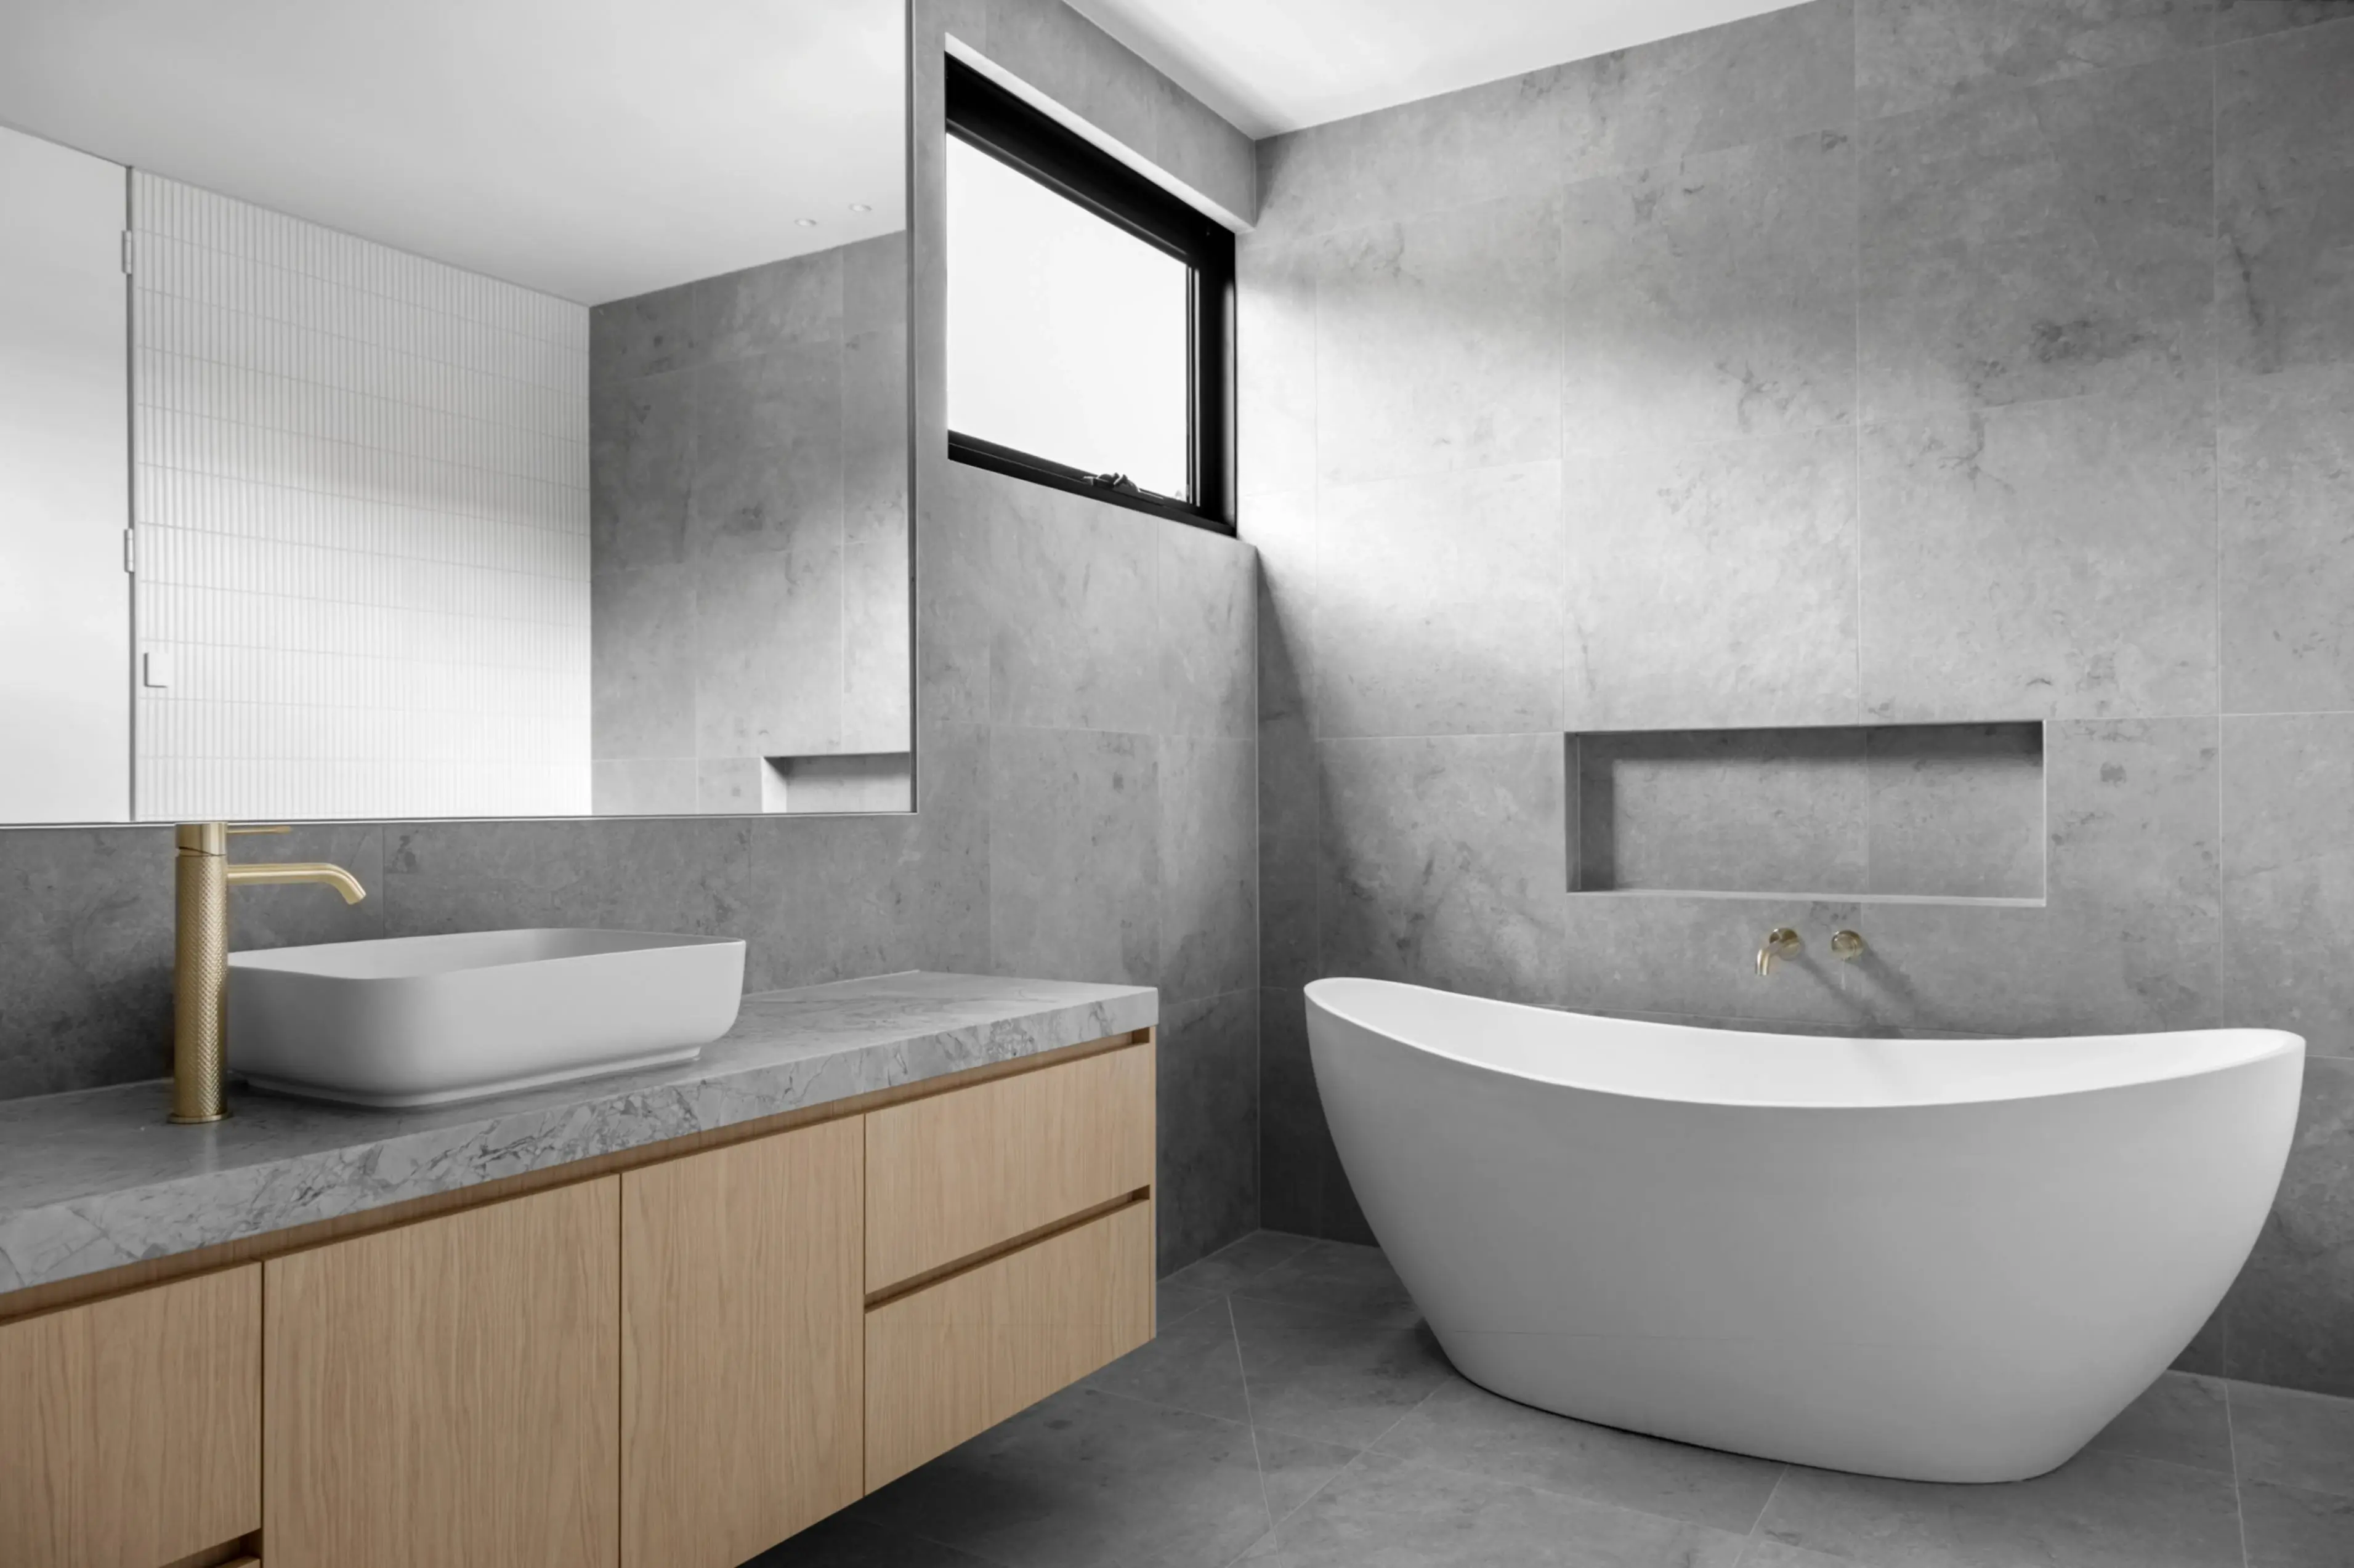
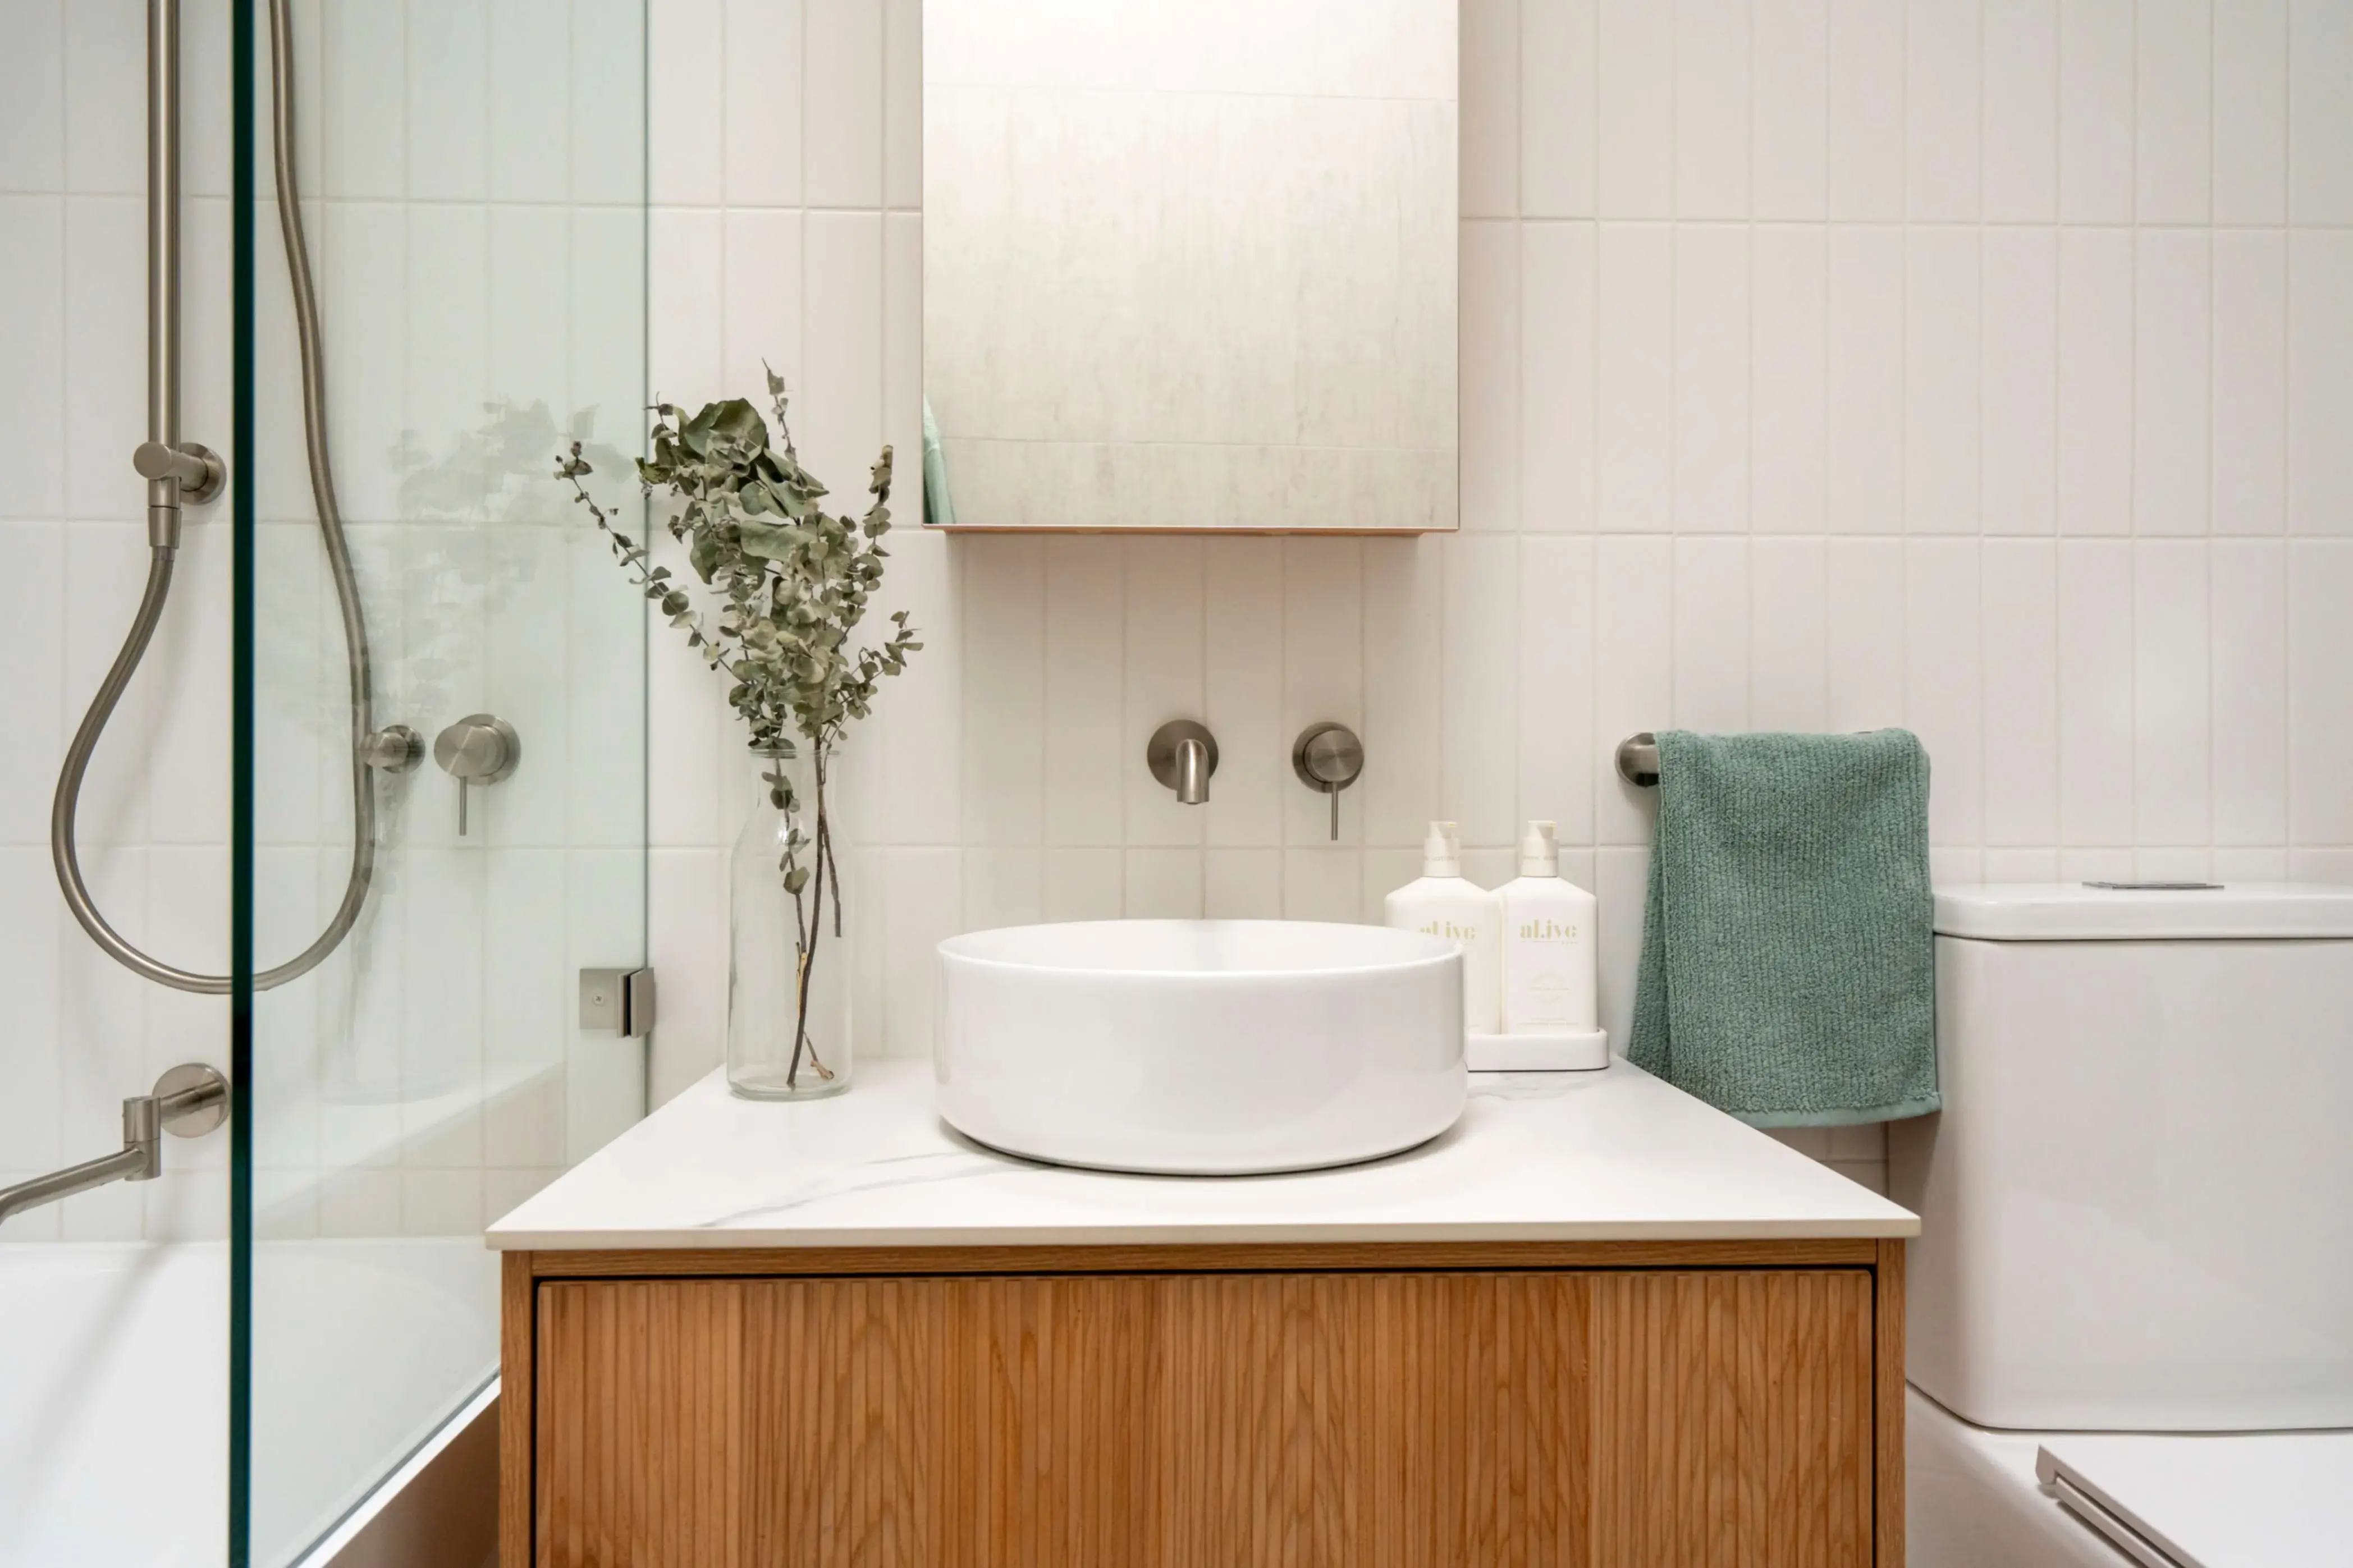
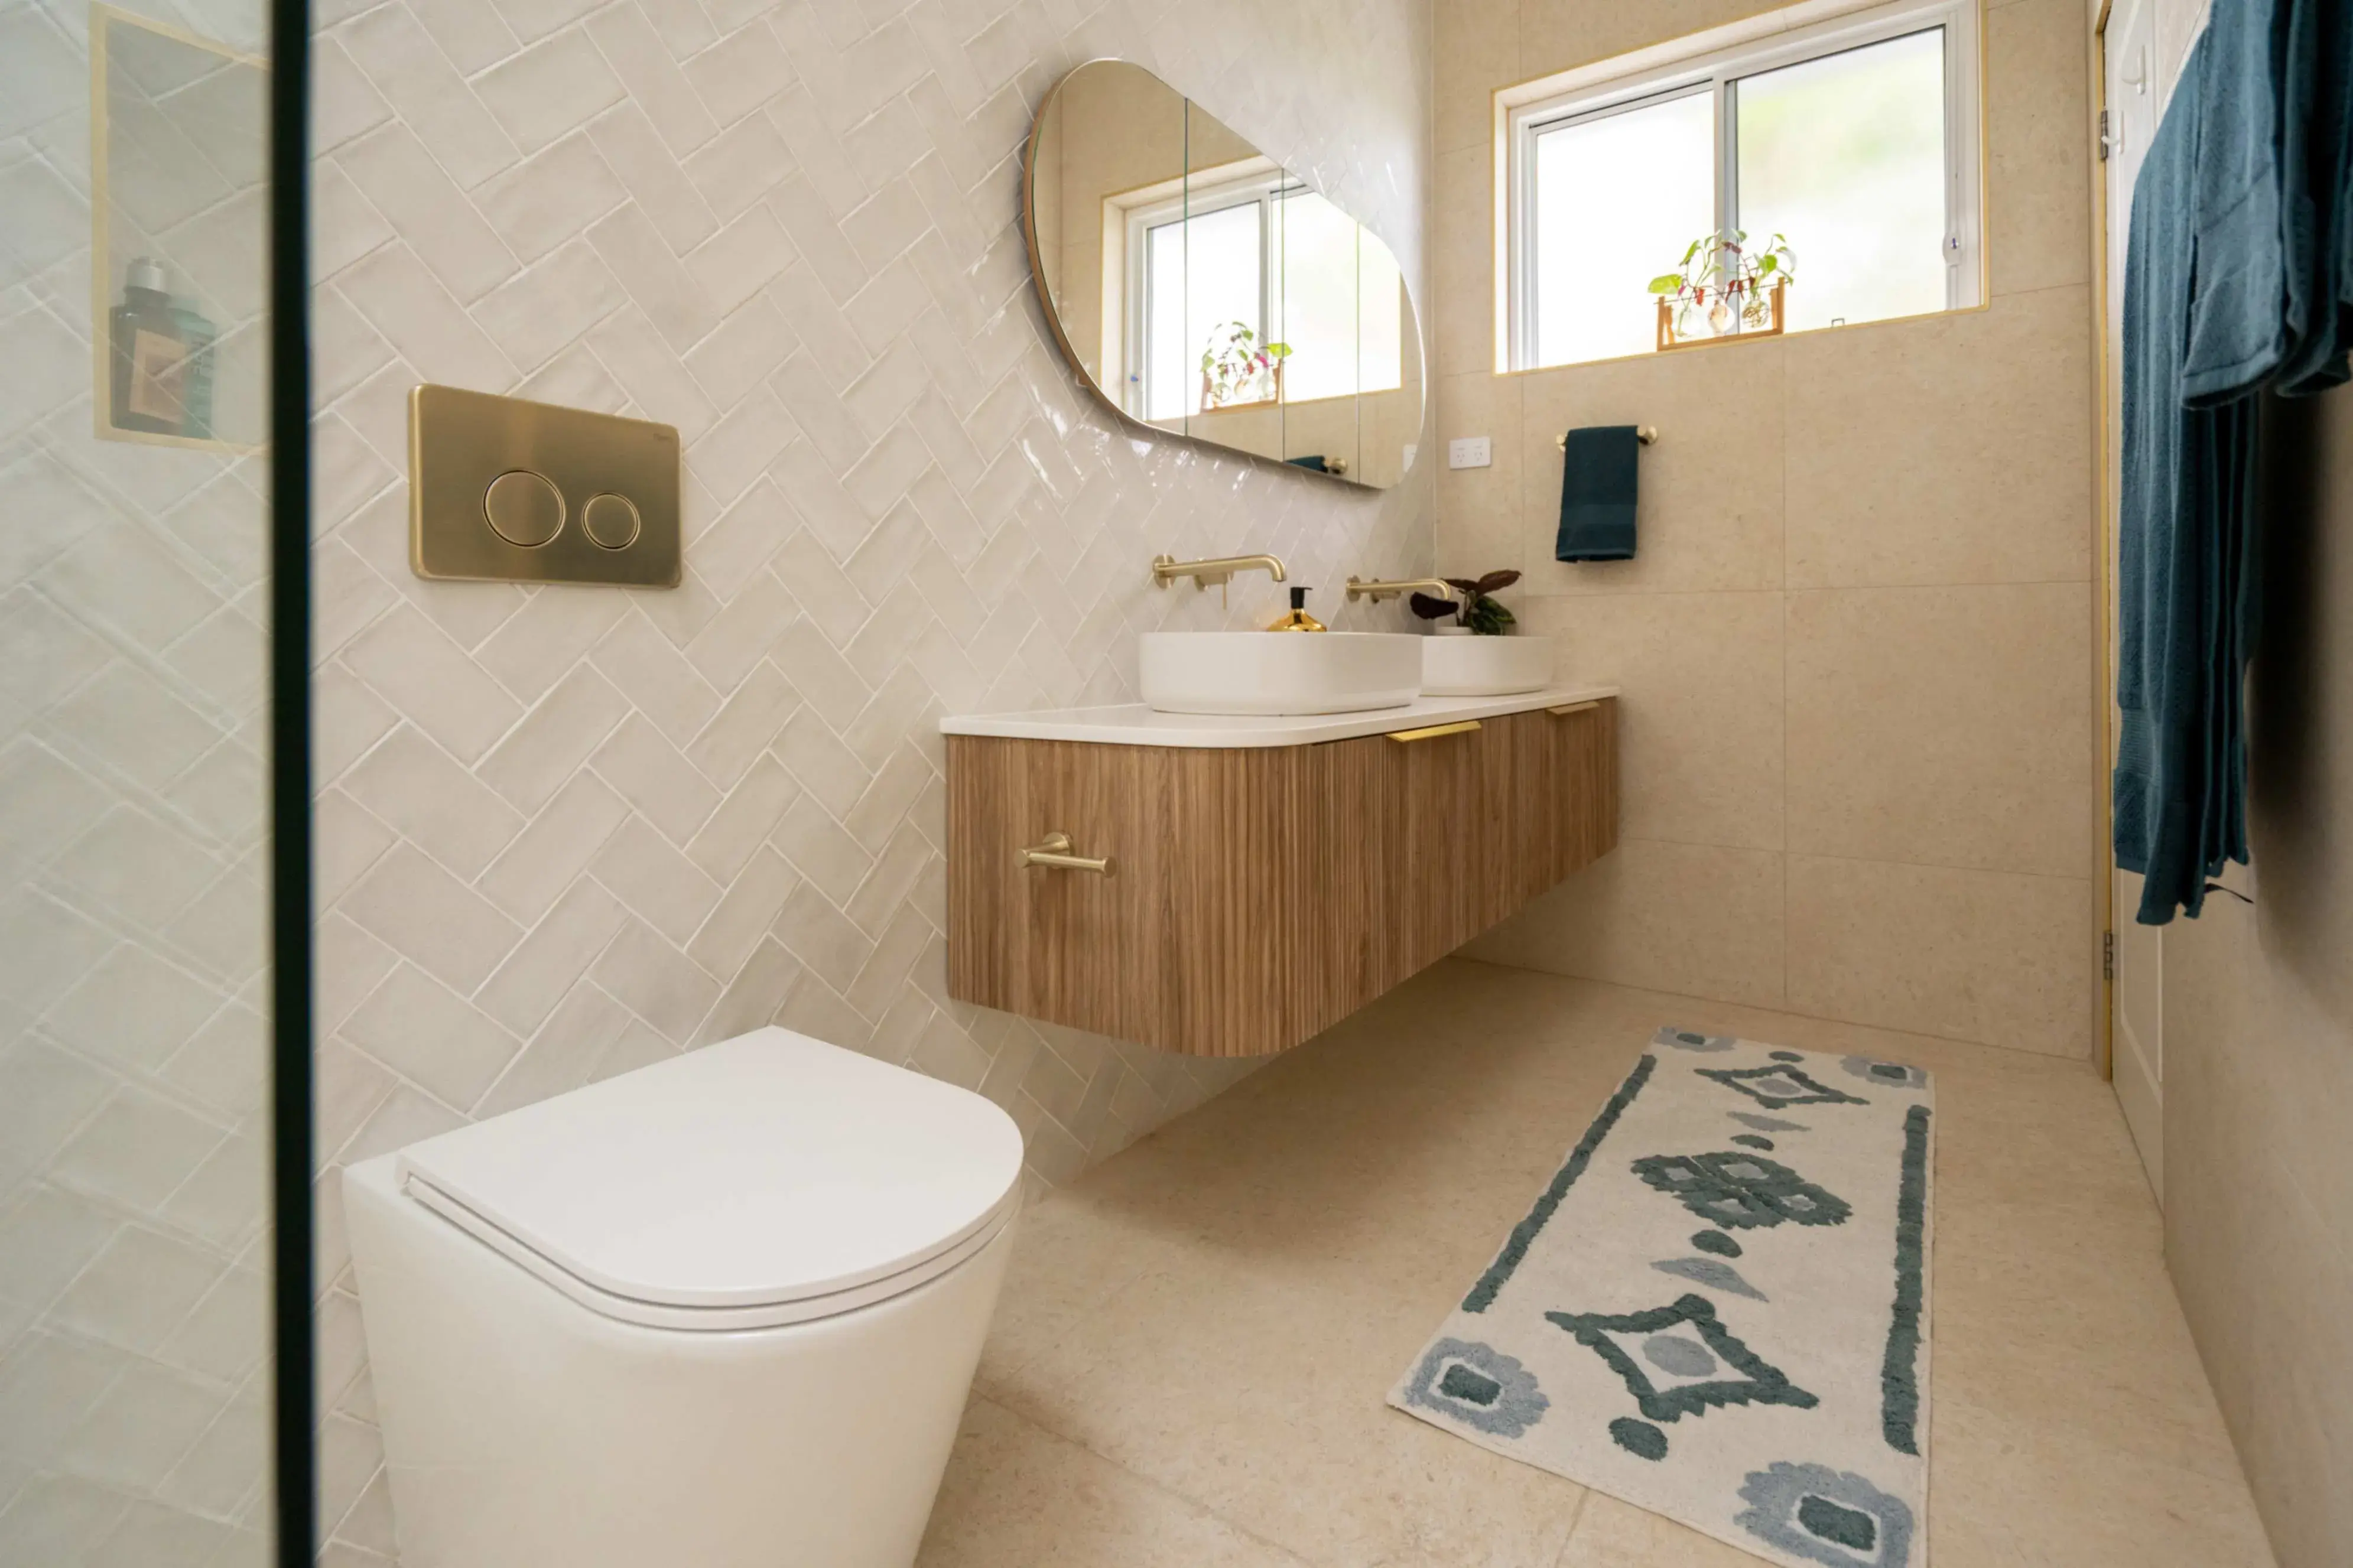
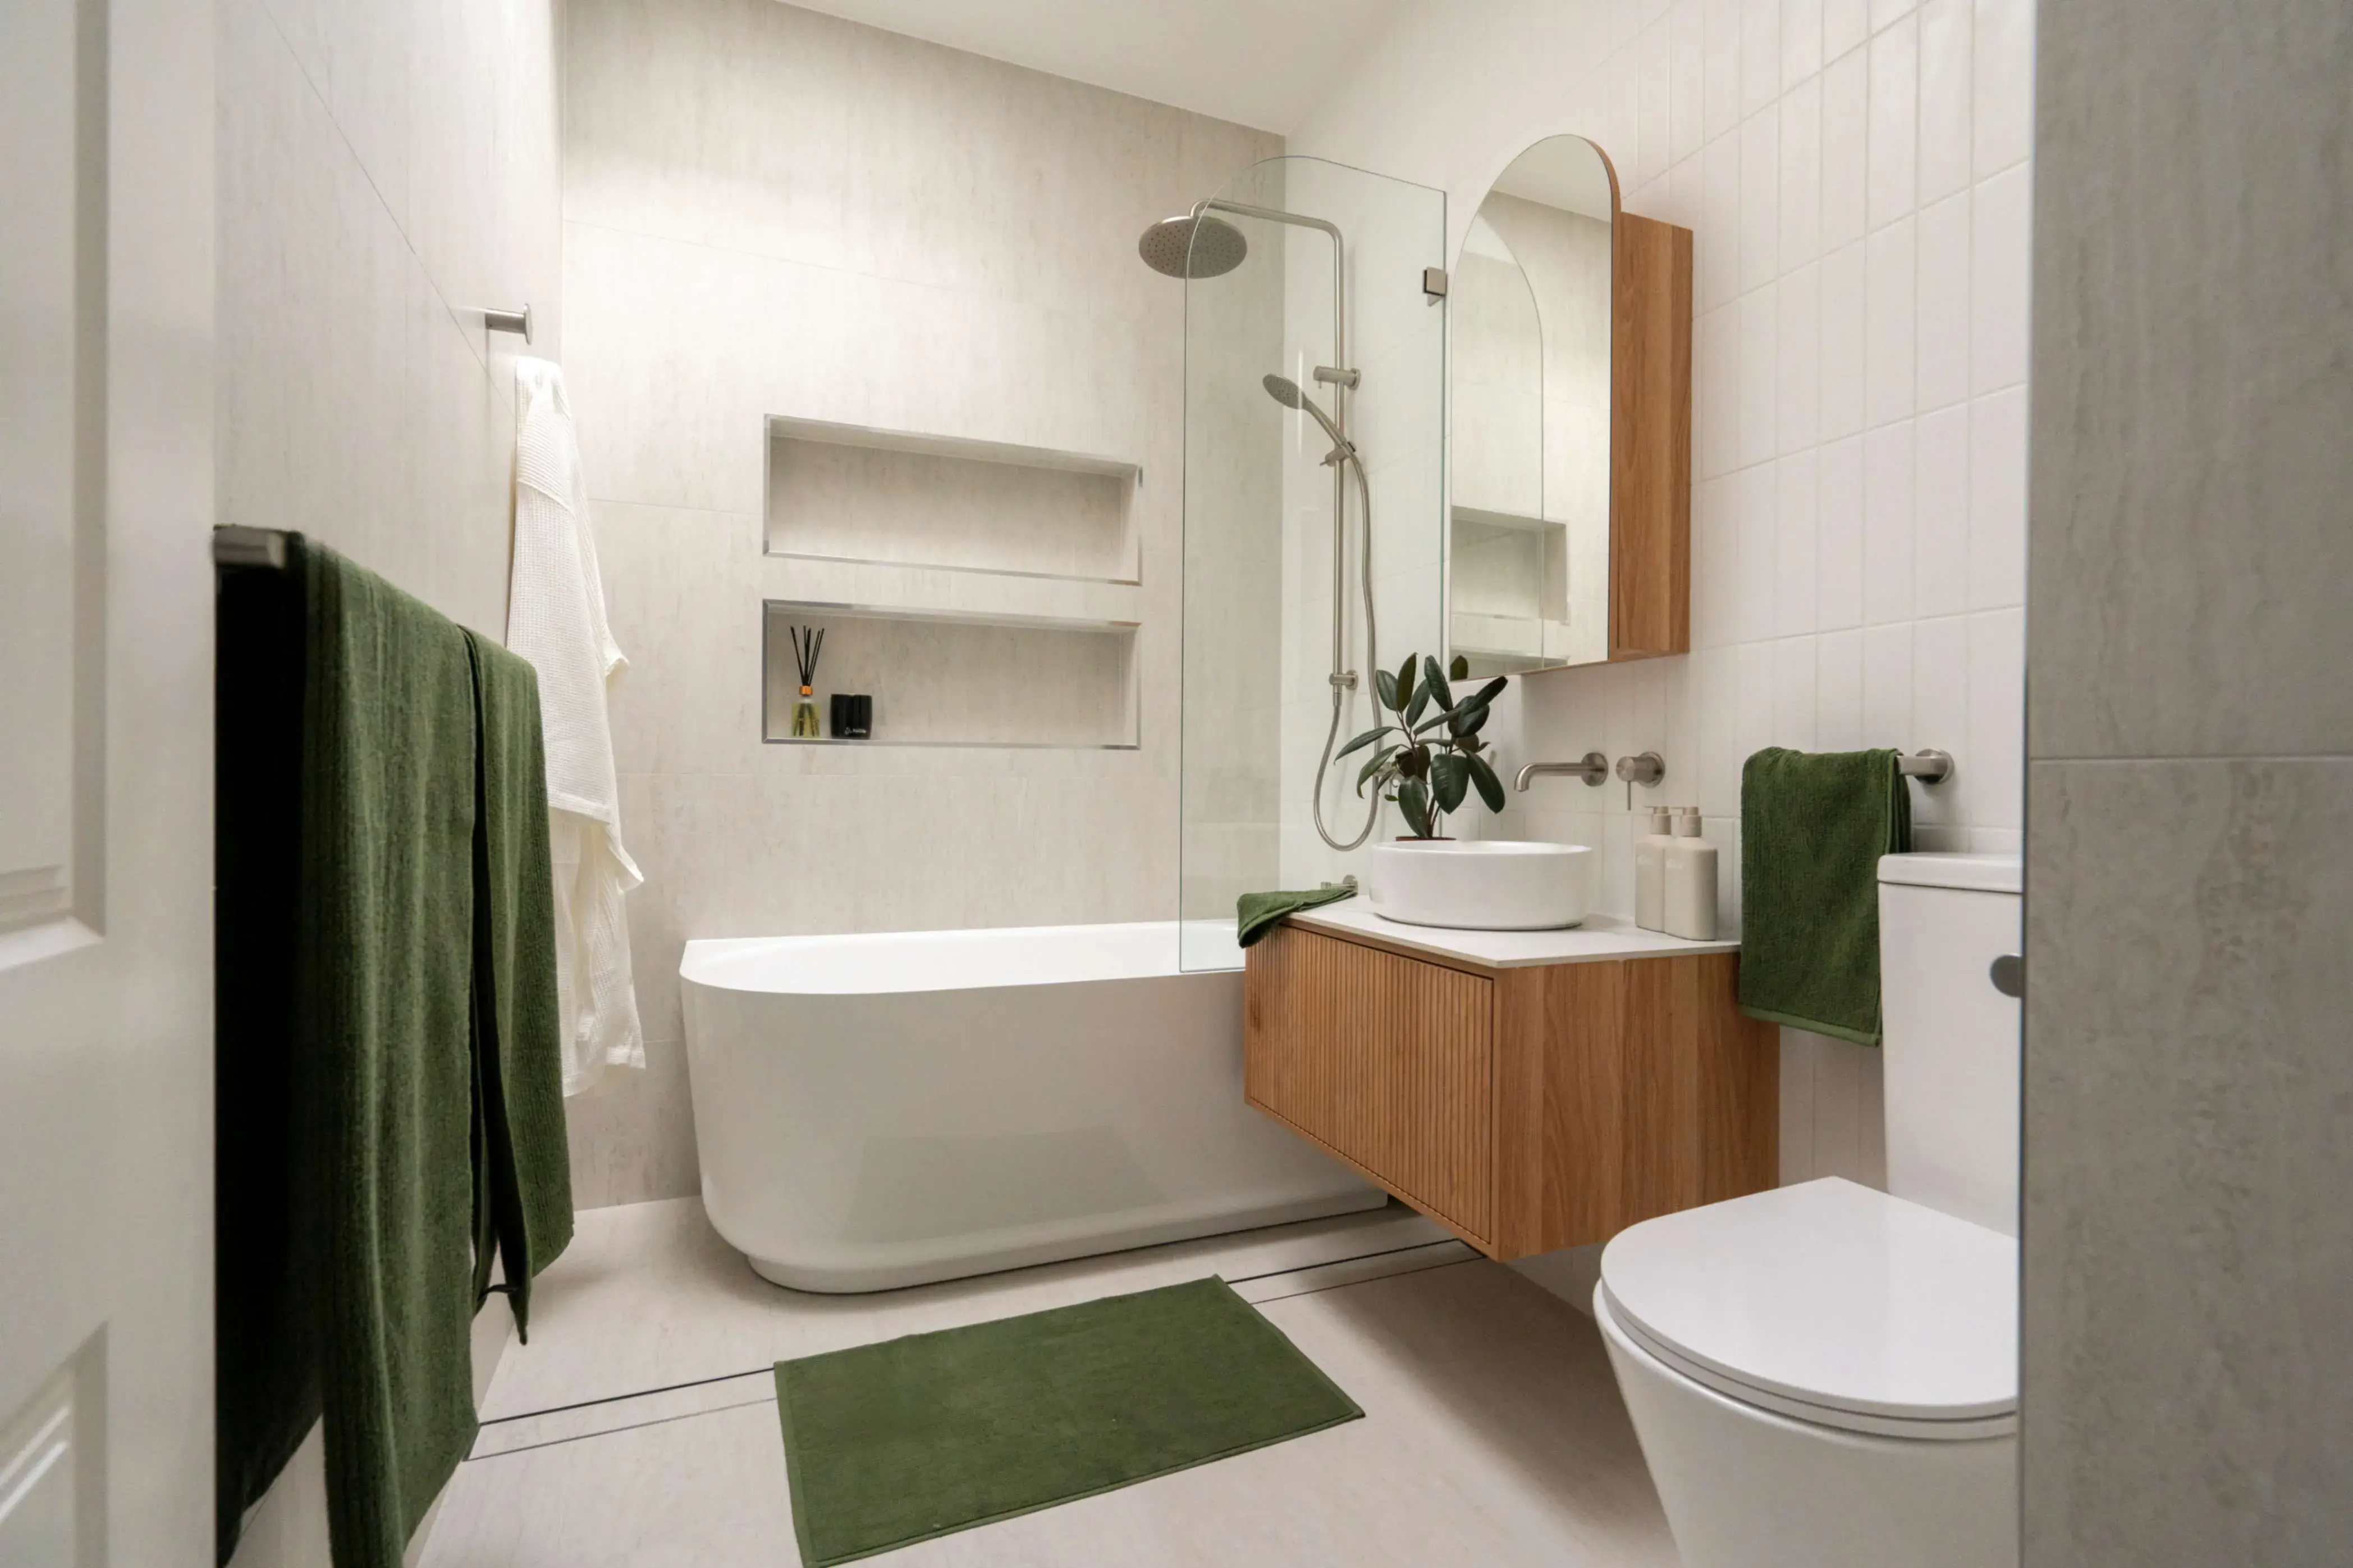
Bathrooms are where ceramic shines — especially on shower walls, vanity splash zones and feature niches, where glazed surfaces make cleaning feel less like a chore.
For bathroom floors, the key factor isn’t “how tough” a tile is — it’s how safe it is when wet. Don’t rely on a wear rating as a proxy for grip: slip resistance is its own rating. Ask your supplier/tiler for the tile’s slip resistance classification (as reported to AS 4586) and confirm it’s suitable for your specific area, use, and cleaning expectations. Then choose the finish + format that supports both grip and maintenance.
Small mosaics are popular because more grout lines can create more underfoot traction, while larger tiles can still work beautifully if they have an appropriate slip rating and are installed correctly with proper falls in shower zones.
Nero styling cue: If you’re building a spa-like bathroom, pair calm wall tiles with a shower experience that feels intentional. In higher-humidity bathrooms (and especially coastal homes), durability becomes part of the design. Consider 316L stainless steel options where corrosion resistance matters—then keep the rest of the styling calm so the space still feels spa-like.
Planning note (Australia): Slip resistance guidance is commonly referenced to AS 4586, but what’s appropriate depends on the space and how it’s used. For wet-prone internal floors (including laundries), suppliers often provide a wet pendulum P rating; for areas commonly used barefoot (such as shower floors), you may also see barefoot classifications (A/B/C). If slip resistance needs to be checked after installation, on-site assessment can be carried out using methods referenced to AS 4663 (for example, pendulum testing). Ask your supplier/tiler to confirm which rating is appropriate for your specific area and use.
Laundries and utility rooms
Laundries need surfaces that handle water splashes, detergent drips and the occasional rogue sock explosion — without looking tired. Ceramic is a strong choice here, especially if you select a floor-rated tile with a wet-area-appropriate slip classification.
In compact European-style laundries, a simple trick is to use slimmer wall tiles stacked vertically — it draws the eye up and makes tight rooms feel taller. Keep grout practical (again, mid-tones win), and prioritise finishes you can wipe down fast.
Nero styling cue: A wall-mounted mixer is one of those small upgrades that makes a laundry feel designed, not purely utilitarian—clearer benchtops, easier wipe-downs, and a lighter visual line.
Living areas and entryways
Ceramic isn’t confined to wet rooms — in warmer climates it’s increasingly used through living rooms, hallways and bedrooms for that cool-underfoot feel and low-maintenance daily living. If you like the timber look, you’ll often find that style in porcelain for extra durability, but you can still achieve a similar aesthetic with the right tile choice and layout.
For open-plan spaces, large-format tiles can create a calmer, more continuous surface with fewer grout lines. In entryways especially, think about wear: grit from outdoors is what quietly damages floors over time, so a good doormat strategy matters as much as the tile itself.
Nero styling cue: In an open-plan home, the kitchen mixer is often the most visible “metal moment.” Choose a finish you love there, then carry it into nearby spaces — a powder room basin mixer, a towel rail, robe hook or shower trim — so the whole home reads as one cohesive design.
Outdoor applications
This is where you want to be picky. Many standard ceramic tiles have higher water absorption than porcelain, which can make them a risky choice for exposed exterior conditions — especially in areas that experience hard cold snaps or significant temperature swings.
For patios, alfresco zones and pool surrounds, look for outdoor-rated porcelain (or stone) with low absorption and a slip rating suitable for wet use, and have your installer specify adhesives, drainage/falls, and movement joints appropriate for exterior conditions, following the tile and setting-material manufacturers’ guidance for the site.
Nero styling cue: For indoor–outdoor flow, aim for continuity in finish rather than matching everything perfectly. Use one durable metal tone outdoors and add practical touchpoints (hooks, hand-held rinse points) so the space stays usable—not just photogenic.
Types and finishes of ceramic tiles
Ceramic tiles aren’t one category. They’re a whole family — and the difference that matters most is often inside the tile body, not just on the surface you see.
Water absorption is a useful proxy here because it affects where a tile feels “at home” (walls vs floors, indoors vs outdoors).
It’s measured as the percentage of water that can penetrate the tile body, often reported using test methods such as ISO 10545.3. Check the product datasheet for the stated absorption category and intended applications.
Fast buyer rule:
- Walls = glazed ceramic is often an easy win.
- Floors = confirm floor-rated + suitable slip classification.
- Outdoors = porcelain is usually the simpler long-term performance choice.
At a glance: tile types, feel, and best uses
Type | What it is | Typical water absorption (guide) | Best uses |
Glazed wall tiles (earthenware-style) | Thinner, lighter tiles designed for walls. The glaze is a low-porosity, glass-like surface layer, while the tile body is often more porous (part of why it’s lighter and easy to work with). | Often >10% | Kitchen splashbacks, shower walls, feature niches |
Ceramic floor tiles (non-porcelain) | Thicker and stronger than wall tiles. Can be glazed or unglazed. Often chosen for indoor floors where you want value and variety. | Typically ~3–10% | Living areas, hallways, laundry floors (choose an appropriate slip rating for wet zones) |
Stoneware / “gres” (non-porcelain) | Denser, harder ceramic sometimes sold as “stoneware” or “gres”. Lower absorption than standard ceramic floor tile. | ~0.5–3% | Interior floors and some outdoor applications depending on product specs and exposure |
Porcelain (porcelain stoneware) | A ceramic tile that’s fully vitrified with very low absorption — a key reason it’s common outdoors and in high-traffic zones. | ≤0.5% | High-traffic floors, patios, pool surrounds, facades |
Mosaic + patterned tiles | Small-format tiles (often in sheets) in ceramic or porcelain. More grout lines = more texture and often better underfoot “grip feel”, but also more cleaning. | Varies by material | Shower floors, splashbacks, feature walls |
Buyer’s guide: If it’s a wall, you can lean into glazed ceramics. If it’s a floor, check it’s floor-rated and suitable for that room. If it’s outside, porcelain usually makes life easier because of its very low absorption.
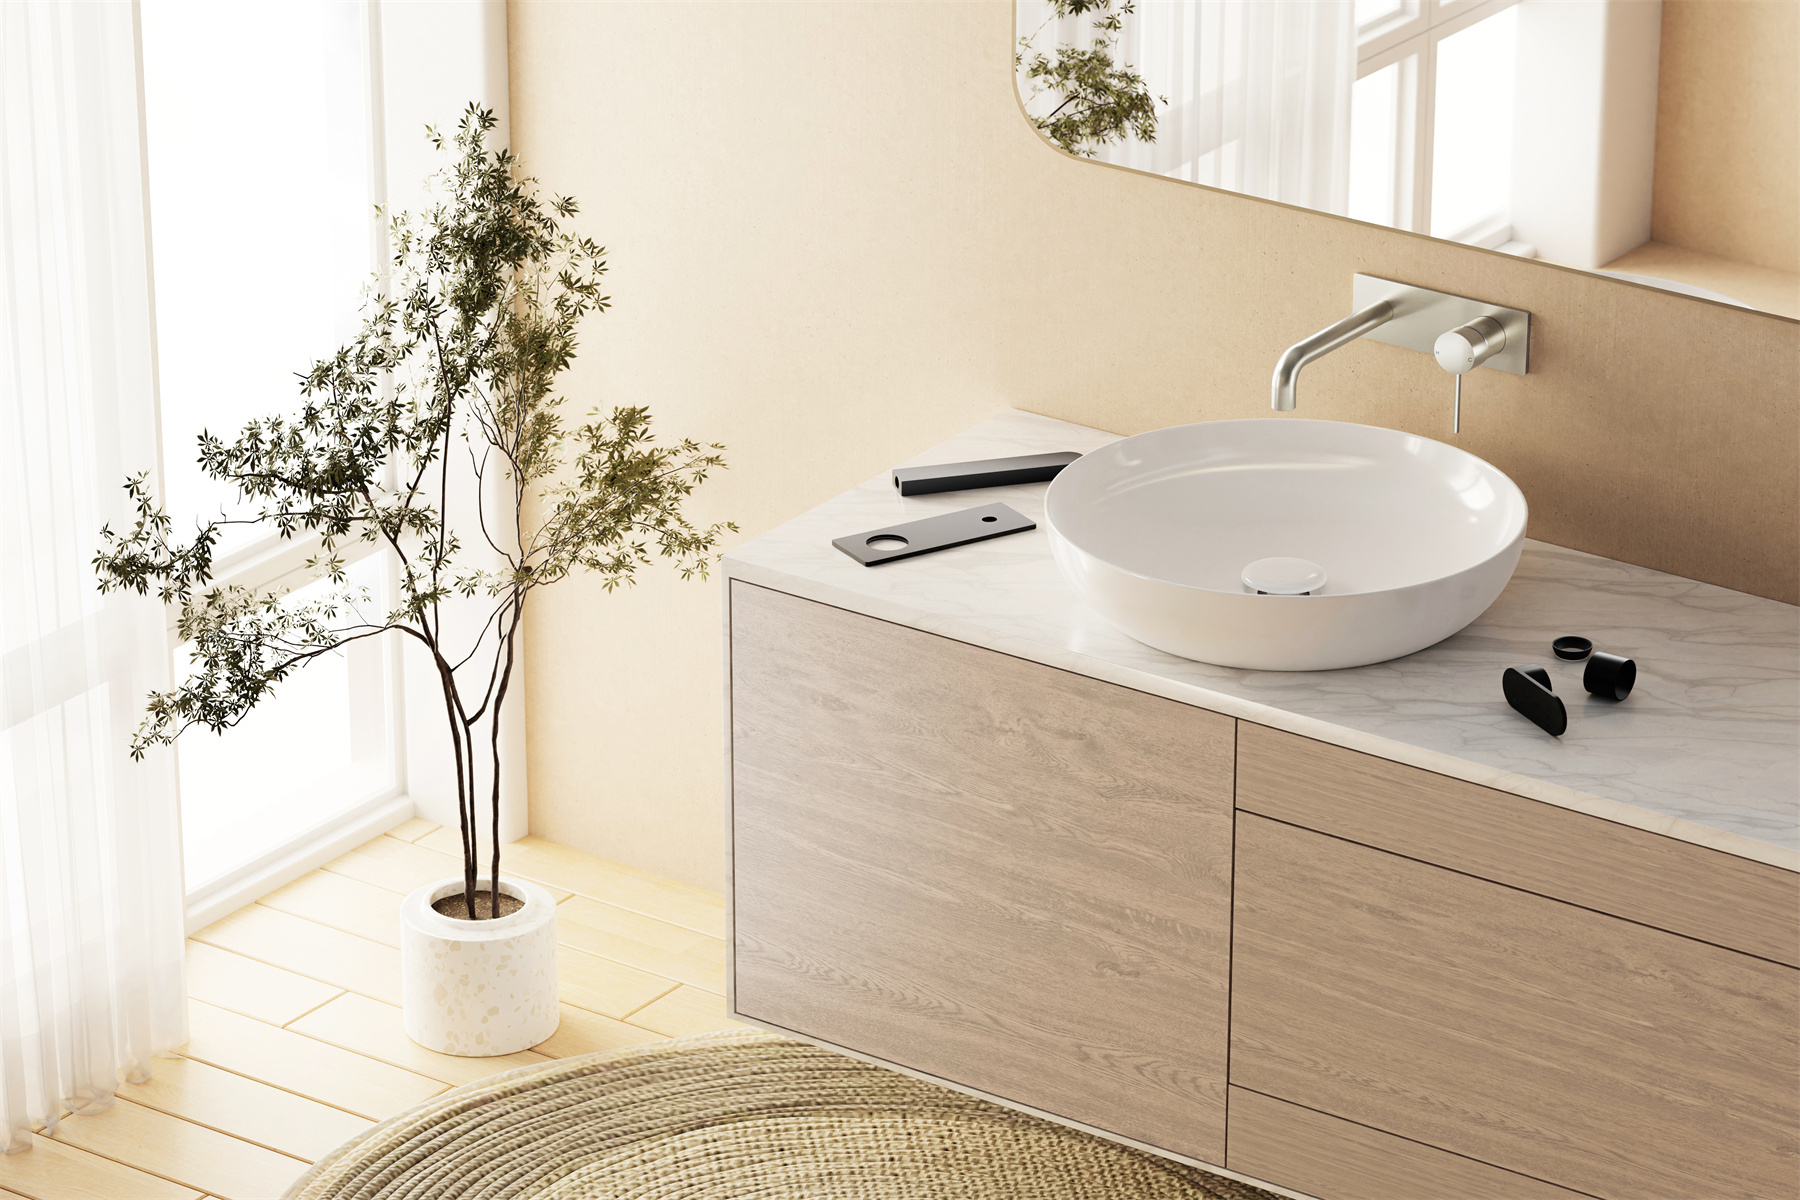
Beyond tiles: ceramic basins and sinks (and what to look for)
Ceramic doesn’t stop at wall and floor coverings. You’ll also see glazed ceramic used in basins and some kitchen/laundry sinks (often described as vitreous china or fireclay). The appeal is the same: a hard, hygienic surface that reads clean and sculptural in a finished room.
When you’re choosing ceramic sanitaryware, look for products supplied for the Australian market and check the product documentation for any standards and performance claims the manufacturer references (for example, you may see standards such as AS 1756 for household sinks or AS 1976 for vitreous china quality). If you’re unsure, ask your supplier to confirm suitability for your installation.
Nero design cue: If your tile selection is doing the “visual texture” work (handmade-look glaze, fluting, mosaic relief), keep the tapware silhouette clean and confident so the room feels curated, not crowded.
Colours and finishes
Ceramic tiles come in matte, satin and gloss, and modern glazing and printing can convincingly mimic stone, timber, terrazzo or concrete. (The trick is choosing a finish that behaves well in your light.)
- Gloss: sharp, bright, light-bouncing. Makes small rooms feel bigger — but it can show water spots and texture irregularities more clearly.
- Satin: the easiest all-rounder. Softer highlights, fewer fingerprints, still feels refined.
- Matte: calm and contemporary. It diffuses light and hides day-to-day smudges, but can visually “flatten” darker colours in low light.
When choosing colour, pay attention to undertones. A white tile can read cool and crisp in daylight, then pick up warmth at night under ambient lighting.
Nero design tip:
- Cool whites + grey veining look polished with brushed nickel or gunmetal tones.
- Warm neutrals and creams feel richer beside brushed gold or brushed bronze.
- Want drama? Pair deep charcoal or inky tiles with matte-black Nero mixers (like Mecca) for a high-contrast, architectural finish.
Also Read: Limestone Ultimate Guide: Design Ideas, Costs & Care Tips - Nero Tapware
Pros and cons of ceramic tiles
Ceramic tiles are the classic all-rounder: they can sit quietly as a clean backdrop, or become the detail that makes a room feel finished. They’re practical, stylish, and often budget-friendly — but they do come with trade-offs. Here’s what to love, and what to plan for, before you commit.
Advantages
- Cost-effective and versatile: Entry-level ceramics often start from around $30/m², with a huge spread of colours, patterns and finishes. (Prices rise with size, texture and design detail.)
- Easier to work with than porcelain: Ceramic is typically easier to cut and drill than denser porcelain. That helps around corners, niches and fixtures — and can reduce install time.
- Long life when installed well: With the right tile rating, correct substrate prep and good workmanship, ceramic can last for decades in residential spaces when correctly specified and well installed. Bonus: if one tile chips, a professional can often replace it without redoing the whole room.
- Easy-clean surfaces (especially glazed): A glazed ceramic face resists most everyday stains and splashes, making it a strong pick for splashbacks and wet-area walls.
- Low maintenance day-to-day: Regular sweeping plus a mop with warm water and a mild, pH-neutral cleaner is usually enough for glazed tiles.
- Allergy-friendly: Tile’s hard surface doesn’t harbour allergens the way soft flooring can. Dust and pollen sit on top, so they’re easy to remove.
- Design freedom: Modern printing lets ceramic mimic timber, stone or concrete — without the same cost or upkeep — and it comes in endless formats, from sleek large-format to tactile handmade looks.
- More eco-minded options exist: Ceramic tile itself is an inert, fired product. Some ranges also include recycled content, depending on the manufacturer. (For the healthiest result, choose low-VOC adhesives/grouts and ventilate during installation.)
Disadvantages
- Cold and hard underfoot: Tiles can feel chilly and unforgiving. Under-tile heating, runners and rugs soften the experience fast.
- Chips and edge damage can happen: Ceramic is generally less dense than porcelain, so dropped impacts can chip edges. Reduce risk with proper handling during install, trims where needed, and by keeping a few spare tiles from the same batch.
- High-traffic floors need smart spec: Some ceramics will show wear sooner than porcelain in busy entryways. If you’re tiling a heavy-use zone, choose a floor-rated tile and ask your supplier/tiler to confirm the slip classification is appropriate for a wet-prone laundry floor.
- Outdoor use is more limited: Ceramic typically absorbs more water than porcelain. That matters most in exposed outdoor installs or cold regions where water can stress the tile over time. For patios, pool surrounds and alpine climates, porcelain is usually the safer default.
- Substrate matters (a lot): Tiles are hard and brittle. They need a stable, well-prepared base. Movement or deflection in floors — especially timber — can lead to cracked tiles or grout.
- Installation is detail-heavy: A great result depends on prep, correct adhesives, movement joints, careful grouting and (in wet areas) proper waterproofing behind the tile. DIY is possible, but precision matters.
- Grout needs upkeep: Grout lines can stain or develop mildew if neglected. Sealing (where appropriate) and regular cleaning keeps the finish looking sharp.
If durability is critical (outdoors or very high-traffic floors), porcelain or natural stone may be the better investment. If budget and design flexibility matter most, ceramic remains a smart choice for walls, splashbacks and many indoor floors.
Also Read: A Buyer's Guide: 27 Tips on How to Choose Bathroom Tiles
How much do ceramic tiles cost in Australia?
Tiles can be the most cost-effective design decision in a room — or the one that quietly blows the budget. The difference usually comes down to three things: the tile you pick, how complex the layout is, and how much prep your surfaces need.
Why prices vary: Quotes can differ depending on whether you’re comparing supply-only vs installed pricing, the condition/flatness of the substrate, demo/removal, waterproofing scope in wet areas, and layout complexity (cuts, patterns, large-format handling).
Typical price ranges (AUD, per m²)
- Ceramic tile supply: roughly $30–$100/m² depending on range, finish and whether it’s wall or floor grade.
- Porcelain tile supply: roughly $50–$150/m² (denser tile, often higher cost).
- Installation / labour: commonly $30–$120/m², with many standard jobs landing around the $40–$50/m² mark — and complex patterns pushing higher.
- Reality check: small areas often cost more per m² because cutting and set-up time don’t scale down neatly.
Nero budgeting lens: If you’re splurging on a “hero” tile (handmade look, strong glaze, statement shape), keep the layout simple. If you want a complex pattern, choose a calmer tile. One “wow” is usually enough.
Budget tiers for ceramic tile projects (materials + install)
Tier | Typical total (materials + labour) | What you’re really paying for | Best for |
Budget | $90–$160/m² | Straight lay, standard-format ceramic, minimal cutting and good existing surfaces | Laundry floors, secondary bathrooms, rental refreshes |
Mid-range | $160–$260/m² | Better tile selection + more precise finishing, niche trims, more cuts (niches, corners, fixtures) | Family kitchens, main bathrooms, open-plan living |
High-end | $260–$350+/m² | Large formats, feature edges, specialty glazes, detailed patterns, higher labour intensity | Statement floors, feature walls, design-led bathrooms |
These tiers align with widely published AU guides showing tile supply ranging from budget to premium, and labour varying sharply with complexity.
Cost breakdown by component (what moves the needle)
Component | Typical cost driver | Notes |
Tiles (supply) | Tile type + finish | Ceramic generally sits below porcelain, but artisan glazes and boutique styles can jump quickly. |
Adhesives, grout, trims | Product choice | Epoxy grout costs more but resists staining better than standard cement grout (useful in high-mess zones). |
Labour / install | Layout + tile size + cuts | Complex patterns and large formats demand more precision and time. |
Substrate prep | Flatness + condition | Levelling, repair, and unsuitable surfaces add cost but protect longevity. |
Old tile removal (if needed) | Demo + disposal | Often $20–$50/m² on top. |
Waterproofing (wet areas) | Compliance + system | Wet areas often need membranes and correct detailing; some guides estimate $15–$30/m² as an added wet-area allowance. |
Budgeting tips (the ones that actually save money)
- Measure twice, then add 10% extra for cuts, breakage and future repairs (more for patterns).
- Choose the layout early: herringbone, diagonals and mosaics usually increase labour.
- Ask about prep in the quote: levelling, removal, and membranes can change totals fast.
- Get at least three quotes and compare scope line-by-line (tile removal, trims, waterproofing, sealing).
Sources for pricing:
- Building Institute NSW — How Much Do Professional Tiling Services Cost in Australia?
- realestate.com.au — How much does flooring cost?
- hipages — How much does it cost to install floor tiles?
Also Read: 27 Stunning Bathroom Tile Ideas to Transform Your Space in 2025
Ceramic tile installation and maintenance: DIY or professional?
Tiling looks simple once it’s finished. The reality is that great tiling is mostly prep — flat surfaces, correct products, and enough drying time built into your schedule.
DIY can work beautifully for a splashback or a small feature wall if you’re patient and detail-focused. But for showers, bathroom floors, and anything involving waterproofing, it’s worth investing in the right professionals.
One rushed shortcut can lead to uneven tiles, cracked corners, or water damage that costs far more to fix.
Nero planning cue: lock in tapware positions early. Confirm spout reach, heights, and where mixer bodies will sit before waterproofing and tiling begins — it’s the cleanest way to achieve that “everything lines up” finish.
For maintenance, keep it gentle and consistent. Sweep or vacuum regularly to remove grit, then mop with warm water and a mild, pH-neutral cleaner. Avoid abrasive pads and harsh acidic products that can dull finishes over time. If you have cement-based grout, sealing can help reduce staining (especially in wet zones), and good ventilation keeps mildew at bay. If a tile cracks, a professional can often replace it individually so the overall surface stays intact.
Ceramic sinks and surrounds for small spaces & special fixtures
Ceramic isn’t only for floors and walls. It also shows up in hardworking fixtures — especially where you want a surface that feels classic, clean, and easy to live with.
A ceramic or fireclay kitchen sink brings that grounded, timeless look, and it pairs beautifully with modern tapware because the contrast feels intentional: warm, familiar material with a crisp, contemporary silhouette. In laundries, ceramic tubs are popular for the same reason — they handle daily wear well and clean up easily after messy jobs.
In bathrooms, you’ll more commonly see ceramic in the surround rather than the bathtub itself: tiled bath hobs, bath panels, and nib walls create a seamless look when you run the same tile up the walls. It’s a simple way to make a compact bathroom feel calmer and more “built-in”.
Buyer’s guide move: choose the fixture first, then match the tapware to how you’ll actually use it. Wall-mounted mixers free up bench space in tight rooms, while the right spout length helps prevent splashing and makes basins feel more comfortable day to day. Nero’s wall basin/bath mixers and universal bodies can also make future updates easier, because the in-wall component can stay in place while trim is refreshed later.
Next steps
Shortlist your tile, then choose a Nero finish that complements it — matte black for contrast, brushed nickel for cool restraint, or brushed gold for warmth. Explore our Mecca, Serenity, Zen, Opal, or Bianca collections to find the final touch that makes the room feel complete.
Your home. Your style. Nero is the finishing touch.
Important Disclaimer: This guide is for general information only. Costs and specifications are indicative and may vary based on location, supplier and project complexity. Always consult qualified tradespeople and refer to local building codes before commencing any renovation. Nero Tapware provides design inspiration and product solutions but is not a regulator or financial adviser.