Timber benchtop cost in Australia (2025): a design-led guide to timber kitchen benchtops
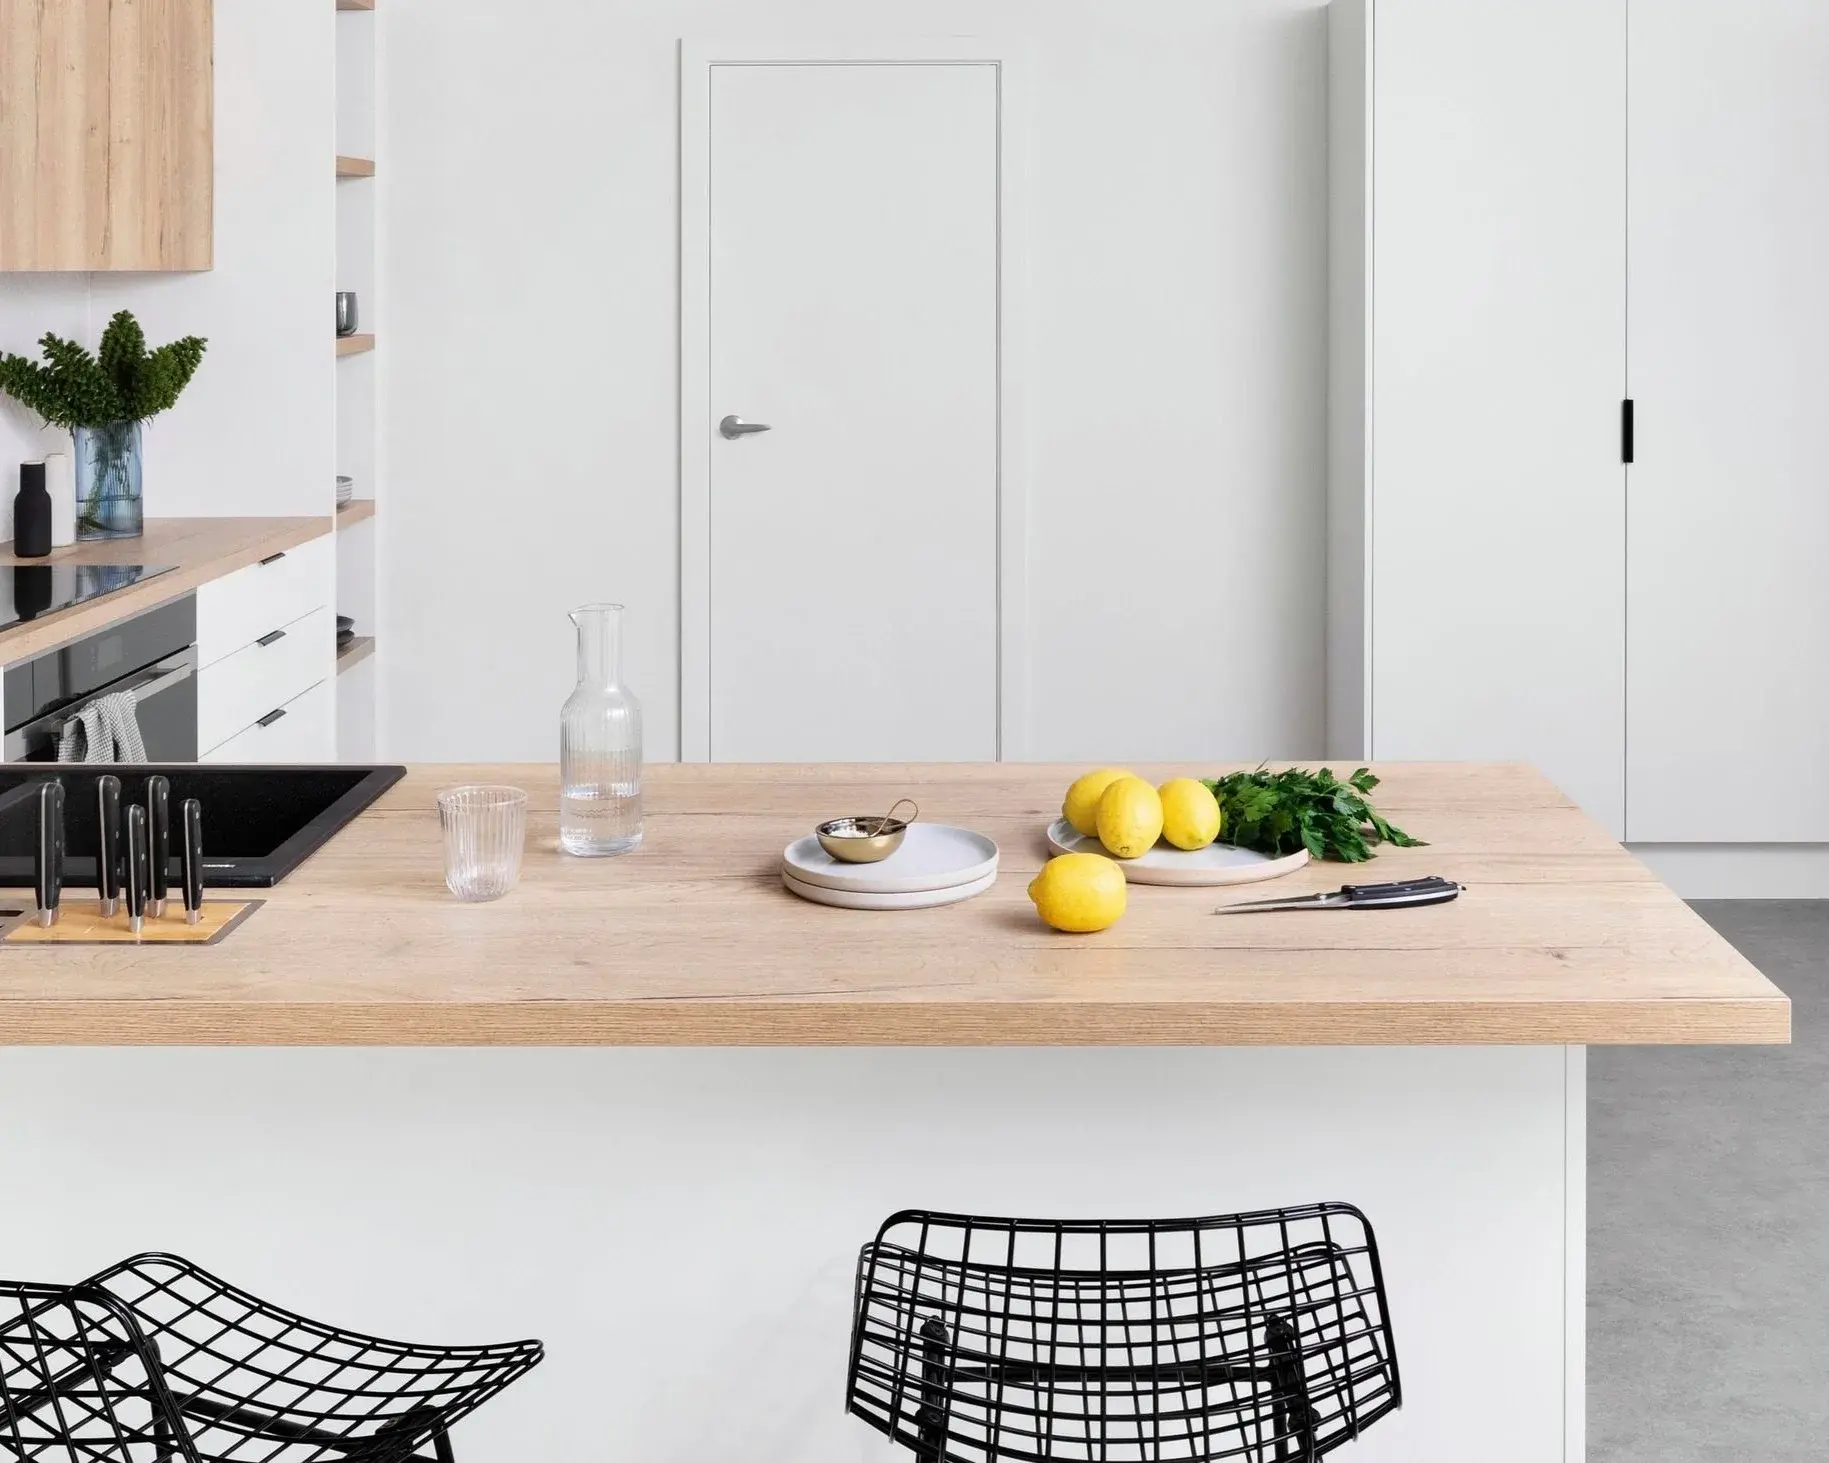
The benchtop is the surface you touch most in a kitchen — the landing zone for groceries, the chopping board when you’re in a rush, the place guests drift to without being invited. A timber benchtop earns its popularity because it feels human: warm under the palm, forgiving in a bright Australian kitchen, and visually softer than stone.
But timber also has rules. Water sits on it. Heat marks it. And the “sink zone” can punish lazy sealing faster than anywhere else.
This Nero guide walks you through timber benchtop costs in Australia in 2025 (AUD), which timber species suit real family kitchens, the difference between oil vs polyurethane finishes, and practical alternatives now that engineered stone benchtops, panels and slabs are prohibited for manufacture, supply, processing and installation in Australia (from 1 July 2024 — check your state/territory regulator for any transitional details).
What this guide will help you do
- Budget accurately (and understand the difference between material price and installed reality)
- Choose a timber and finish that suits daily cooking + cleaning habits
- Protect the sink zone with the right detailing, so timber stays beautiful for years
Timber benchtops at a glance (for busy renovators)
If you only read one section, make it this: timber benchtop cost is driven as much by risk control (cut-outs, joins, sealing and install accuracy) as it is by the timber itself.
- Timber benchtop cost (AUD): Published Australian ranges often sit around $350–$600/m² for bamboo or pre-made panels, and $600–$1,200+/m² for solid hardwoods like jarrah and ironbark (species, thickness and finishing systems can move this quickly).
- The real cost is the sink + cut-outs: Joins, cooktop/sink cut-outs, templating, delivery and sealing often move you from “material price” to “installed reality”.
- The upside and the upkeep: Timber adds warmth, texture and individuality to kitchens. High‑quality hardwoods can last decades when sealed and refinished. However, timber is susceptible to heat, scratches and water damage; it needs regular maintenance and resealing.
- Wood choice at a glance: Durable hardwoods such as Tasmanian oak, maple, jarrah and walnut resist wear, while softer woods (e.g. pine) offer rustic character but need more upkeep. Reclaimed timber provides sustainability and unique character, while bamboo offers an affordable alternative.
Finish matters more than species for daily living: Oil is repairable but needs regular re-coating; polyurethane is tougher but harder to spot-repair (choose based on how you cook and clean)
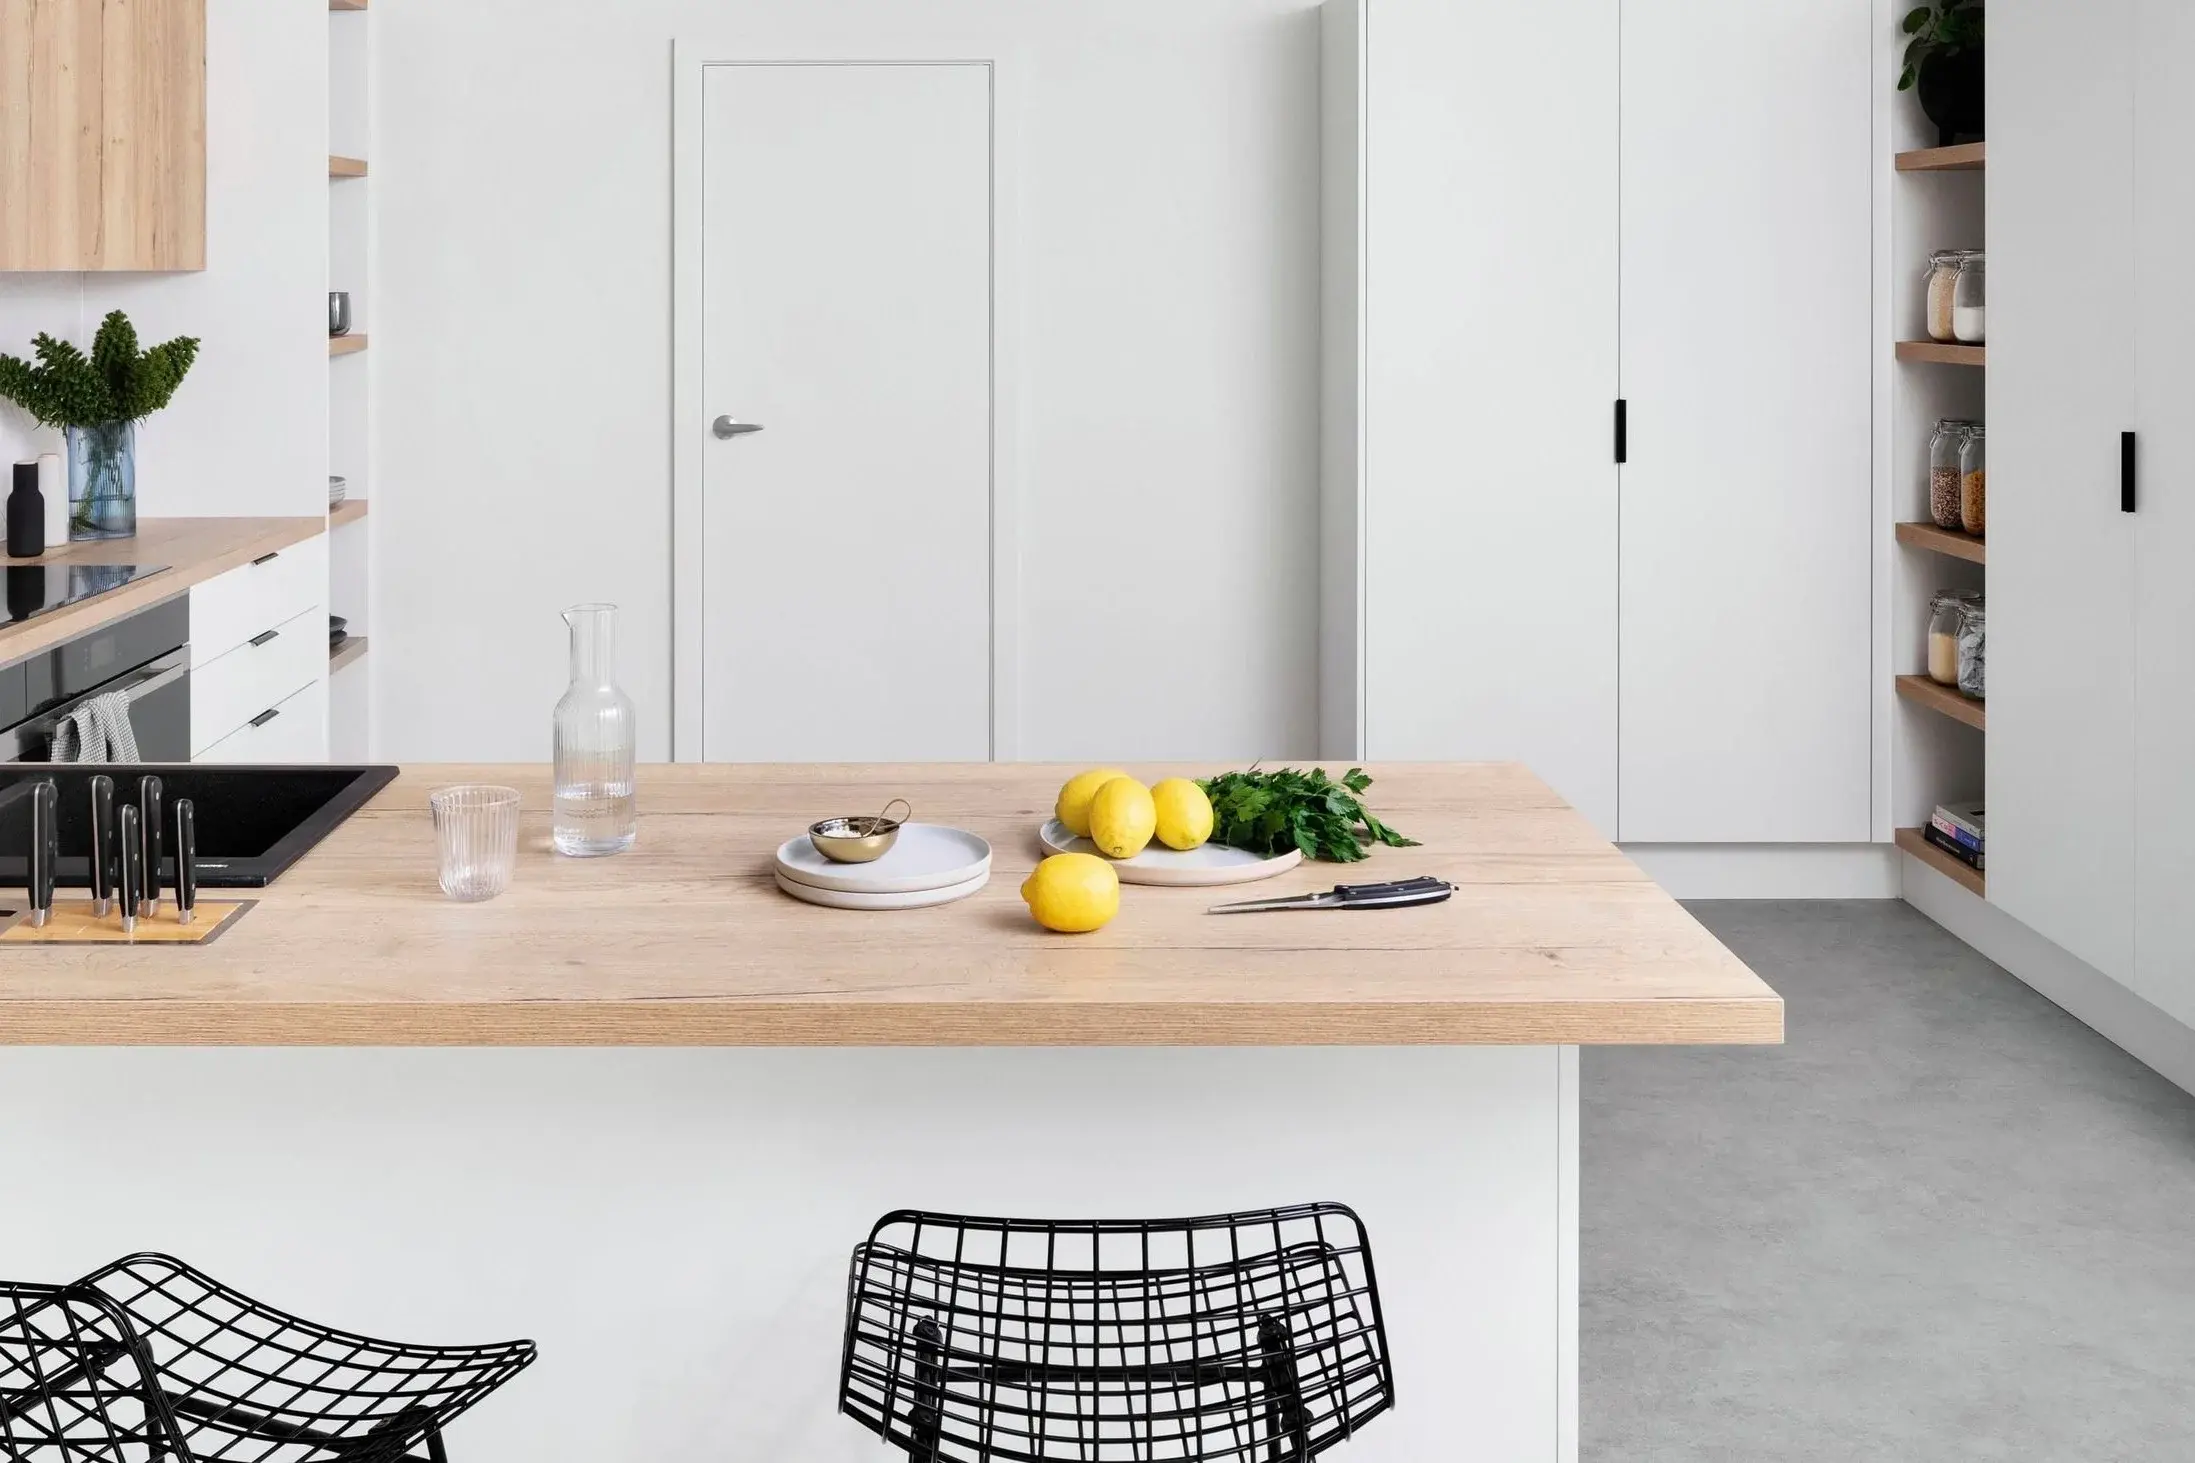
A quick profile: what a timber benchtop is really like in an Australian kitchen
- Best for: warmth, character, coastal/Japandi/mid-century kitchens, softer acoustics, and people who like natural materials
- Not ideal for: households that want truly “zero maintenance”, or kitchens where puddles sit near the sink
- The feel: matte and tactile; grain that changes in daylight; a surface that ages (patina) rather than staying perfect
- The main risk: water ingress at cut-outs, joins and tap penetrations — almost always preventable with the right sealing and habits
A timber benchtop is a countertop made from solid wood, engineered timber, reclaimed timber or laminated panels. Unlike laminate, timber brings a tactile warmth and grain that makes a kitchen feel lived-in (in the best way). Lighter woods like Victorian ash can brighten a space, while darker timbers such as jarrah add depth and mood.
Each species has its own colour and grain pattern: lighter woods like Victorian ash brighten a space, whereas darker timbers such as mahogany or jarrah add depth and sophistication. Homeowners often choose timber to personalise their kitchen, pairing it with contemporary cabinetry or heritage‑style fixtures.
🔹Nero Design Tip: If your timber has warm honey or red undertones (blackbutt, jarrah, reclaimed hardwoods), tapware in brushed nickel, brushed bronze or aged brass tends to look intentional — not matchy.
How timber benchtops are constructed
Not all timber benchtops are built the same — construction affects cost, durability, and how easily the surface can be refreshed over time.
- Solid timber slabs: Large sections of hardwood glued together, sanded and coated with clear polyurethane for durability. Custom sizes allow seamless islands or waterfall edges.
- Pre‑made panels: Finger‑jointed or laminated boards that are more affordable but use smaller pieces of timber glued together. Pre‑made panels suit budget‑friendly projects and simple layouts.
- Engineered timber or timber veneer: Thin wood veneers bonded to plywood or MDF; these provide the look of wood at a lower cost but can’t be sanded back repeatedly.
- Reclaimed or recycled timber: Salvaged hardwoods with a previous life as flooring, beams or railway sleepers. Reclaimed timbers offer character, sustainability and long lengths that may be unavailable with new timber.
How much does a timber kitchen benchtop cost in Australia? (price tiers + real-world examples)
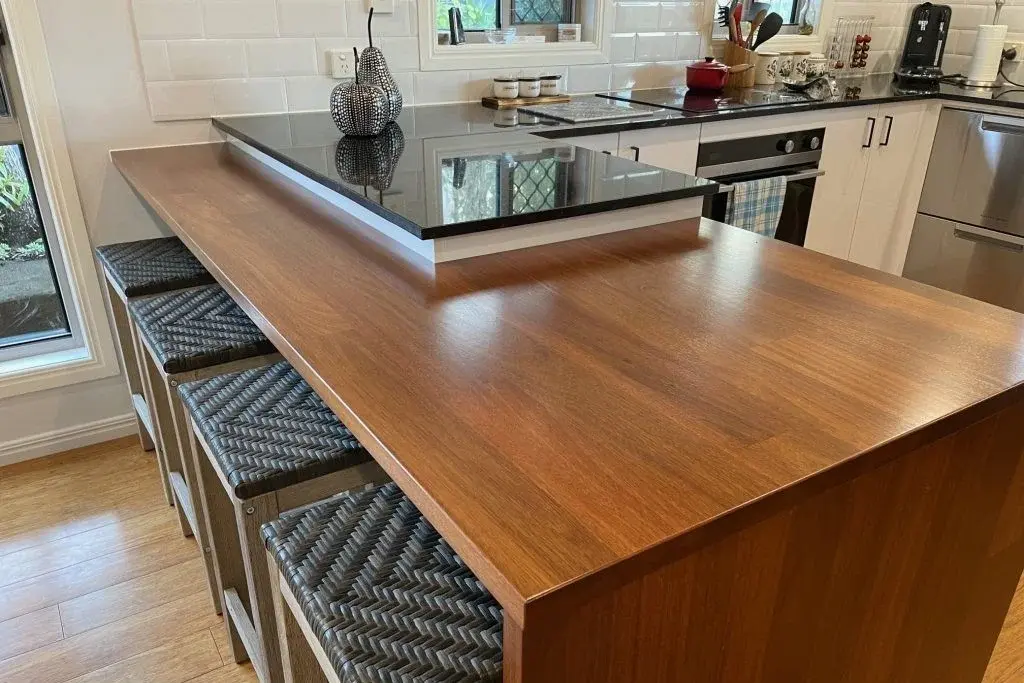
Source: Timber Benchtops
Timber benchtops are usually priced either per square metre ($/m²) (often supply-only) or per linear metre ($/lm) (often installed at a standard depth like ~600 mm). Before you compare quotes, confirm the unit and inclusions.
Cost tiers at a glance (AUD)
Before we talk numbers: the most expensive timber benchtops aren’t always the “fanciest” species — they’re the ones with more cut-outs, joins and wet-area detailing to get right.
A timber benchtop can be a simple, budget-friendly surface — or a hero feature you build the whole kitchen around. Here’s what Australian pricing typically looks like across budget, mid-range and premium tiers, so you can anchor your expectations early.
Tier | Typical timber benchtop price | What it looks like in real life | Best for |
Budget | $350–$600/m² | Bamboo or pre-made panels, simpler edge profile, straight runs, fewer cut-outs | Small kitchens, rentals, DIY-friendly upgrades |
Mid‑Range | $600–$900/m² | Solid hardwood in standard thickness, one main run + island, careful sealing around sink (e.g. Tasmanian oak, blackbutt) | Family kitchens that cook daily |
High‑End | $900–$1,200+/m² | Exotic or dense hardwoords (jarrah, ironbark), thick slabs, statement island, waterfall ends, premium species/reclaimed timber, custom detailing | High-end renovations and design-led homes |
Interpretation: If you’re quoted “cheap timber” but you have two cut-outs + joins + a waterfall end, you’re not shopping budget anymore — the labour and risk control are doing the heavy lifting.
The quote trap: $/m² vs $/linear metre (how to compare apples with apples)
Some suppliers quote benchtops per linear metre ($/lm) based on a standard perimeter depth (often 600 mm in Australia). Wider tops (for example 900 mm islands) are usually priced differently — so always confirm the depth the $/lm rate assumes before converting.
To convert roughly between units, you need the depth in metres.
- $/m² ≈ $/lm ÷ depth (m)
- $/lm ≈ $/m² × depth (m)
Example: If a supplier quotes $/linear metre installed at ~600 mm depth, here’s the quick conversion:
- $/m² ≈ $/lm ÷ 0.6
- $/lm ≈ $/m² × 0.6
Important: This is a rough comparison tool only. Installed quotes often include fixed items (templating, cut-outs, joins, delivery, sealing), so always confirm inclusions before comparing prices.
🔹Nero Design Tip: When budgeting, measure your benchtop area in square metres (length × depth) and add 10% for wastage. Remember to factor in fabrication and installation (templating, cut-outs, joins, delivery and sealing). Depending on complexity, these line items can add a substantial uplift to the slab cost—especially for sinks, cooktops and waterfall ends.
What drives the price of timber kitchen benchtops up (and what’s worth paying for)

Source: Bunnings Warehouse
A timber benchtop quote isn’t just “wood + install”. The final number usually reflects risk management (especially around water), labour intensity (cut-outs, joins, edge profiles), and how custom the job becomes once a fabricator templates your kitchen.
1) Timber species and grade (the biggest material variable)
- Dense hardwoods (like jarrah, ironbark and some imported hardwoods) tend to cost more because the raw material is pricier and it’s harder on tools and labour. They can also be heavier to transport and handle.
- More available, mid-range hardwoods (often used in Australian joinery) usually sit in the “best balance” zone: good durability without the premium price tag.
- Budget timbers and bamboo lower the entry cost, but dents and surface marking can show sooner if the finish and daily habits don’t protect them.
- Reclaimed timber can carry a premium because of the extra work involved: de-nailing, re-milling, stabilising, and sorting boards for structural reliability and a consistent glue-up.
What’s worth paying for: If you’re choosing a premium or reclaimed species, pay for a fabricator who understands movement, moisture pathways and sealing systems—that’s what protects your investment.
2) Thickness, spans and structural demands (what you’re asking the timber to do)
- Thicker slabs (40–60 mm) cost more in material, machining and handling. They also increase installation effort and sometimes require extra structural support.
- Long spans (especially over dishwashers, bins or wide cabinets) may require reinforcement details to prevent sagging or movement over time.
- Waterfall ends, mitres and feature returns look high-end because they are high-labour details (more cutting accuracy, more finishing, more risk).
What’s worth paying for:
- Reinforcement where needed (particularly on long runs and waterfall ends).
- Correct allowances for timber movement (expansion gaps, appropriate fixing methods).
These are invisible details that prevent future cracking, cupping or split joins.
3) Cut-outs, joins and edge profiles (the “labour multiplier”)
This is where quotes can jump quickly.
- Sink and cooktop cut-outs add time, tool wear and risk—particularly around undermount sinks where the exposed timber edge must be sealed perfectly.
- Joins (for L-shapes or long runs) add joinery complexity and finishing time. A good join is both structural and moisture-resistant.
- Edge profiles (square, pencil-round, shark nose, bevels) change labour time and finishing quality expectations.
What’s worth paying for (non-negotiables):
- A sink cut-out that’s sealed like a “wet area detail”, not a quick brush-over.
- Joins that are properly aligned, supported and sealed—especially if they’re within splash range of the sink.
4) Finish system (this often decides whether timber feels “easy” or “annoying”)
A cheaper quote may include a lighter finish system, fewer coats, or less attention to end grain.
- Simple oils can be beautiful and repairable, but they rely on regular re-coating—especially near the sink.
- Hardwax oils can add toughness while staying natural-looking, but application standards matter.
- High-build polyurethane systems usually cost more upfront but often reduce day-to-day stress in busy kitchens (wipes clean, resists water better).
What’s worth paying for:
- A finish system that matches your lifestyle (busy family kitchens often benefit from tougher protection).
- Extra coats and attention to end grain and cut edges (sink and tap holes). That’s where failure starts.
5) Installation, templating and on-site finishing (where “supply-only” becomes “installed reality”)
Professional installation typically includes:
- Templating (accurate measuring of walls that are rarely perfectly square)
- Cutting/adjustments for real-site conditions
- Fitting, levelling and fixing
- Sealing joins and penetrations and, ideally, a final tidy seal once everything is set
Labour can be priced per job or hourly. Depending on region and complexity, published guides often show wide hourly ranges (it’s not unusual to see anything from around $50–$250/hour depending on the trade and site conditions).
What’s worth paying for:
- Templating (especially if walls are out of square).
- On-site final sealing after installation (the last line of defence against water ingress).
- Clear responsibility: who seals the sink cut-out before the sink goes in?
6) Location, access and handling (the sneaky costs)
- Apartments, stairs, narrow hallways, tight entries and limited parking/loading can add handling time and extra labour.
- Regional or remote sites may add delivery fees and longer lead times.
- Heavy slabs may require extra crew or special handling.
What’s worth paying for: Safe handling and correct install beats a cracked slab or a rushed join any day. If access is hard, build the handling cost into expectations early.
7) Design extras and “nice-to-haves” that increase cost (but can be worth it)
- Drainer grooves and integrated timber features
- Waterfall panels or thick mitred edges
- Seamless island detailing with concealed joins
- Feature end panels and custom overhangs
What’s worth paying for: Only the details that you’ll see and feel daily. If budget is tight, invest first in the sink zone and sealing system, then add hero details if you have room.
Quick sanity check for quotes
Before you accept any price, ask the supplier to confirm in writing whether it includes:
- templating
- all cut-outs (sink + cooktop)
- joins and edge profiling
- pre-sealing of cut-outs (especially undermount sink edges)
- installation + levelling
- final on-site sealing/silicone
- warranty + care instructions (and what voids them)
Typical cost breakdown (example, Australia — AUD)
Below is an indicative breakdown for a 3.0 m × 0.6 m mid-range hardwood benchtop (~1.8 m²), assuming a fairly standard layout with 1 sink cut-out + 1 cooktop cut-out, simple edging, and metro access.
Component | Estimated Cost (AUD) | Explanation |
Timber slab (Tasmanian oak / similar mid-range hardwood, ~40 mm) | $1,150–$1,650 | Equivalent to roughly $640–$920/m² base material supply pricing (species/grade changes this fast) |
Cutting & joinery (cut to length, basic joins, sink + cooktop cut-outs) | $400–$900 | A sink cut-out is commonly quoted as an add-on (often ~$250 as a general benchtop fabrication allowance), with extra cost for undermount detailing, cooktop cut-outs, joins and edge work. |
Sealing/finish (oil / hardwax / polyurethane system) | $150–$450 | May be bundled into fabrication or listed separately; multi-coat systems and workshop finishing push this higher than “materials only”. (Supplier “finished benchtop” pricing often sits well above raw/sanded.) |
Installation labour (templating/fitting/fixing; basic silicone work) | $450–$900 | Varies with access, levelling, scribing to walls, and on-site adjustments. |
Indicative total | $2,150–$3,900 | ~$1,190–$2,170/m² installed (upper end typically reflects more complex detailing/inclusions rather than “timber alone”). At an average, installed timber can sit broadly up to around $1,600/m² for some oiled timber scenarios, but custom thickness, premium finishing and extra fabrication can exceed that. |
Interpretation (Australia):
- If your quote exceeds $3,000 for ~1.8 m², it might be premium timber or extra thickness — but it’s just as often extra fabrication (joins, drainer grooves, undermount detailing), difficult access, removal/disposal, or a higher-end finishing system.
- If it’s under $2,000, it commonly indicates supply-only, a pre-made panel, fewer cut-outs, or DIY installation/finishing.
Note: This example excludes plumbing disconnection/reconnection, sink/tapware costs, and removal/disposal unless specified in your quote.
Further inspiration (if you’re designing the whole zone, not just pricing it):
- Kitchen island bench ideas: layouts that work in real Aussie kitchens
- Kitchen renovation cost guide: what benchtops sit inside, budget-wise
- Butler’s pantry ideas: layouts, sizes, and storage that work
Pros & cons: where timber benchtops shine (and where they struggle)

Source: Bunnings Warehouse
Timber is a feel-good surface — warm, tactile and easy to love — but it rewards realistic expectations. Here’s what timber does beautifully in a kitchen, and the trade-offs you need to plan for (especially around heat, water and maintenance).
Advantages of timber benchtops
Timber benchtops are prized for their natural beauty and versatility. The natural grains and textures provide warmth and richness that complement both traditional and contemporary kitchens.
Homeowners appreciate these benefits:
- Aesthetic appeal: Every timber slab is unique. Timber can be stained or painted to match existing décor and can evolve with changing trends.
- Durability: When properly maintained, hardwood benchtops can last decades. Timber withstands daily meal prep and the occasional hot pot when protected by trivets.
- Refinishable: Scratches, dents or burns can often be sanded out and refinished, effectively renewing the surface.
- Hygiene: Timber has natural antibacterial properties and can be easier to clean than some surfaces when sealed.
- Environmental impact: Timber is renewable and biodegradable. Sourcing wood from sustainably managed forests or using reclaimed timber reduces landfill waste. Recycled timber has a lower carbon footprint and repurposes valuable resources.
🔹Nero Design Tip: With timber, choose one calm metal finish (brushed nickel or brushed gold) and repeat it (tapware + cabinet hardware + lighting) so the grain stays the hero. For daily practicality, prioritise a spout/aerator that reduces splash — less water on the surface means fewer sink-zone stains over time.
Disadvantages of timber benchtops
Despite their charm, timber surfaces have some downsides:
- Maintenance: Timber requires regular maintenance. Periodic sealing or oiling protects against stains and water damage; neglect leads to dullness or warping. Household chemicals can strip natural oils, so gentle cleaners are essential.
- Susceptibility to damage: Hot pots, knives and standing water can cause burns, scratches and cracks. Softer woods dent easily, and moisture can lead to mould if spills aren’t wiped quickly.
- Cost: High-quality hardwoods can be more expensive than laminate and some other compliant benchtop options, and ongoing maintenance products add to long-term costs.
- Inconsistent hardness: Wood species vary in density. Softwoods may show wear sooner, while very dense timbers can be heavy and hard to work with.
Which timber is best for a kitchen benchtop? (species, hardness, movement, vibe)
Source: Bunnings Warehouse
Choosing the right species affects aesthetics, durability and maintenance. Here are common options:
Hardwood Favourites: The “easy living” picks (most forgiving)
- Tasmanian oak / Victorian ash: Light‑coloured with a fine, straight grain; easy to stain and suits modern or coastal kitchens. Durable and moderately priced.
- Blackbutt / Spotted gum: Indigenous Australian hardwoods known for their density and striking grain patterns. Excellent resistance to wear; often used in high‑traffic kitchens.
- Jarrah & Ironbark: Deep reddish hues and exceptional hardness. Premium price point but extremely durable; perfect for statement islands.
- Walnut & Maple: Popular imported hardwoods with rich colour; walnut offers dark sophistication while maple provides a creamy warmth.
Softwood & budget options (bamboo + panels): when budget timber is a smart choice
- Bamboo: Technically a grass, bamboo benchtops are affordable (starting around $350/m²) and sustainable. Bamboo resists moisture better than some hardwoods but still needs sealing.
- Pine: Soft and rustic; suits country or farmhouse styles. Requires diligent maintenance and protective finishes.
- Engineered timber veneer: Thin slices of hardwood bonded to a substrate; more affordable but cannot be sanded back like solid timber.
Statement timbers (reclaimed & recycled timber): High character, higher maintenance
Recycled hardwoods offer sustainability and history. Dense species like recycled eucalyptus or blackbutt are salvaged from demolition sites and milled into benches. Benefits include:
- Durability: Reclaimed hardwoods have already stood the test of time and will last decades.
- Unique character: Natural patina, nail holes and grain patterns provide a story and texture.
- Low environmental impact: Using recycled timber diverts material from landfill and conserves forests.
However, reclaimed boards may require extra preparation (de‑nailing, de‑pest) and can be heavy. Always source from reputable suppliers who kiln‑dry and treat the wood appropriately.
Oil vs polyurethane vs hardwax: which timber benchtop finish suits your lifestyle?
Timber species sets the look. The finish sets the lived experience. Most timber benchtop disappointments are finish problems.
Think of finish as lifestyle matching: how often you wipe the sink zone, how quickly you clean up spills, and how much maintenance you’re happy to do will matter more than the species name on the quote.
Finish type | How it behaves | Pros | Cons | Best for |
Oil (food-grade) | Soaks in; tends to look matte | Easy to refresh; spot-repairs are simple | Needs regular re-coating; sink-zone can stain if neglected | Renovators who don’t mind a 10-minute maintenance rhythm |
Hardwax oil | Builds a slightly tougher surface | More resistant than basic oil; natural look | Still needs upkeep; brand systems vary | People who want a natural look with extra forgiveness |
Polyurethane (incl. “high build”) | Forms a film over timber | Best day-to-day protection; wipes clean easily | Harder to invisibly spot-repair; scratches show as “lines” | Busy family kitchens, heavy sink use |
A practical rule: If you wipe the sink zone once and forget it for hours, lean tougher (often polyurethane). If you love a natural matte look and you’re happy to refresh it, oil can be beautiful. Choose the finish that matches your household’s cleaning rhythm, not just the photos you like.
Solid timber, bamboo, recycled timber and other options
Different timber benchtop constructions cater to various budgets and aesthetics. The table below summarises key options:
Type | Typical Cost (AUD/m²) | Pros | Cons | Best Suited For |
Solid hardwood | $600–$1,500 | Warm, unique grain; can be sanded and refinished; long lifespan | Expensive; heavy; requires sealing; may warp if not maintained | High‑end renovations; statement islands |
Pre‑made panels / Laminated timber | $350–$700 | Affordable; easy to install; good for DIY | Uses smaller pieces; limited thickness; cannot be refinished as often | Budget kitchens, rental properties |
Bamboo | $350–$650 | Sustainable; consistent appearance; mid‑level hardness | Needs regular sealing; can dent or scratch | Small budgets, modern styles |
Recycled timber | $550–$800+ (glue-up; finishing/install extra) | Eco‑friendly; unique patina; dense hardwood durability | Variable supply; extra preparation; heavy | Eco‑conscious homeowners; heritage restorations |
Timber veneer on substrate | $250–$500 | Low cost; variety of species; lightweight | Cannot be sanded; less durable | Quick updates; low‑impact renovations |
Note: Some reclaimed suppliers price glue-ups per m² excluding finishing; installed, finished and fully customised projects will typically land higher.
🔹Nero Design Tip: Pair rich recycled timbers with Nero’s Brushed Bronze or Aged Brass finishes to highlight the timber’s warmth. Matte Black taps contrast elegantly with light bamboo or oak surfaces.
Also Read: Quartzite countertops: durability, cost, maintenance, & more
How to buy timber you can feel good about
If sustainability matters to you, ask your supplier for evidence — not just reassurance. Look for credible third-party certification such as FSC chain-of-custody.
Questions that separate good suppliers from vague ones
- Is the timber FSC-certified or documented as recycled?
- Is it kiln-dried for interior joinery use (movement control)?
- What finish system do you recommend specifically for the sink zone?
Timber benchtop installation & maintenance tips

Source: Bunnings Warehouse
Proper installation and care are critical for timber longevity.
The sink zone is the failure zone: water, sealing, tapware and daily habits
If timber benchtops fail, it’s rarely in the middle of the island. It’s usually at:
- the sink cut-out
- joins close to the sink
- tap holes and plumbing penetrations
- the dishwasher edge (steam + drips)
Pro tip (joinery mindset): specify a ‘belt-and-braces’ sink detail
- Seal the cut-out before the sink goes in (not after).
- Use a finish system that allows multiple coats on end grain (your fabricator should know this).
- Ensure silicone is neat, continuous and refreshed when it ages (old silicone is a leak path).
- Consider a sink that reduces splash (a deeper bowl + well-aimed spout matters more than people think).
If you’re spending on any single upgrade for timber longevity, make it sink-zone detailing — that’s the line between “timber that ages beautifully” and “timber that stains early.”
🔹Nero Design Tip: A pull-out spray mixer helps you rinse corners without flooding the rim — a small functional choice that protects a timber kitchen benchtop over years, not weeks.
Timber benchtop day‑to‑day care
- Sealing schedule: Apply a food‑grade oil every 3–6 months or re‑coat polyurethane every few years.
- Use trivets and cutting boards: Protect against heat and knife marks. Avoid placing hot pans directly on the timber
- Wipe spills immediately: Water left standing can cause swelling or black marks. Use coasters for drinks and avoid harsh chemicals.
- Sand and refinish: Minor scratches can be lightly sanded with fine grit and re‑oiled. Deep gouges may require professional sanding and recoating.
- Check joints and seals: Inspect joins near sinks and appliances. Reseal any gaps promptly to prevent moisture ingress.
Also Read: Ceramic tiles, explained: A design-smart guide for Australian homes
Timber benchtops vs porcelain, laminate, natural stone and stainless steel (what to choose when)
If you’re comparing materials post-prohibition, focus on compliant options like porcelain/sintered stone, laminate, natural stone, stainless steel, concrete and recycled surfaces.
Timber is just one option in a broad benchtop landscape. Consider these comparisons when deciding:
- Laminate: Usually the most budget-friendly. Expect around $300–$600 per linear metre installed for straightforward runs, with supply-only options often priced lower depending on width and finish. It’s low maintenance, but it can lack the depth and texture of real timber.
- Porcelain / sintered stone: A high-performance, low-fuss surface compliant with the 2024 stone ban. Pricing is commonly $1,200–$2,500 per linear metre installed, depending on thickness, pattern, edge detailing and cut-outs. It suits households that want heat resistance and very low maintenance.
- Recycled glass surfaces: Architectural and speckled, with costs often quoted around $1,000–$1,800 per linear metre installed. Great when you want a statement look and are happy to pay for specialist fabrication.
- Natural stone (granite, marble): Premium and timeless, but porous, heavier, and expensive. As a guide, granite is often $700–$2,000/m² installed, while marble is commonly $1,000–$2,500/m² installed. It can be stunning, but sealing and stain-awareness are part of the deal.
- Stainless steel: Hygienic, heat-proof and very “professional kitchen”, with scratches forming a lived-in patina. A commonly published range is $1,200–$3,600 per linear metre installed, depending on thickness, fabrication complexity and whether sinks are integrated.
- Concrete: On-trend and tactile, but it’s workmanship-dependent and needs sealing; cracking risk varies with build and substrate. Indicative pricing ranges broadly from $700–$2,500+/m² installed.
Ultimately, timber stands out for its tactile warmth and ability to be renewed. It is neither the cheapest nor the most durable option but offers a balance of aesthetics, sustainability and customisability.
Planning checklist: quotes, licensing, approvals and what to confirm before install
Follow this step‑by‑step method to plan your timber benchtop project:
- Define scope and measure: Measure the total benchtop area (including islands) and determine where timber will be used. Note sink and cooktop positions.
- Choose timber species and thickness: Decide between budget (bamboo), mid‑range (oak, blackbutt) or high‑end (jarrah, reclaimed). Select a thickness (30–60 mm) based on style and budget.
- Select finish: Choose between oil, polyurethane or hardwax; decide whether you want a matte or glossy sheen.
- Get quotes: Obtain at least three quotes from licenced installers. Ask about material origins, sustainability certifications and warranties.
- Plan for maintenance: Allocate time and budget for regular oiling or resealing. Understand warranty conditions and recommended care schedules.
- Choose tapware and accessories: Select tapware that complements your timber. Nero offers collections in finishes like brushed nickel, matte black and brushed gold, each engineered to endure Australian conditions.
🔹Nero Design Tip: Once your benchtop budget is set, pick tapware that supports timber’s rules: a finish that complements your timber undertone, plus a spout height/reach that keeps splashing inside the bowl. If you’re using timber around the sink, “splash control” is a longevity feature — not just a styling choice.
Expert due diligence: who should install your timber benchtop?
A timber benchtop looks simple — until you add sink cut-outs, appliance clearances, plumbing connections and warranty conditions. Before you accept a quote:
- Ask whether the quote is supply-only or fully installed, and insist on a written list of inclusions (templating, cut-outs, joins, sealing system, final on-site sealing).
- Confirm the right trade/licensing for your state and scope (especially once plumbing, electrical or broader kitchen renovation work is involved).
Authoritative starting points (Australia)
- NSW renovators: NSW Government – kitchen, bathroom and laundry renovation work licensing NSW Government
- QLD renovators: QBCC – builder restricted to kitchen, bathroom and laundry QBCC
Next steps: tying the scheme together with Nero Tapware

Once your timber species and finish are locked in, choose tapware that supports timber’s “rules” — especially around the sink zone. Look for a finish that complements your timber undertone (warm timbers pair beautifully with brushed metals), and a spout/aerator that helps control splash and standing water.
Nero tapware is engineered for Australian homes using durable, lead-free DZR brass and long-warranty components. If timber is your hero surface, the most helpful pairing is tapware that stays easy to clean, controls splash, and looks calm beside natural grain.
Explore Nero Tapware’s thoughtfully designed tapware collections—Mecca, Zen, Serenity, Opal and Bianca—each available in finishes that complement the full spectrum of timber colours.
Your kitchen should be a reflection of you. With a timber benchtop and carefully selected fixtures, you can create a space that feels both timeless and distinctly yours.
Important Disclaimer: All costs are indicative only and shown in AUD. Prices vary by region, supplier, site access and installation complexity. Regulations and standards can change — confirm requirements with your local council, state regulator and appropriately licensed professionals.